Features
- Compatible with the pin of Arduino Uno;
- Uniform Microduino interface standard and rich peripheral modules, capable of having a fast and flexible connection and extension with other modules and sensors meeting Microduino interface standard;
- Onboard analog button and sensor interface;
Specification
- Electrical specification
- MicroUSB power supply;
- 3.3V constant voltage;
- Select the 5V or 3.3V power via PWR jumper(The default voltage is 3.3V);
- Onboard power supply indicator(5V and PWR).
- Extension
- Onboard reset button;
- The fixed OLED base;
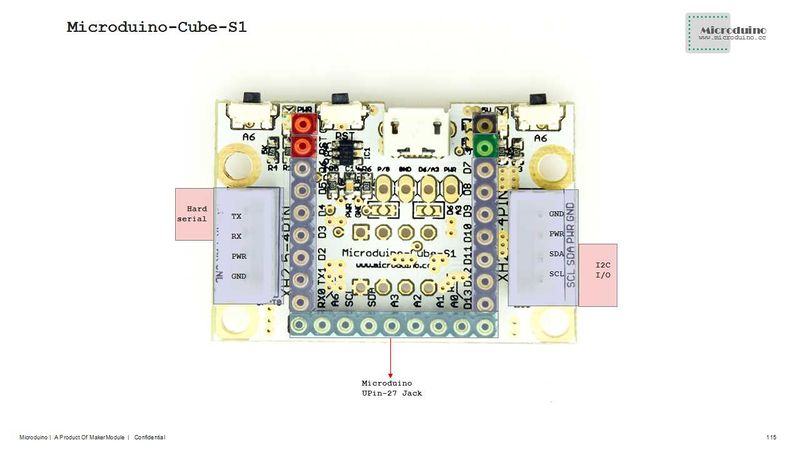
- Two serial ports including (RX0, TX0)and (D2, D3);
- Two IIC interfaces;
- Two analog button interfaces connected to A7;
- The sensor interface can be selected and combined through jumpers:
- PWR, A3, GND, PWR or PWR, A3, GND, GND or PWR, D6, GND, PWR or PWR, D6, GND,GND (Users can make the connection as they like).
 Microduino-Cube-S1-Pinout 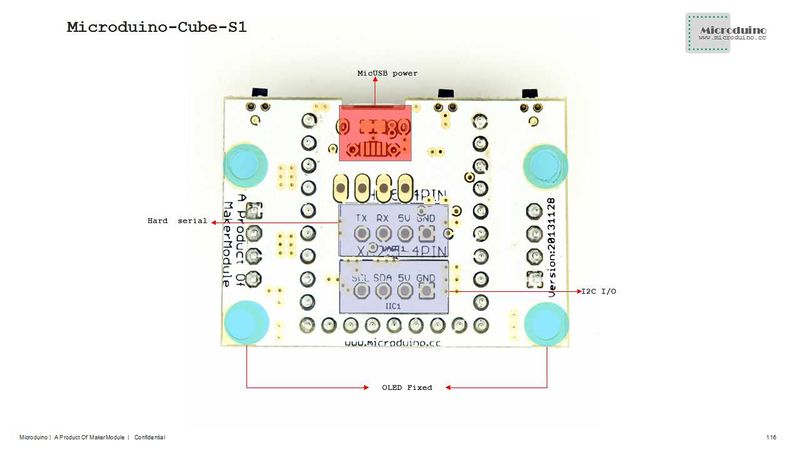 Microduino-Cube-S1-Pinout Document
Eagle PCB: File:Microduino-Cube-S1.zip
Main Component:
Development
Microduino-Cube-S1 is capable of having a fast and flexible connection and extension with other modules and sensors meeting Microduino interface standard, achieving specific function.
Application
- You can download Microduino test program, which together with OLED to test the function of Microduino-Cube-S1's two analog buttons. Just as follows:
https://github.com/Microduino/Microduino_Tutorials/commit/b0e0fe74269ee0f6a886d8fa8db497ec57cc4073
- Hardware Needed:Microduino FT232R, Microduino Core, Microduino-Cube-S1 and Microduino OLED;
- Software Needed:Microduino example program (Arduino part) and Arduino IDE(Version 1.0 and higher);
- Open the example program in IDE, select the board "Microduino Core (Atmega328P@16M,5V)", then download directly;
- After the download, "No button is pressed " is displayed on the OLED,
- Press the left button and "Press the left button" will come out, meaning the left button gets pressed;
- Press the right button and "Press the right button" will be displayed on the OLED, meaning the right button is pressed;
- When no button is pressed, "No button is pressed " will be displayed, which is just like the initial state.
Bug
History
Picture
Front
Back
Video
|


