Template:Setup USBTTL With Core (Windows)
From Microduino Wiki
- Open the Microduino software.
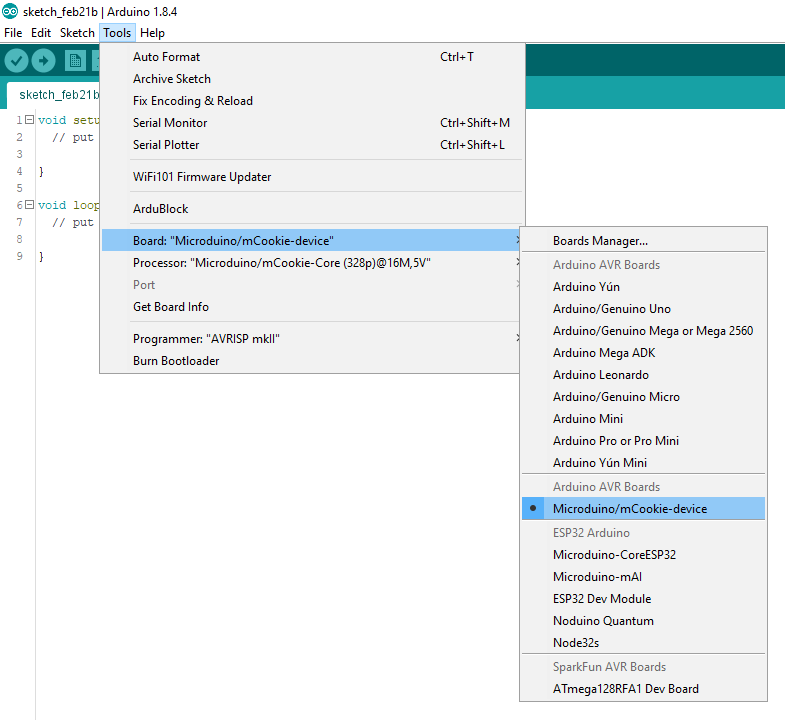
- Go to “Tools > Board” and select “Microduino/mCookie-device”
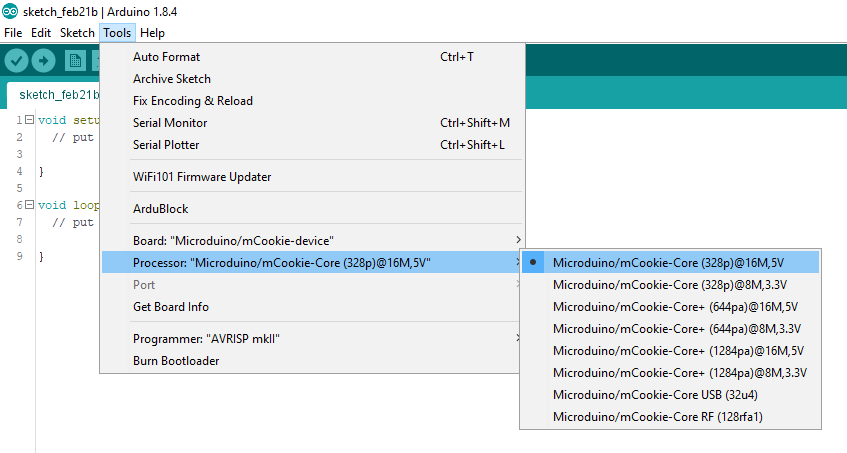
- Go to “Tools > Processor” and select “Microduino/mCookie-Core (328p)@16M,5V”
- Only have the red Core module and USBTTL module stacked. Then connect the MicroUSB cable to the USBTTL module and the other end to your computer's USB port.
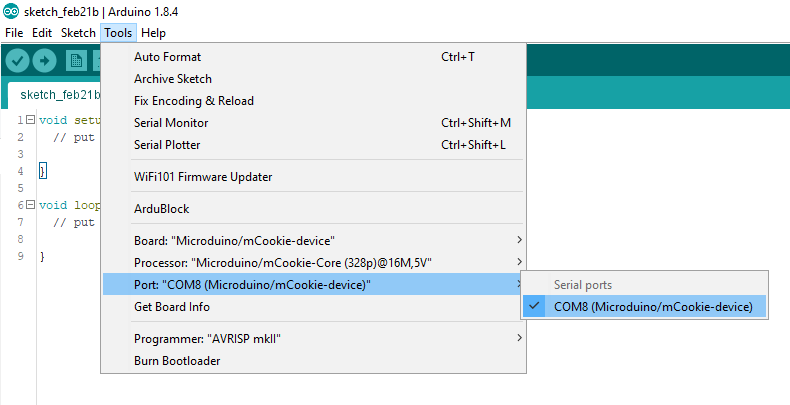
- Go to “Tools > Port” and select the port. It is usually the one that is select-able. (If you are using a Mac, it is not the Bluetooth one)
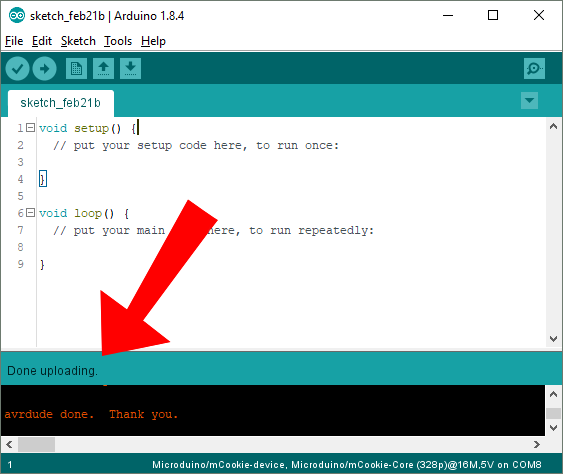
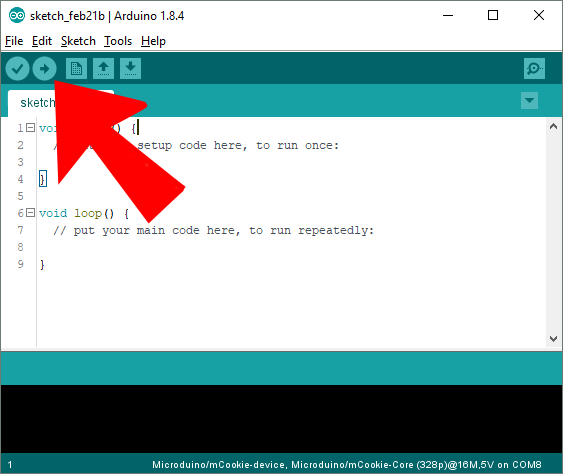
- With the default sample code. Hit upload (right arrow icon on the top left of the software).
- The code will compile and will say upload complete if successful. Congratulations the software setup is complete!