Difference between revisions of "Birthday Lamp"
From Microduino Wiki
(→Hardware Buildup) |
|||
| (One intermediate revision by one other user not shown) | |||
| Line 24: | Line 24: | ||
|[[Microduino-BUZZER]]||1||Buzzer | |[[Microduino-BUZZER]]||1||Buzzer | ||
|- | |- | ||
| − | | [[Microduino- | + | | [[Microduino-Colored LED]]||1||Colored light |
|} | |} | ||
[[File:music_birth.jpg|600px|center]] | [[File:music_birth.jpg|600px|center]] | ||
==Preparation== | ==Preparation== | ||
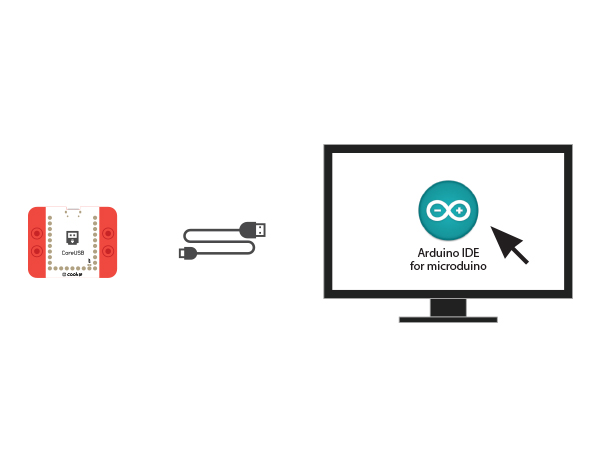
| − | *Setup | + | *Setup 1: Connect CoreUSB and PC with USB cable, open Arduino IDE. |
[[File:CoreUSB_Ble_pc.jpg|600px|center]] | [[File:CoreUSB_Ble_pc.jpg|600px|center]] | ||
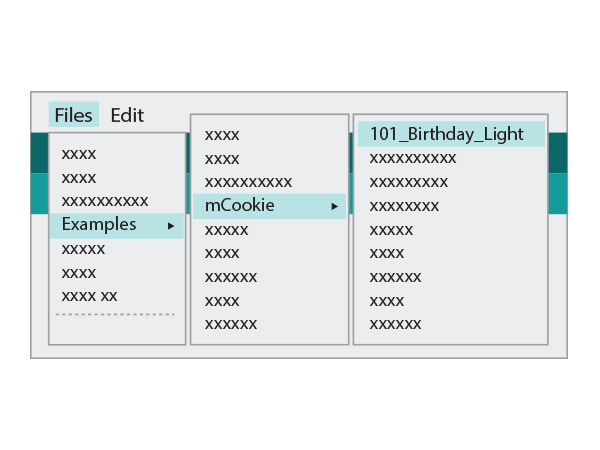
| − | *Setup | + | *Setup 2: Click Files > Examples > mCookie > _101_BirthdayLight, download program. Or download: |
[[File: _101_BirthdayLight.jpg|600px|center]] | [[File: _101_BirthdayLight.jpg|600px|center]] | ||
| − | * Setup | + | * Setup 3: Select the right board card and COM port, download program. |
==Program description== | ==Program description== | ||
*Function | *Function | ||
| − | ** | + | **"playNote()" Volume control |
| − | ** | + | **"colorSet()" Color control |
| − | ** | + | **"blink()" Judge if the key is pressed |
*Define pin | *Define pin | ||
<source lang="cpp"> | <source lang="cpp"> | ||
| Line 62: | Line 62: | ||
</source> | </source> | ||
*Light change (Red-green-blue-yellow) | *Light change (Red-green-blue-yellow) | ||
| − | ** | + | **"colorSet(strip.Color(R, G,B));" R, G and B are three primary colors. Users can change that according to personal needs. |
<source lang="cpp"> | <source lang="cpp"> | ||
add++; | add++; | ||
| Line 89: | Line 89: | ||
==Hardware Buildup== | ==Hardware Buildup== | ||
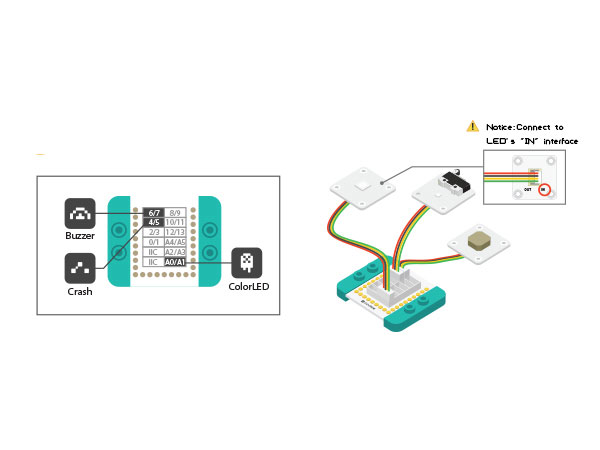
| − | *Setup | + | *Setup 1: Connect Buzzer to D6 pin of Sensorhub and Colored LED to A0, crash switch to D4. |
[[File:CoreUSB_Sensorhub_BirthdayLight_E.jpg|600px|center]] | [[File:CoreUSB_Sensorhub_BirthdayLight_E.jpg|600px|center]] | ||
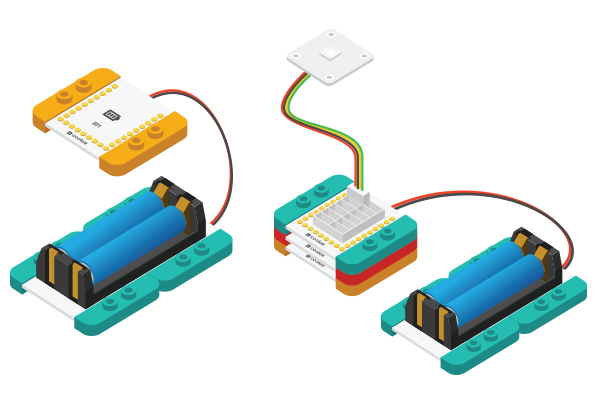
| − | *Setup | + | *Setup 2: Connect the activated battery box to BM. |
[[File:CoreUSB_Ble_steup2.jpg|600px|center]] | [[File:CoreUSB_Ble_steup2.jpg|600px|center]] | ||
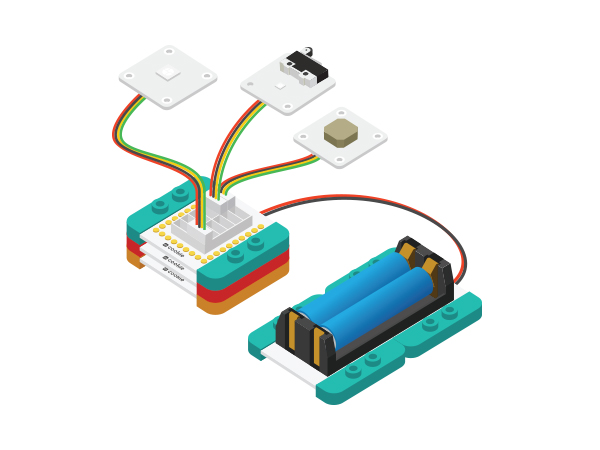
| − | *Setup | + | *Setup 3: Stack all modules together without fixed order and finish the hardware buildup. |
[[File: music_birth_all.jpg|600px|center]] | [[File: music_birth_all.jpg|600px|center]] | ||
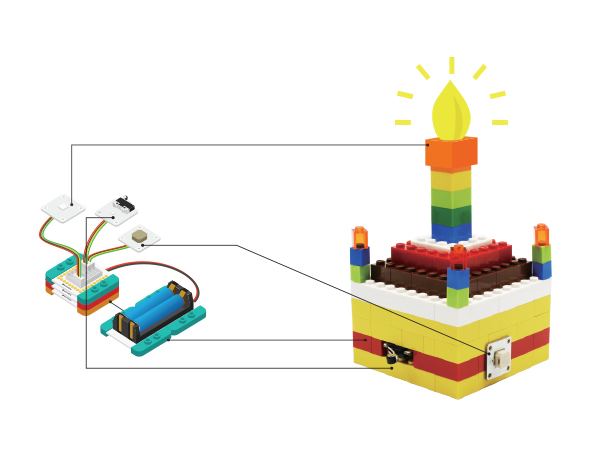
| − | * Setup | + | * Setup 4: DIY your LEGO birthday lamp. |
[[File: music_birth_over.jpg|600px|center]] | [[File: music_birth_over.jpg|600px|center]] | ||
If modules do not work normally, please try to cut off and power supply and restart it. | If modules do not work normally, please try to cut off and power supply and restart it. | ||
Latest revision as of 06:51, 30 September 2016
| Language: | English • 中文 |
|---|
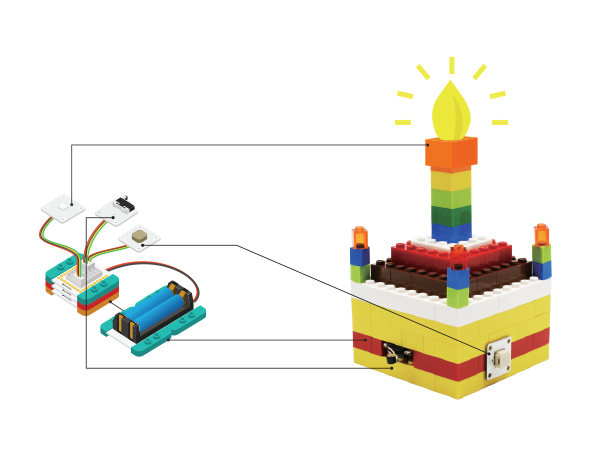
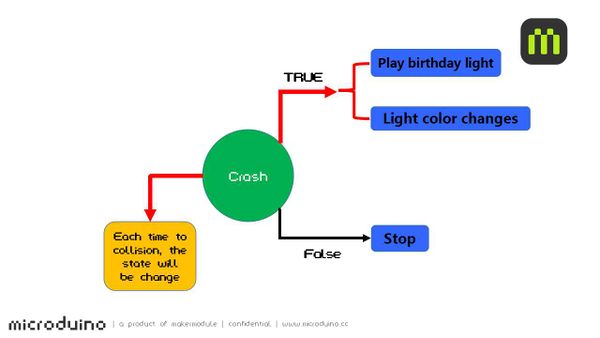
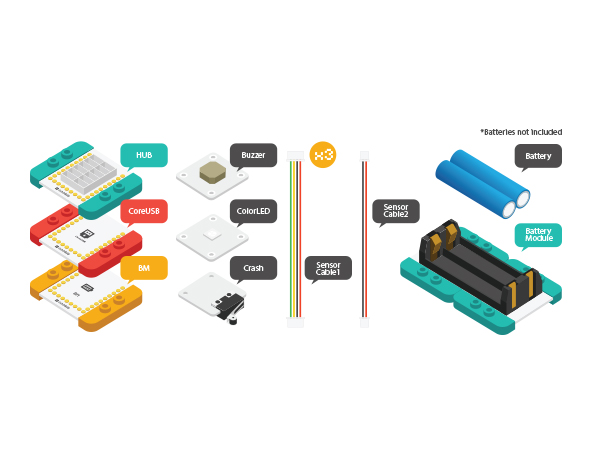
ContentsOverviewPress switch, the buzzer will play pre-set Happy Birthday song and at the same time, the lamp will shine. Double press the key, it'll stop. SchematicSystem can detect if the crash switch is collided. If yes, the status including True and False will change once. When it is True, the device will play music and get lighted. conversely, it'll stop playing music and turn off the light. Equipment
Preparation
Program description
#define PIXEL_PIN    A0 //Colored led

int key_Pin = 2;  //Key
int speakerPin = 6;  //Buzzer
void blink()
{
  if (key_get(key_Pin, 0))  //Press the key
  {
    delay(200);  //Shockproof
    play_pause = !play_pause; // Status changes one time.
  }
}
add++;
if (add == 5)
add = 1;
if (add == 1)
colorSet(strip.Color(i * 10, 0, 0));
else if (add == 2)
colorSet(strip.Color(0, i * 10, 0));
else if (add == 3)
colorSet(strip.Color(0, 0, i * 10));
else if (add == 4)
colorSet(strip.Color(i * 10, i * 10, 0));
int notes[] = {
  NOTE_C4, NOTE_C4, NOTE_D4, NOTE_C4, NOTE_F4, NOTE_E4,
  NOTE_C4, NOTE_C4, NOTE_D4, NOTE_C4, NOTE_G4, NOTE_F4,
  NOTE_C4, NOTE_C4, NOTE_C5, NOTE_A4, NOTE_F4, NOTE_E4, NOTE_D4,
  NOTE_AS4, NOTE_AS4, NOTE_A4, NOTE_F4, NOTE_G4, NOTE_F4
};
Hardware Buildup
If modules do not work normally, please try to cut off and power supply and restart it. ResultPress crash switch, play birthday song and get lighted. The light will get brighter and brighter. Then press the switch once more, the music and light will be turned off. Video |
