Difference between revisions of "Microduino-Module Ethernet,WIZ"
(→Features) |
|||
| (One intermediate revision by one other user not shown) | |||
| Line 16: | Line 16: | ||
==Features== | ==Features== | ||
| − | *A | + | *A new all hardware TCP/IP protocol stack network chip since W5100, W5200 and W5300. With lower power consumption and operating temperature and modified process, and it’s the best solution choice of the embedded Ethernet; |
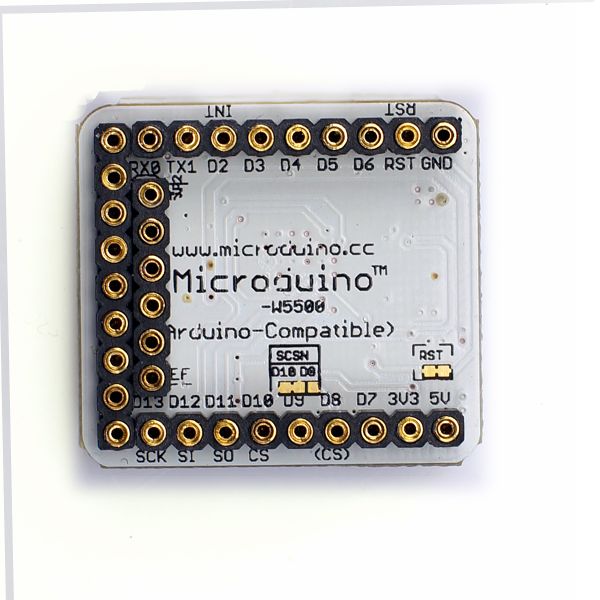
| − | *Adopts U-shape 27pin Microduino standard interface, and can be used stacked with module Microduino-RJ45 . Plug and play. The whole size is | + | *Adopts U-shape 27pin Microduino standard interface, and can be used stacked with module Microduino-RJ45 . Plug and play. The whole size is smaller; |
| − | *Open-source hardware circuit design, and compatible-with-Arduino compilation development | + | *Open-source hardware circuit design, and compatible-with-Arduino compilation development environment; |
| − | *With unified Microduino interface specification and abundant periphery modules, which make it can be extended and connected with other modules and sensors which meet the Microduino interface specification, quickly, conveniently and | + | *With unified Microduino interface specification and abundant periphery modules, which make it can be extended and connected with other modules and sensors which meet the Microduino interface specification, quickly, conveniently and flexibly; |
*With 2.54-spacing female header connector interface, which is convenient for the integration to the pegboard. | *With 2.54-spacing female header connector interface, which is convenient for the integration to the pegboard. | ||
| Line 40: | Line 40: | ||
*Interface features | *Interface features | ||
**TTL level input | **TTL level input | ||
| − | **Single power supply: 3. | + | **Single power supply: 3.3V; |
**Doesn’t support IP burst. | **Doesn’t support IP burst. | ||
Status indicator | Status indicator | ||
| − | **Two programmable LED outputs used to show the status of connection, sending, receiving, conflict, full duplex and half | + | **Two programmable LED outputs used to show the status of connection, sending, receiving, conflict, full duplex and half duplex; |
| − | *Pin | + | *Pin introduction: |
{|class="wikitable" | {|class="wikitable" | ||
! rowspan="1" | Name of W5500’s pin ||Microduino pin || Function | ! rowspan="1" | Name of W5500’s pin ||Microduino pin || Function | ||
| Line 81: | Line 81: | ||
Preparation | Preparation | ||
| − | *The hardware needs to be | + | *The hardware needs to be prepared: Microduino FT232R, Microduino Core. Microduino-W5500, router and cables; |
| − | *The software needs to be | + | *The software needs to be prepared: Arduino IDE(version 1.0 and above), libraries, test programs provided by Microduino(for Arduino); |
| − | *Put the downloaded library files into the folder libraries under the installation directory Arduino | + | *Put the downloaded library files into the folder libraries under the installation directory Arduino IDE; |
| − | *Remove the original Ethernet | + | *Remove the original Ethernet library; |
*Stack all the modules, and connect the LAN port of the router with the Ethernet port of the module Microduino-RJ45 through the cables; | *Stack all the modules, and connect the LAN port of the router with the Ethernet port of the module Microduino-RJ45 through the cables; | ||
Step 1:Get your IP address. | Step 1:Get your IP address. | ||
| − | *Start Arduino IED, open the sample program DhcpAddressPrinter, and choose the board card Microduino Core (Atmega328P@16M,5V);Download directly after | + | *Start Arduino IED, open the sample program DhcpAddressPrinter, and choose the board card Microduino Core (Atmega328P@16M,5V);Download directly after compiling; |
| − | *Open the serial port monitor(note the baud rate is 9600), and you can see | + | *Open the serial port monitor(note the baud rate is 9600), and you can see "My IP address: XXX.XXX.XX.XXX.", so you get your IP. |
Step 2:Make the Microduino core link to the Ethernet to get the information about the web. | Step 2:Make the Microduino core link to the Ethernet to get the information about the web. | ||
| − | *Open sample program WebClient, and change the address in the code | + | *Open sample program WebClient, and change the address in the code "IPAddress ip(192,168,0,177);" into the IP address you have read, and then download directly after compiling. |
| − | *After the download, open the serial port monitor, and you can see | + | *After the download, open the serial port monitor, and you can see "connecting..." at first. If the connection is successful, it will print out the data gotten from the internet, such as the address, server, time and so on. |
'''Other applications:''' | '''Other applications:''' | ||
Latest revision as of 23:28, 1 August 2017
| Language: | English • 中文 |
|---|
|
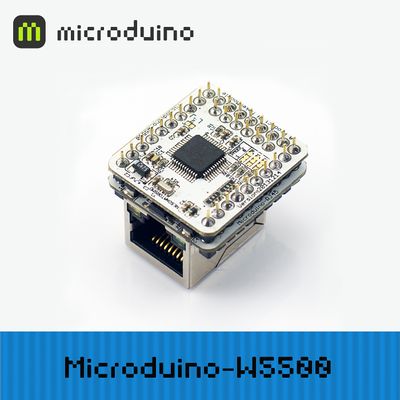
Microduino-W5500 is an ethernet control module developed by the network chip W5500. Microduino-W5500 must be stacked with Microduino-RJ45 to compose into a completed network module, and it can’t be used alone.
Contents[hide]Features
Specification
Status indicator
Documents
DevelopmentArduino library and supporting package: _02_Microduino_Ethernet_WIZ It can be widely used in: The family network equipment:Set-top boxes, personal video recorder and digital media adapter. Security system: Digital video recorders, network camera, information kiosk, factories and building automation control system, medical monitoring equipment and embedded server. ApplicationThrough the sample program to make the Microduino core link to the internet: Preparation
Step 1:Get your IP address.
Step 2:Make the Microduino core link to the Ethernet to get the information about the web.
Other applications: The family network equipment: Set-top boxes, personal video recorder, and digital media adapter Security system: Digital video recorder, network camera, and information kiosk Factories and building automation control system, medical monitoring equipment and embedded server Purchase | ||||||||||||||||||
HistoryGalleryFrontageBackVideo |


