Difference between revisions of "Microduino-Module USBHOST"
m (Fengfeng moved page Microduino-USBHOST to Microduino-Module USBHOST) |
|||
| (5 intermediate revisions by the same user not shown) | |||
| Line 9: | Line 9: | ||
==Features== | ==Features== | ||
| − | *Support MicroUSB | + | *Support MicroUSB interface; |
*Small, cheap, stackable and open; | *Small, cheap, stackable and open; | ||
*Open hardware circuit design and Arduino compatible programming development environment; | *Open hardware circuit design and Arduino compatible programming development environment; | ||
| Line 27: | Line 27: | ||
**Compatible with MAX3420 MAX3420E USB peripheral device control software with SPI interface; | **Compatible with MAX3420 MAX3420E USB peripheral device control software with SPI interface; | ||
**Comply with USB 2.0 specification (12 Mbps peripherals at full speed and 12Mbps/1.5 Mbps host at full speed/low speed); | **Comply with USB 2.0 specification (12 Mbps peripherals at full speed and 12Mbps/1.5 Mbps host at full speed/low speed); | ||
| − | **Smart USB | + | **Smart USB SIE; |
**Automatic processing of USB flow control and double buffer; | **Automatic processing of USB flow control and double buffer; | ||
**Process low level USB signaling. | **Process low level USB signaling. | ||
| Line 33: | Line 33: | ||
*Device Support: | *Device Support: | ||
**HID devices, such as keyboards, mouse, joystick and so on; | **HID devices, such as keyboards, mouse, joystick and so on; | ||
| − | **Game controller: Sony | + | **Game controller: Sony PS3, Nintendo Wii and XBOX360; |
| − | **USB-to-serial converter: | + | **USB-to-serial converter: FTDI, PL-2303, ACM and mobile phones with OTG function and GPS receiver; |
| − | **Android mobile with ADK | + | **Android mobile with ADK function; |
**Digital Camera: Canon EOS's Powershot, Nikon digital SLR cameras and P&S as well as general PTP; | **Digital Camera: Canon EOS's Powershot, Nikon digital SLR cameras and P&S as well as general PTP; | ||
| − | **Mass storage devices, such as U disk, card reader and the external hard | + | **Mass storage devices, such as U disk, card reader and the external hard drive; |
**Bluetooth dongle. | **Bluetooth dongle. | ||
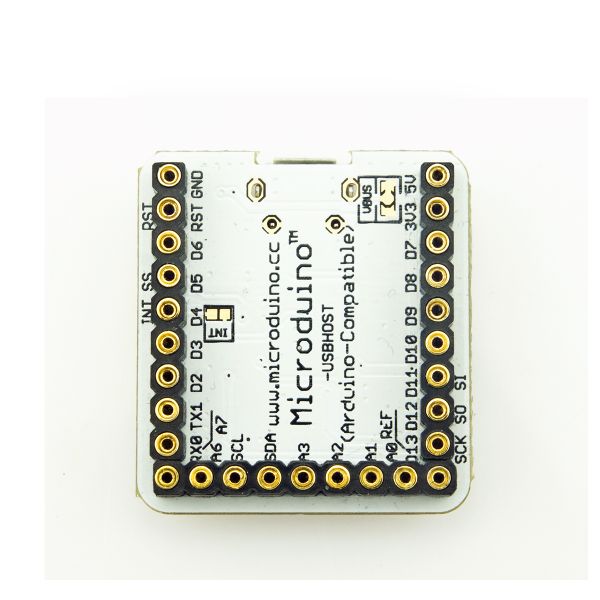
| − | *Pin | + | *Pin description: |
{|class="wikitable" | {|class="wikitable" | ||
! rowspan="1" | Chip Pin || Microduino Pin || Function | ! rowspan="1" | Chip Pin || Microduino Pin || Function | ||
| Line 62: | Line 62: | ||
==Document== | ==Document== | ||
Eagle PCB local download | Eagle PCB local download | ||
| − | Main | + | Main components: |
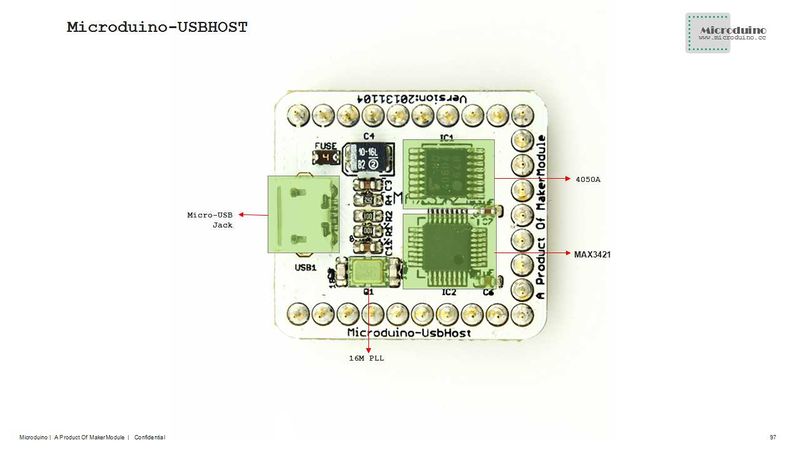
*Voltage converter chip:TC74HC4050 '''[[File:TC74HC4050AF.pdf]]''' | *Voltage converter chip:TC74HC4050 '''[[File:TC74HC4050AF.pdf]]''' | ||
| − | *Main control | + | *Main control chi: MAX3421E '''[[File:MAX3421E.pdf]]''' |
==Development== | ==Development== | ||
| − | *Need | + | *Need library: https://github.com/Microduino/Microduino_Tutorials/tree/master/Microduino_Libraries/_06_Microduino_USBHOST_MAX3421E |
*Serial debug is disabled under default condition. | *Serial debug is disabled under default condition. | ||
**You need open the file "settings.h" from library folder; | **You need open the file "settings.h" from library folder; | ||
| − | **Find | + | **Find "#define ENABLE_UHS_DEBUGGING 1", an then change to "#define ENABLE_UHS_DEBUGGING 1", then save it. |
| − | *USB_Host_Shield_2.0 library | + | *USB_Host_Shield_2.0 library usage: |
| − | **Bluetooth | + | **Bluetooth libraries: |
An ordinary Bluetooth adapter. You can easily add different Bluetooth services, such as a PS3 or Wii controller or SPP which is supported through Bluetooth virtual serial port. A number of different examples can be found in the examples directory. | An ordinary Bluetooth adapter. You can easily add different Bluetooth services, such as a PS3 or Wii controller or SPP which is supported through Bluetooth virtual serial port. A number of different examples can be found in the examples directory. | ||
| − | **HID | + | **HID library: |
Connect USB peripherals. Such as a mouse, handle etc. | Connect USB peripherals. Such as a mouse, handle etc. | ||
| − | **BTHID | + | **BTHID library: |
Connect HID devices via Bluetooth, currently supports HID mouse and keyboard. | Connect HID devices via Bluetooth, currently supports HID mouse and keyboard. | ||
| − | **SPP | + | **SPP library: |
Allow you send data to your Microduino from PM/mobile phone via Bluetooth. | Allow you send data to your Microduino from PM/mobile phone via Bluetooth. | ||
| − | **PS4 | + | **PS4 Library: |
Allow you to use the Sony PS4 controller via Bluetooth and USB. | Allow you to use the Sony PS4 controller via Bluetooth and USB. | ||
| − | **PS3 | + | **PS3 Library: |
Use DUALSHOCK3, navigation or motion controller via Bluetooth and USB. | Use DUALSHOCK3, navigation or motion controller via Bluetooth and USB. | ||
| − | **Xbox | + | **Xbox Libraries: |
| − | **Xbox | + | **Xbox Libraries: |
The library uses USB as the Xbox 360 controller. | The library uses USB as the Xbox 360 controller. | ||
==Application== | ==Application== | ||
| − | Light a LED via a mobile using the ADK example | + | Light a LED via a mobile using the ADK example library: |
===Prepare work=== | ===Prepare work=== | ||
| − | *Prepared | + | *Prepared hardware: Microduino FT232R, Microduino Core, Microduino USBHOST, OTG cable, make sure your Android device supports and turn on the USB debug mode, USB cable; |
| − | *Prepared | + | *Prepared software: USB_Host_Shield_2.0 library, Arduino IDE(1.0 release and upper); |
| − | *Uncompress the zip folder and rename to | + | *Uncompress the zip folder and rename to "USB_Host_Shield" because Arduino IDE doesn't support any special characters, then copy to libraries folder of Arduino IDE; |
| − | *Connect the Microduino FT232R and PC using USB cable to download program and serial | + | *Connect the Microduino FT232R and PC using USB cable to download program and serial monitor; |
| − | *Connect a LED to I/O port D6 of Microduino- | + | *Connect a LED to I/O port D6 of Microduino-Core. |
===Debug=== | ===Debug=== | ||
| − | *Open the example program "ArduinoBlinkLED" from ADK folder of | + | *Open the example program "ArduinoBlinkLED" from ADK folder of examples; |
| − | *Change LED_BUILTIN to Microduino pin in "#define LED LED_BUILTIN", such as "#define LED 6". But can't be D13, because D13 is used as SCK | + | *Change LED_BUILTIN to Microduino pin in "#define LED LED_BUILTIN", such as "#define LED 6". But can't be D13, because D13 is used as SCK; |
| − | *After compiled, select the board "Microduino Core (Atmega328P@16M,5V)", download | + | *After compiled, select the board "Microduino Core (Atmega328P@16M,5V)", download directly; |
*Connect the mobile phone and Microduino USBHOST by OTG cable and USB cable; | *Connect the mobile phone and Microduino USBHOST by OTG cable and USB cable; | ||
| − | *Open the | + | *Open the serial monitor, will display "Arduino Blink LED Started"; |
| − | *The phone will automatically pop up the application "ArduinoBlinkLED", download and install | + | *The phone will automatically pop up the application "ArduinoBlinkLED", download and install it; |
| − | *After installed the application, will | + | *After installed the application, will prompt to open the USB connection fittings, and click OK to enter the program interface; |
*Successful connection will show "connected", and can control the LED light on and off via the button. | *Successful connection will show "connected", and can control the LED light on and off via the button. | ||
Latest revision as of 04:20, 4 August 2017
| Language: | English • 中文 |
|---|
|
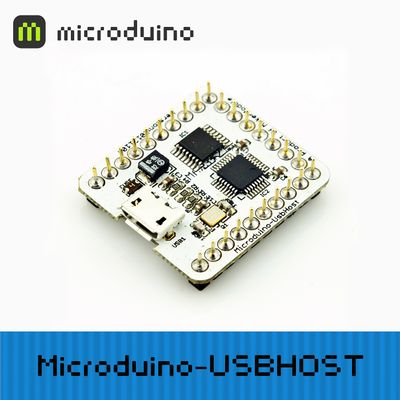
Microduino USBHOST mainly offers the USB host function for devices, supporting USB host controller and USB peripherals, such as mobile phones with OTG function, keyboards, joystick, and camera. ContentsFeatures
Specifications
DocumentEagle PCB local download Main components:
Development
An ordinary Bluetooth adapter. You can easily add different Bluetooth services, such as a PS3 or Wii controller or SPP which is supported through Bluetooth virtual serial port. A number of different examples can be found in the examples directory.
Connect USB peripherals. Such as a mouse, handle etc.
Connect HID devices via Bluetooth, currently supports HID mouse and keyboard.
Allow you send data to your Microduino from PM/mobile phone via Bluetooth.
Allow you to use the Sony PS4 controller via Bluetooth and USB.
Use DUALSHOCK3, navigation or motion controller via Bluetooth and USB.
The library uses USB as the Xbox 360 controller. ApplicationLight a LED via a mobile using the ADK example library: Prepare work
Debug
BugHistoryPictureFrontBackVideo |


