Difference between revisions of "Microduino-GPRS/GSM"
From Microduino Wiki
(→Debugging) |
(→Development) |
||
| (11 intermediate revisions by 4 users not shown) | |||
| Line 14: | Line 14: | ||
*Small, cheap, stackable and open; | *Small, cheap, stackable and open; | ||
*Open hardware circuit design and Arduino compatible programming development environment; | *Open hardware circuit design and Arduino compatible programming development environment; | ||
| − | * | + | *Uniform Microduino interface standard and rich peripheral modules, capable of having a fast and flexible connection and extension with other modules and sensors in accord with Microduino interface standard; |
| − | *Easy to be integrated to pegboards with a 2.45-pitch female header connector interface. | + | *Easy to be integrated to pegboards with a 2.45-pitch female header connector interface. |
==Specifications== | ==Specifications== | ||
| Line 29: | Line 29: | ||
**Build-in TCP/IP protocol; | **Build-in TCP/IP protocol; | ||
**Encoding format:CS-1, CS-2, CS-3 and CS-4; | **Encoding format:CS-1, CS-2, CS-3 and CS-4; | ||
| − | **Support Unstructured Supplementary Service Data(USSD) | + | **Support Unstructured Supplementary Service Data (USSD) |
*Serial debugging | *Serial debugging | ||
**Support standard full-function serial as well as the transmission rate with a range from 1200bps to 115200bps; | **Support standard full-function serial as well as the transmission rate with a range from 1200bps to 115200bps; | ||
| − | **Support serial port multiplexing function | + | **Support the serial port multiplexing function complying with GSM 07.10 protocol; |
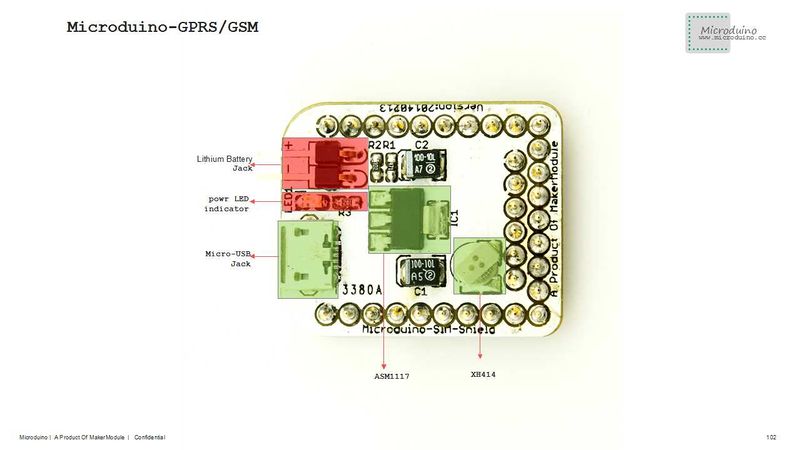
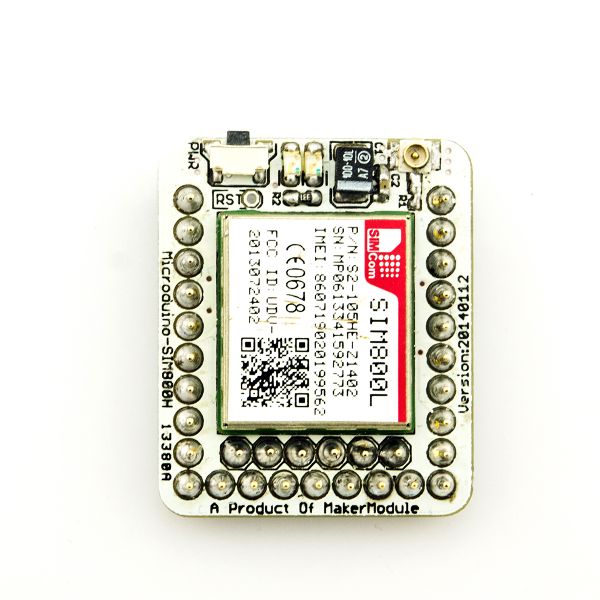
| − | *Two Main | + | *Two Main Components: |
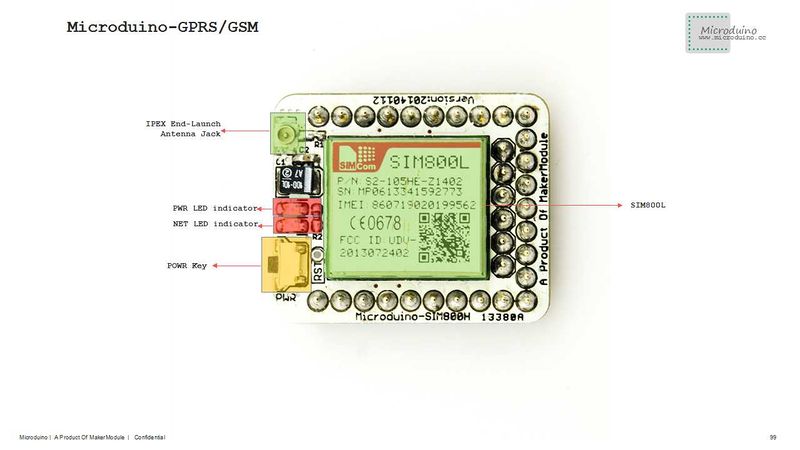
**SIM800L module | **SIM800L module | ||
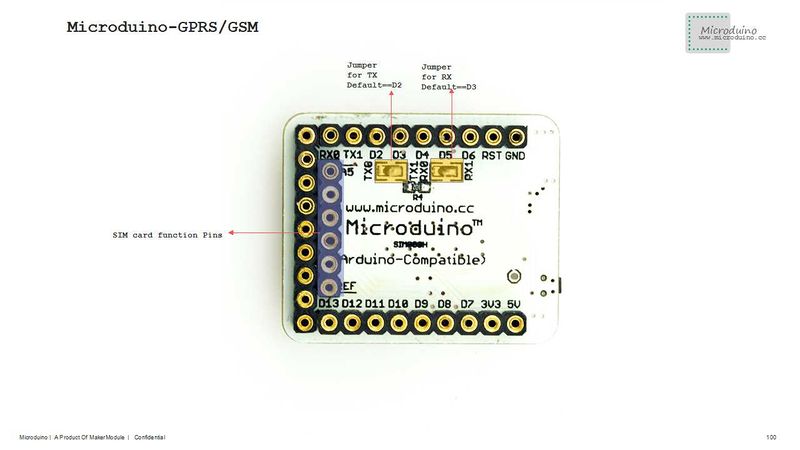
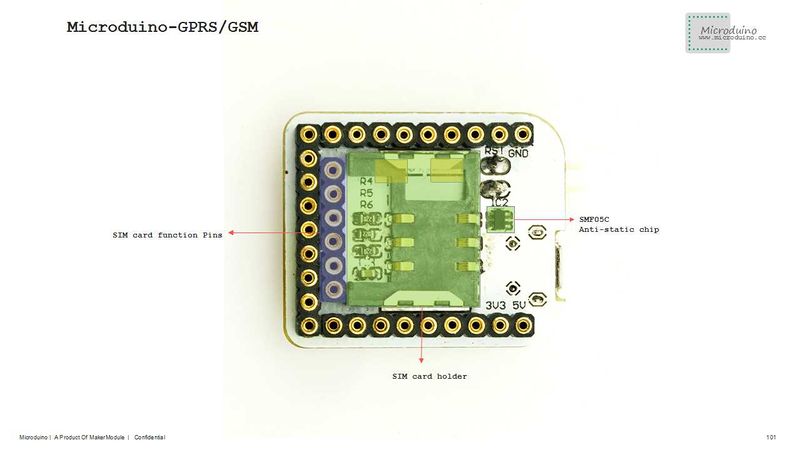
[[file:Microduino-SIM800L-Pinout1.jpg|800px|thumb|center|Microduino-SIM800L-Pinout]] | [[file:Microduino-SIM800L-Pinout1.jpg|800px|thumb|center|Microduino-SIM800L-Pinout]] | ||
| Line 45: | Line 45: | ||
==Document== | ==Document== | ||
*Eagle PCB: '''[[File:Microduino-GSM.zip]]''' | *Eagle PCB: '''[[File:Microduino-GSM.zip]]''' | ||
| − | * Microduino-GSM | + | * Microduino-GSM module SIM800L:'''[[File:SIM800L.pdf]]''' |
| − | *SIM | + | *Microduino-GSM Module TCPIP Protocol AT Instruction Manual:'''[[File:Microduino-GSM-AT.pdf]]''' |
| + | *SIM card base:'''[[File:SIM800L.pdf]]''' | ||
==Development== | ==Development== | ||
You can use GSM library to test, https://github.com/Microduino/Microduino_Tutorials/tree/master/Microduino_Libraries/_03_Microduino_GSM_SIM800L | You can use GSM library to test, https://github.com/Microduino/Microduino_Tutorials/tree/master/Microduino_Libraries/_03_Microduino_GSM_SIM800L | ||
| − | |||
| − | |||
==Application== | ==Application== | ||
| − | + | Send short messages using the example program. | |
===Preparation=== | ===Preparation=== | ||
*Hardware:Microduino FT232R, Microduino Core, Microduino GSM, USB cable or lithium battery; | *Hardware:Microduino FT232R, Microduino Core, Microduino GSM, USB cable or lithium battery; | ||
*Software: GSM library, Arduino IDE (version 1.0.3 and higher); | *Software: GSM library, Arduino IDE (version 1.0.3 and higher); | ||
| − | * | + | *Uncompressed the zip folder to libraries of Arduino IDE; |
*Connect the Microduino FT232R and PC using USB cable to download program and monitor the serial port; | *Connect the Microduino FT232R and PC using USB cable to download program and monitor the serial port; | ||
*USB cable or li-ion battery to charge the Microduino GSM module and press the power button for a long time to activate Microduino GSM for about 4 seconds. That the power-on indicator goes on shows a successful start. | *USB cable or li-ion battery to charge the Microduino GSM module and press the power button for a long time to activate Microduino GSM for about 4 seconds. That the power-on indicator goes on shows a successful start. | ||
===Debugging=== | ===Debugging=== | ||
| − | *Open | + | *Download the test program:'''[https://github.com/Microduino/Microduino_Tutorials/blob/25a821ba8894fb02d4b1560c9912450cc353b875/Microduino_Texting/Microduino_GPRS_GSM_text/Microduino_GPRS_GSM_text.ino Github Download]''' |
| − | * | + | *Open the test program, and then you need double check the following parameter: |
| − | + | **“#define NUM "13667928xxx"”:Need change to the number that receive message. | |
| − | ** | + | **“#define SMS_CEN "13010720xxx"”:Your message center for you own mobile phone number, you can find it in your phone. It isn't the necessary. If hit an issue during send a message, you can try it. |
| − | ** | + | *Compile the program, select the board type "Microduino Core+ (Atmega644P@16M,5V)", download directly: |
| − | ** | + | *Open the serial monitor, set the baud rate is 9600: |
| + | **Input "t", to send the message "wiki.microduino.cc"; | ||
| + | **Input "d", you can make a call, but can't finish a normal call, because no the speaker and microphone; | ||
| + | **Input "h", you can submit a HTTP request to get some data from network; | ||
| + | **Input "s", you can send the sensor data to network. | ||
| + | |||
| + | *If using Microduino-Core to debug, you need the soft serial port(TX1, RX1) | ||
| + | *If you use the Microduino Core to debug, must use the Software Serail (TX1,RX1) | ||
| + | **Use the Software Serial library | ||
| + | <source lang="cpp"> | ||
| + | #include <SoftwareSerial.h> | ||
| + | |||
| + | SoftwareSerial mySerial(2, 3); // RX, TX | ||
| + | </source> | ||
| + | **Change the Serial1 to mySerial, it should be ok。 | ||
| + | |||
| + | *If you use the Microduino CoreUSB to debug, you only need to change the serial to serial 0 (TX0,RX0). | ||
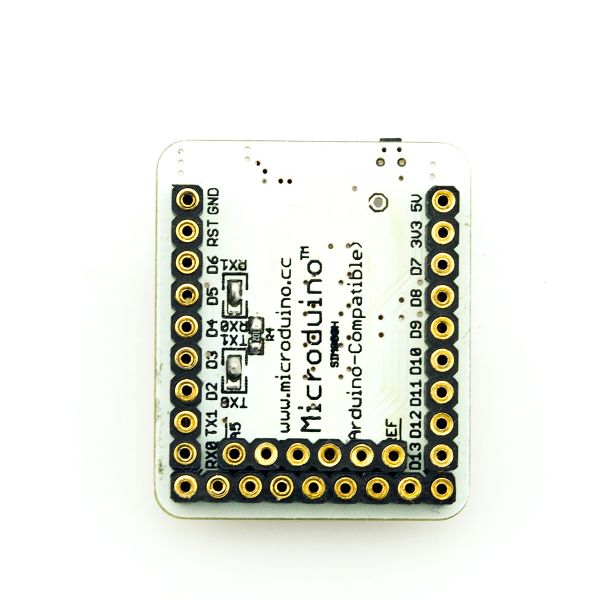
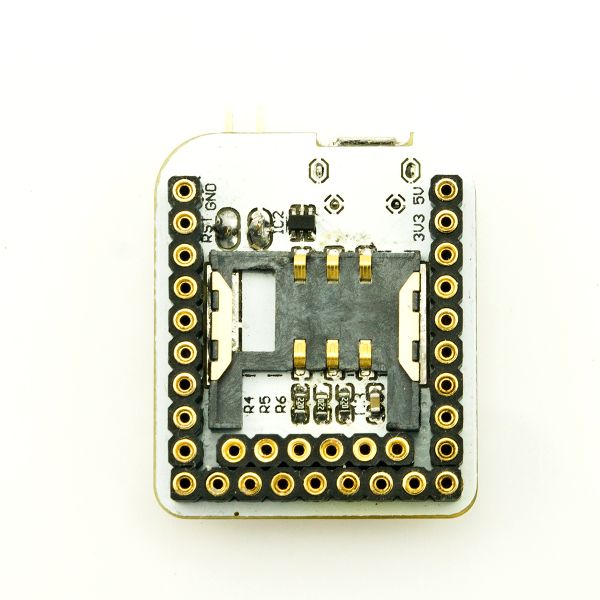
| + | [[file:Microduino-SIM800L-Pinout2.jpg|800px|thumb|center|Microduino-SIM800L-Pinout]] | ||
| + | |||
| + | ==FAQ== | ||
| + | *Can this module be used to make a voice call? Is a pin available for voice? | ||
| + | **This module can’t be used to make a voice call, because it doesn’t have the required pin. | ||
| + | *Does this module work with Core+ module? | ||
| + | **Yes. | ||
| + | *Does this module use Arduino GSM library? | ||
| + | **Yes. | ||
| + | *Does this module work with 3G? | ||
| + | **No, it only supports GPRS and GSM. | ||
| + | *How is this module powered? | ||
| + | **There are two methods: | ||
| + | ***Using the USB port attached to the module with a 5V, 1A power supply (Voltage 5V, Amperage 1A) | ||
| + | ***Using a 3.7V Li-ion battery attached to the module | ||
| + | '''The BM module can power the Core module and other modules, such as the 10DOF. However, use of the BM module to power the GPRS/GSM module is not suggested due to its significant power consumption.'' | ||
==Purchase== | ==Purchase== | ||
Latest revision as of 17:10, 5 January 2015
| Language: | English • 中文 |
|---|
|
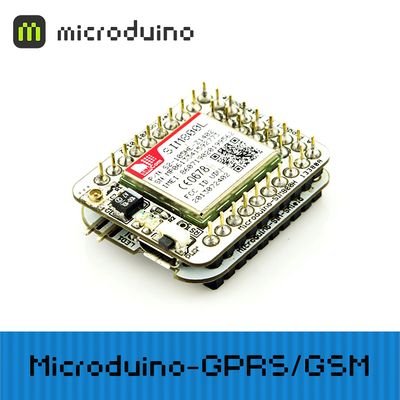
Microduino-GPRS/GSM module can get Microduino core board connected to the internet and achieve the function of sending and receiving messages when it is just inserted with a SIM card and follows some simple instructions. Contents[hide]Features
SpecificationsAdopt SIM800L module to support four-band GSM/GPRS, whose working band is:GSM850, EGSM900, DCS1800 and PCS1900MHz.
Document
DevelopmentYou can use GSM library to test, https://github.com/Microduino/Microduino_Tutorials/tree/master/Microduino_Libraries/_03_Microduino_GSM_SIM800L ApplicationSend short messages using the example program. Preparation
Debugging
#include <SoftwareSerial.h>

SoftwareSerial mySerial(2, 3); // RX, TX
FAQ
'The BM module can power the Core module and other modules, such as the 10DOF. However, use of the BM module to power the GPRS/GSM module is not suggested due to its significant power consumption. PurchaseHistoryPictureVideo |
