Difference between revisions of "Microduino Mobile Bluetooth Controls RGB Lights"
(Created page with "{| style="width: 800px;" |- | ==Outline== *Project:Microduino Mobile Bluetooth Controls the Color of RGB Lights Microduino *Objective:The connection of Microduino BT and M...") |
|||
| (18 intermediate revisions by one other user not shown) | |||
| Line 3: | Line 3: | ||
| | | | ||
==Outline== | ==Outline== | ||
| − | *Project:Microduino Mobile Bluetooth Controls the Color of RGB Lights | + | *Project:Microduino Mobile Bluetooth Controls the Color of RGB Lights |
| + | *Objective:Set the connection between mobile phone and Microduino Core using the Microduino BT module and then to control the color of RGB lights. | ||
*Difficulty:High | *Difficulty:High | ||
| − | *Time- | + | *Time-consuming:5 hours |
*Maker:Microduino Studio-YLB | *Maker:Microduino Studio-YLB | ||
==Principle== | ==Principle== | ||
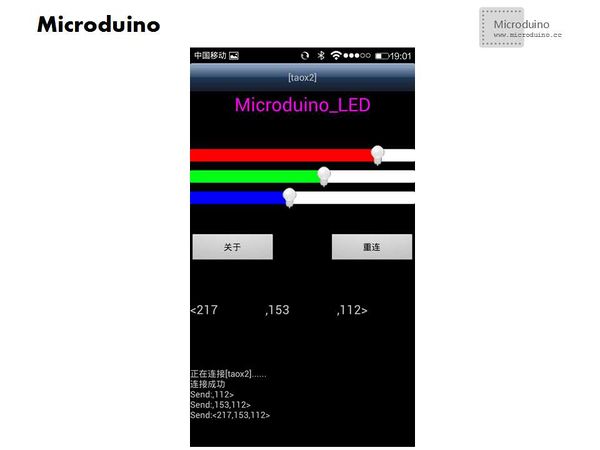
| − | Mobile clients can simulate the color of the lights via three progress indicators which send the quantitative values obtained from simulation experiment to Microduino Core via BT. Thus, we can easily control the color of RGB lights by calculating since we get both the simulated values and analogWrite(). In order to have a better control experience, we need to connect pins of RGB lights to | + | Mobile clients can simulate the color of the lights via three progress indicators which send the quantitative values obtained from simulation experiment to Microduino Core via BT. Thus, we can easily control the color of RGB lights by calculating since we get both the simulated values and using function analogWrite(). In order to have a better control experience, we need to connect pins of RGB lights to those of PMW(3、5、6、11) . Since both Microduino BT and Microduino Core adopt soft serial port for communication, we can't connect RGB lights to pins (9,10). Otherwise, data chaos may appear. |
==Bill of Materials== | ==Bill of Materials== | ||
| Line 15: | Line 16: | ||
{|class="wikitable" | {|class="wikitable" | ||
|- | |- | ||
| − | |Modules|Number||Function | + | |Modules||Number||Function |
| + | |- | ||
| + | |Microduino-Core||1||Core module | ||
|- | |- | ||
| − | |||
|Microduino-FT232R ||1||Download program | |Microduino-FT232R ||1||Download program | ||
|- | |- | ||
| − | |Microduino BT(2. | + | |Microduino BT(2.1)||1||Bluetooth communication |
|} | |} | ||
| − | *Other Equipments | + | *Other Equipments |
{|class="wikitable" | {|class="wikitable" | ||
|- | |- | ||
| Line 29: | Line 31: | ||
|USB cable ||1||For power supply and program download | |USB cable ||1||For power supply and program download | ||
|- | |- | ||
| − | |Small 3D print box||1| For beauty | + | |Small 3D print box||1|| For beauty |
|} | |} | ||
| − | == | + | ==Document== |
| + | |||
| + | Android Client-side: '''[[File:Microduino_RGB.zip]]''' | ||
| − | Android | + | Notice:Make sure your BT is the 2.1 version since Android client-side is only suitable for 2.1 BT temporarily |
| − | |||
Program Test: | Program Test: | ||
| + | |||
https://github.com/Microduino/Microduino_Tutorials/commit/46ebefd3f9739ccbede60e72d4463f998a33590f | https://github.com/Microduino/Microduino_Tutorials/commit/46ebefd3f9739ccbede60e72d4463f998a33590f | ||
| Line 44: | Line 48: | ||
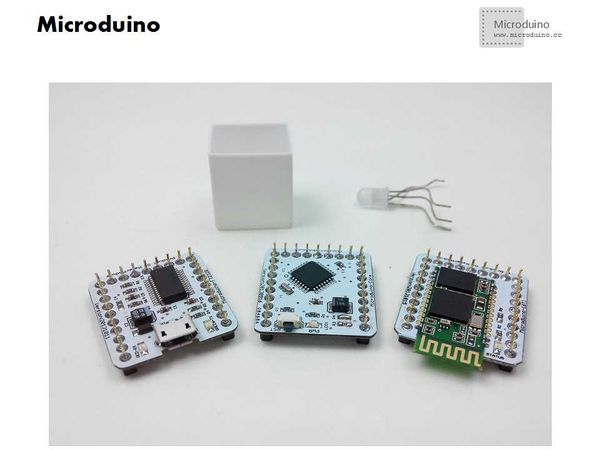
*Step 1:Prepare all equipments [[File:Microduino_BT_RGB_all.jpg||600px|center|thumb]] | *Step 1:Prepare all equipments [[File:Microduino_BT_RGB_all.jpg||600px|center|thumb]] | ||
| − | *Step 2:Make sure your BT serial method. | + | *Step 2:Make sure your BT serial port connection method is right. |
Using soft serial port (9,10) for program test. | Using soft serial port (9,10) for program test. | ||
**If you adopt serial port (2,3) | **If you adopt serial port (2,3) | ||
| − | ***And you use Core, please change | + | ***And if you use Core, please change "SoftwareSerial mySerial(9, 10);" to "SoftwareSerial mySerial(2, 3);" |
| − | ***Or if you use Core+, you need to change | + | ***Or if you use Core+, you need to change "mySerial" of the "loop" to "Serial1". |
**If you adopt serial port (0,1) | **If you adopt serial port (0,1) | ||
| − | ***You need to change | + | ***You need to change "mySerial" of the "loop" to "Serial1".and can't fold BT in the download, or the serial ports will conflict. |
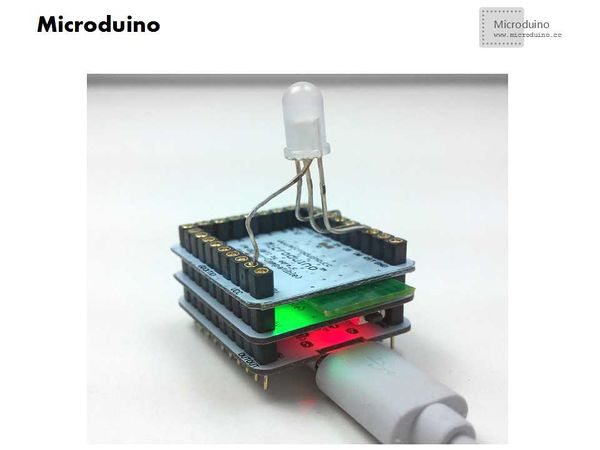
*Step 3:Build a Circuit | *Step 3:Build a Circuit | ||
**Overlay modules available | **Overlay modules available | ||
| − | **Make sure common anode | + | **Make sure RGB pins are of common anode |
| − | ***The longest pin is positive or the widest one when you look at the RGB light in the head. Here no electric resistance is adopted and the pin will be connected to 3.3V. | + | ***The longest pin is positive or the widest one when you look at the RGB light in the head. Here, no electric resistance is adopted and the pin will be connected to 3.3V of electricity. |
***Players can directly measure the corresponding color of the other three pins through a multimeter or a module. And then connect the pins correspondingly. | ***Players can directly measure the corresponding color of the other three pins through a multimeter or a module. And then connect the pins correspondingly. | ||
[[File:Microduino_BT_RGB_ok.jpg||600px|center|thumb]] | [[File:Microduino_BT_RGB_ok.jpg||600px|center|thumb]] | ||
| − | *Step 4:Download test program and open it. | + | *Step 4:Download test program and then open it. |
| − | **First, make sure your BT serial port, which can refer to step 2. | + | **First, make sure your BT serial port connection method is right, which can refer to step 2. |
**Make sure the RGB lights are of common anode. If not, you need to: | **Make sure the RGB lights are of common anode. If not, you need to: | ||
***Change the solution:The longest pin refers to negative and meanwhile, you need to connect it to GND. | ***Change the solution:The longest pin refers to negative and meanwhile, you need to connect it to GND. | ||
| Line 65: | Line 69: | ||
*Step 5:After that, you need to compile program and then download . | *Step 5:After that, you need to compile program and then download . | ||
| − | *Step 6:Download Android client-side, | + | *Step 6:Download Android client-side, uncompress, install and open it. |
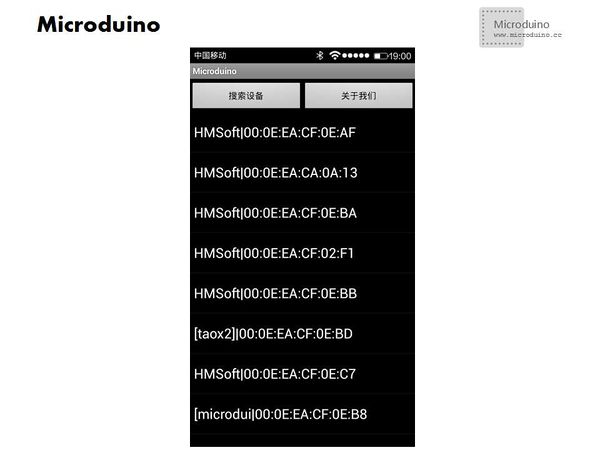
| − | *Step 7:Search equipments and connect. | + | *Step 7:Search equipments and then connect. |
[[File:Microduino_BT_RGB_BT.jpg||600px|center|thumb]] | [[File:Microduino_BT_RGB_BT.jpg||600px|center|thumb]] | ||
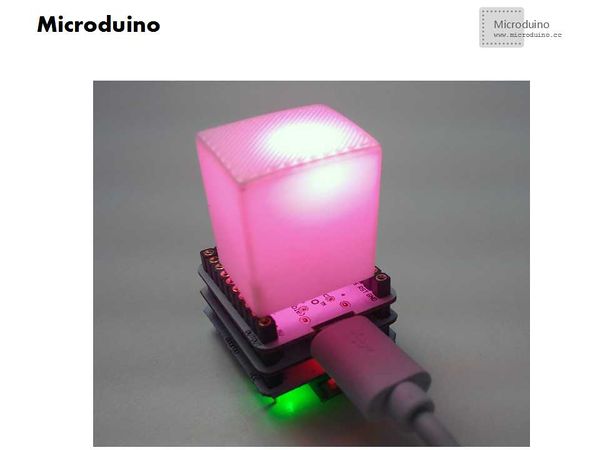
| − | *Step 8:If the connection goes well, then the lights can be easily controlled by | + | *Step 8:If the connection goes well, then the lights can be easily controlled by mobile Bluetooth. Otherwise, you have to reconnect. After several times of failed connection, you can either power down and reset the system, or just shut off the client-side and restart. |
[[File:Microduino_BT_RGB_result1.jpg||600px|center|thumb]] | [[File:Microduino_BT_RGB_result1.jpg||600px|center|thumb]] | ||
| Line 75: | Line 79: | ||
==Result== | ==Result== | ||
| − | + | You can successfully control RGB lights through mobile phone. | |
==Notice== | ==Notice== | ||
| − | *Make sure the serial port of BT | + | *Make sure the serial port connection method of BT is right |
*Figure out whether the RGB lights are of common anode or common cathode | *Figure out whether the RGB lights are of common anode or common cathode | ||
| − | *Pay attention to the connection method of RGB lights. If you find errors occur among color progress indicators and their corresponding RGB lights, you can also change pins of | + | *Pay attention to the connection method of RGB lights. If you find errors occur among color progress indicators and their corresponding RGB lights, you can also change pins of "analogWrite();" and make it right. |
==Video== | ==Video== | ||
| − | |||
| − | |||
|} | |} | ||
Latest revision as of 03:53, 25 July 2016
Outline
PrincipleMobile clients can simulate the color of the lights via three progress indicators which send the quantitative values obtained from simulation experiment to Microduino Core via BT. Thus, we can easily control the color of RGB lights by calculating since we get both the simulated values and using function analogWrite(). In order to have a better control experience, we need to connect pins of RGB lights to those of PMW(3、5、6、11) . Since both Microduino BT and Microduino Core adopt soft serial port for communication, we can't connect RGB lights to pins (9,10). Otherwise, data chaos may appear. Bill of Materials
DocumentAndroid Client-side: File:Microduino RGB.zip Notice:Make sure your BT is the 2.1 version since Android client-side is only suitable for 2.1 BT temporarily Program Test: https://github.com/Microduino/Microduino_Tutorials/commit/46ebefd3f9739ccbede60e72d4463f998a33590f Debugging
Using soft serial port (9,10) for program test.
ResultYou can successfully control RGB lights through mobile phone. Notice
Video |
