Difference between revisions of "Getting started: Microduino IDE for Windows"
(Created page with "{{Language|Microduino Getting started}} {| style="width: 800px;" |- | 360px|right|thumb Getting started: Windows Getting sta...") |
Microduino (talk | contribs) m (Microduino moved page Getting started: Windows to Getting started: Microduino IDE for Windows) |
||
| (93 intermediate revisions by 4 users not shown) | |||
| Line 1: | Line 1: | ||
| − | + | {| style="width: 80%;" | |
| − | {| style="width: | ||
|- | |- | ||
| | | | ||
| − | + | The guide below is a software setup guide for Windows aimed for general use of Microduino products. | |
| + | For kit specific getting started guides please follow the appropriate links in the [[#Kit_Specific_Software_Setup_Guides]] section: | ||
| − | + | =Kit Specific Software Setup Guides= | |
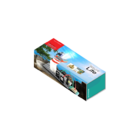
| + | {{Clickable_headed_image_table_box_small|header=Itty Bitty City|link=Getting_Started_with_Itty_Bitty_City_(Windows)|image=File:IBC.png|image_size=140px|table_width=175px|table_height=150px}} | ||
| + | {{Clickable_headed_image_table_box_small|header=mCookie 101 Basic|link=Getting_Started_with_101_Basic_Kit_(Windows)|image=File:mCookie_Basic_Kit.png|image_size=140px|table_width=175px|table_height=150px}} | ||
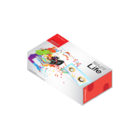
| + | {{Clickable_headed_image_table_box_small|header=mCookie 201 Advanced|link=Getting_Started_with_201_Advanced_Kit_(Windows)|image=File:mCookie_Advanced_Kit.png|image_size=140px|table_width=175px|table_height=150px}} | ||
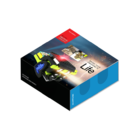
| + | {{Clickable_headed_image_table_box_small|header=mCookie 301 Expert|link=Getting_Started_with_301_Expert_Kit_(Windows)|image=File:mCookie_Expert_Kit.png|image_size=140px|table_width=175px|table_height=150px}} | ||
| + | {{Clickable_headed_image_table_box_small|header=mCookie 102 Basic|link=Getting_Started_with_102_Basic_Kit_(Windows)|image=File:mCookie_102_Basic_Kit.png|image_size=140px|table_width=175px|table_height=150px}} | ||
| + | {{Clickable_headed_image_table_box_small|header=mCookie 202 Advanced|link=Getting_Started_with_202_Advanced_Kit_(Windows)|image=File:mCookie_202_Advanced_Kit.png|image_size=140px|table_width=175px|table_height=150px}} | ||
| + | {{Clickable_headed_image_table_box_small|header=mCookie 302 Expert|link=Getting_Started_with_302_Expert_Kit_(Windows)|image=File:mCookie_302_Expert_Kit.png|image_size=140px|table_width=175px|table_height=150px}} | ||
| + | {{Clickable_headed_image_table_box_clear}} | ||
| + | <big><b>If your kit is not listed, please proceed following the general setup guide below.</b></big> | ||
| − | + | =Previous Installations= | |
| + | {| class="wikitable" style="background-color:#FEF9E7;" | ||
| + | |'''Note:''' If you have a previous version installed already, you must uninstall that version prior to installing a newer version. | ||
| + | *Go to Control Panel and uninstall the '''Arduino IDE for Microduino'''. | ||
| + | *Delete the '''C:\Program Files (x86)\Arduino IDE for Microduino''' folder as some legacy files may cause issues with a new installation. | ||
| + | Then proceed to the next steps. | ||
| + | |} | ||
| − | == | + | =Download= |
| − | + | Download the latest Windows Microduino IDE (Version 6.0, 2020-02-27): [http://oss.microduino.cn/download/download/Arduino%20IDE%20for%20Microduino-win-1.8.4-V6.0.exe <big>HERE</big>]<br clear=all> | |
| + | Download the previous Windows Microduino IDE (Version 5.0, 2019-03-25): [https://microduinoinc.com/downloads/Arduino.IDE.for.Microduino-win-1.8.4-V5.0.exe <big>HERE</big>] | ||
| + | [[File:Arduino_Download.png|link=https://microduinoinc.com/downloads/Arduino.IDE.for.Microduino-win-1.8.4-V5.0.exe|150px|left|thumb]]<br clear=all> | ||
| − | + | =Installation= | |
| − | + | 1. Double click on the setup file to start the installation process. Click <b>Next</b>. | |
| − | + | [[File:WinInstallNew_01.png|500px|left|thumb]]<br clear=all> | |
| + | 2. The next window will allow you to select which options to install. Leave all checked and click <b>Install</b>. | ||
| + | [[File:WinInstallNew_02.png|500px|left|thumb]]<br clear=all> | ||
| + | 3. The installation process will begin for the Arduino IDE. | ||
| + | [[File:WinInstallNew_03.png|500px|left|thumb]]<br clear=all> | ||
| + | 4. Wait until it is complete. | ||
| + | [[File:WinInstallNew_04.png|500px|left|thumb]]<br clear=all> | ||
| + | 5. After the Arduino IDE has been installed, a window for driver installation will appear. Click <b>Next</b>. | ||
| + | [[File:WinInstallNew_05.png|500px|left|thumb]]<br clear=all> | ||
| + | 6. Click on "<b>I accept this agreement</b>" and click <b>Next</b> to start the drivers installation. | ||
| + | [[File:WinInstallNew_06.png|500px|left|thumb]]<br clear=all> | ||
| + | 7. After the drivers are installed, click <b>Finish</b>. | ||
| + | [[File:WinInstallNew_07.png|500px|left|thumb]]<br clear=all> | ||
| + | 8.Installation is now complete! Click on <b>Finish</b>. | ||
| + | [[File:WinInstallNew_08.png|500px|left|thumb]]<br clear=all> | ||
| + | 9.If you left the run option checked, the software will start to launch. Otherwise locate the program shortcut on your desktop or start menu and launch it. | ||
| + | [[File:WinInstallNew_09.png|500px|left|thumb]]<br clear=all> | ||
| + | 10. The software is now ready to be used! | ||
| + | [[File:WinInstallNew_10.png|500px|left|thumb]]<br clear=all> | ||
| + | =Confirm Drivers Installed Successfully= | ||
| + | Confirm that the drivers are installed successfully based on your hardware. | ||
| − | + | Refer to the table below for which programmer each kit uses: | |
| − | + | {| class="wikitable" | |
| − | + | |- | |
| − | + | ! Programmer | |
| − | {| | + | ! Contained in Kit |
| + | ! Programmable Boards | ||
|- | |- | ||
| − | | | + | | USBTTL |
| − | + | | 102 Basic Kit | |
| − | + | | Core, Core+, CoreRF | |
| − | + | |- | |
| − | + | | mBattery | |
| − | + | | Itty Bitty City, 202 Advanced Kit, 302 Expert Kit | |
| − | + | | Core, Core+, CoreRF | |
| − | |||
| − | |||
| − | |||
| − | |||
| − | |||
| − | |||
| − | | | ||
| − | |||
| − | |||
| − | |||
|- | |- | ||
| − | | | + | | (CoreUSB)* |
| − | + | | X01 Series Kits: 101 Basic Kit; 201 Advanced Kit; 301 Expert Kit | |
| − | + | | CoreUSB | |
| − | |||
| − | |||
| − | |||
| − | |||
| − | |||
| − | |||
| − | |||
| − | |||
| − | * | ||
| − | |||
| − | |||
|} | |} | ||
| + | *NOTE: CoreUSB is a core module with an integrated programmer. | ||
| − | == | + | ==USBTTL== |
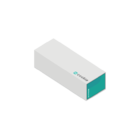
| + | *Connect [[Microduino-USBTTL]] to your computer. Verify that there are available Port options under Tools. | ||
| + | [[File:microduinoGettingStart-USBTTL.jpg|500px|center|thumb]] | ||
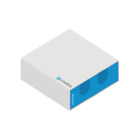
| + | ==CoreUSB== | ||
| + | *Connect [[Microduino-CoreUSB]] or [[mCookie-CoreUSB]] to your computer. Verify that there are available Port options under Tools. | ||
| + | [[File:microduinoGettingStart-CoreUSB.jpg|500px|center|thumb]] | ||
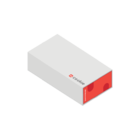
| + | ==mBattery== | ||
| + | *Connect [[mCookie-Battery]] to your computer. | ||
| + | [[File:MBattery-t.jpg|400px|center|thumb]] | ||
| + | <blockquote>IMPORTANT: Ensure that mBattery is "ON" by pressing and holding the button. A red LED should be on, which indicates that power is being supplied to the modules. mBattery must be "ON" in order to program the modules.</blockquote> | ||
| + | *Verify that there are available Port options under Tools. | ||
| + | [[File:microduinoGettingStart-USBTTL.jpg|500px|center|thumb]] | ||
| − | + | =Selecting Board Type and Processor= | |
| + | Selecting the Board Type and Processor is required to compile the correct code for the core module. | ||
| + | Configuring the software is done under '''Tools > Board''' and '''Tools > Processor'''. | ||
| − | ''' | + | Below is the table which lists all the core modules with corresponding '''Board''' and '''Processor'''. The table also lists kits that contain specific core modules. |
| − | |||
| − | |||
| − | |||
| − | ''' | + | Example usage would be for the Core module in Itty Bitty City. Board is '''Microduino/mCookie-Core (328p)''' and Processor is '''Atmega328P@16M,5V'''. |
| + | {| class="wikitable" | ||
| + | |- | ||
| + | ! Name | ||
| + | ! Board | ||
| + | ! Processor | ||
| + | ! Contained in Kit | ||
| + | |- | ||
| + | | rowspan="2" | Core (168pa) | ||
| + | | rowspan="2" | Microduino/mCookie-Core (168pa) | ||
| + | | Atmega168pa@8M,3.3V | ||
| + | |- | ||
| + | | Atmega168pa@16M,5V | ||
| + | |- | ||
| + | | rowspan="2" | Core (328p) | ||
| + | | rowspan="2" | Microduino/mCookie-Core (328p) | ||
| + | | Atmega328P@8M,3.3V | ||
| − | |||
| − | |||
|- | |- | ||
| − | | | + | | Atmega328P@16M,5V |
| − | ''' | + | | [[Itty_Bitty_City|Itty Bitty City Kit]], '''X02 Series Kits''': [[MCookie_Basic_Kit|102 Basic Kit]]; [[MCookie_Advanced_Kit|202 Advanced Kit]]; [[MCookie_Expert_Kit|302 Expert Kit]] |
| − | + | |- | |
| − | + | | rowspan="2" | Core+ (644pa) | |
| − | + | | rowspan="2" | Microduino/mCookie-Core+ (644pa) | |
| − | + | | Atmega644pa@16M,3.3V | |
| − | + | |- | |
| − | + | | Atmega644pa@16M,5V | |
| − | + | | [[MCookie_Expert_Kit|302 Expert Kit]] | |
| − | + | |- | |
| − | + | | rowspan="2" | Core+ (1284pa) | |
| − | + | | rowspan="2" | Microduino/mCookie-Core+ (1284pa) | |
| − | | | + | | Atmega1284pa@8M,3.3V |
| − | + | |- | |
| − | + | | Atmega1284pa@16M,5V | |
| − | |||
|- | |- | ||
| − | | | + | | CoreUSB |
| − | + | | Microduino/mCookie-Core USB (32u4) | |
| − | + | | USB | |
| − | + | | '''X01 Series Kits''': [[MCookie_Basic_Kit|101 Basic Kit]]; [[MCookie_Advanced_Kit|201 Advanced Kit]]; [[MCookie_Expert_Kit|301 Expert Kit]] | |
| − | |||
| − | |||
| − | |||
| − | | | ||
| − | |||
| − | |||
| − | |||
| − | |||
| − | |||
| − | |||
| − | |||
| − | |||
| − | |||
| − | |||
| − | |||
| − | |||
| − | |||
| − | |||
| − | |||
| − | |||
| − | |||
| − | |||
| − | |||
|- | |- | ||
| − | | | + | | CoreRF |
| − | + | | Microduino/mCookie RF (128rfa1) | |
| − | |||
| − | |||
| − | |||
| − | |||
|} | |} | ||
| + | ==Determining Processor Variant== | ||
| + | ===Core=== | ||
| + | <center> | ||
| + | [[File:microduinoGettingStart-Core3V3.jpg|250px]] | ||
| + | [[File:microduinoGettingStart-Core+3V3.jpg|250px]] | ||
| + | </center> | ||
| + | ===Core+=== | ||
| + | <center> | ||
| + | [[File:microduinoGettingStart-Core5V.jpg|250px]] | ||
| + | [[File:microduinoGettingStart-Core+5V.jpg|250px]] | ||
| + | </center> | ||
| − | + | =Arduino IDE Basics= | |
| − | + | ===Interface=== | |
| − | + | [[File:Interface.png|400px|center|thumb]] | |
| − | + | *'''[Verify]''': Checks for errors in the code. | |
| − | |||
| − | |||
| − | |||
| − | [[File: | ||
| − | |||
| + | *'''[Upload]''': Uploads the program to a MCU. | ||
| + | *'''[Serial Monitor]''': Useful in debugging programs. | ||
| + | ===Tools=== | ||
| + | [[File:Tools.JPG|400px|center|thumb]] | ||
| + | *'''[Board]''': Select the corresponding core module to which the program is being uploaded. | ||
| + | *'''[Processor]''': Select the corresponding processor. | ||
| − | + | *'''[Port]''': Select the common USB port. | |
| + | ===Uploading Code=== | ||
| + | #Select board type and processor. | ||
| + | #Select the port. | ||
| + | #Click upload. | ||
| − | |||
| − | |||
| − | | | + | *Note: If using mBattery to upload to a core module. Ensure that mBattery is "ON" and supplying power to the modules. There will be a red LED on. |
| + | [[File:MBattery-t.jpg|300px]] | ||
Latest revision as of 23:59, 27 February 2020
|
The guide below is a software setup guide for Windows aimed for general use of Microduino products. For kit specific getting started guides please follow the appropriate links in the #Kit_Specific_Software_Setup_Guides section: ContentsKit Specific Software Setup GuidesIf your kit is not listed, please proceed following the general setup guide below. Previous Installations
DownloadDownload the latest Windows Microduino IDE (Version 6.0, 2020-02-27): HERE Installation1. Double click on the setup file to start the installation process. Click Next. 2. The next window will allow you to select which options to install. Leave all checked and click Install. 3. The installation process will begin for the Arduino IDE. 4. Wait until it is complete. 5. After the Arduino IDE has been installed, a window for driver installation will appear. Click Next. 6. Click on "I accept this agreement" and click Next to start the drivers installation. 7. After the drivers are installed, click Finish. 8.Installation is now complete! Click on Finish. 9.If you left the run option checked, the software will start to launch. Otherwise locate the program shortcut on your desktop or start menu and launch it. 10. The software is now ready to be used! Confirm Drivers Installed SuccessfullyConfirm that the drivers are installed successfully based on your hardware. Refer to the table below for which programmer each kit uses:
USBTTL
CoreUSB
mBattery
IMPORTANT: Ensure that mBattery is "ON" by pressing and holding the button. A red LED should be on, which indicates that power is being supplied to the modules. mBattery must be "ON" in order to program the modules.
Selecting Board Type and ProcessorSelecting the Board Type and Processor is required to compile the correct code for the core module. Configuring the software is done under Tools > Board and Tools > Processor. Below is the table which lists all the core modules with corresponding Board and Processor. The table also lists kits that contain specific core modules. Example usage would be for the Core module in Itty Bitty City. Board is Microduino/mCookie-Core (328p) and Processor is Atmega328P@16M,5V.
Determining Processor VariantCore
Core+
Arduino IDE BasicsInterface
Tools
Uploading Code
|


