Difference between revisions of "Template:IDE Setup Legacy (Windows)"
| (One intermediate revision by the same user not shown) | |||
| Line 1: | Line 1: | ||
<pre style="color: red"> | <pre style="color: red"> | ||
NOTE: This product is discontinued and no longer supported in the latest software package. | NOTE: This product is discontinued and no longer supported in the latest software package. | ||
| + | Please download the legacy software package here: http://microduinoinc.com/downloads/Arduino+IDE+1.6.9+for+Microduino.exe | ||
</pre> | </pre> | ||
<pre style="color: red"> | <pre style="color: red"> | ||
| Line 10: | Line 11: | ||
[[File:Arduino_Logo.png|link=http://microduinoinc.com/downloads/Arduino+IDE+1.6.9+for+Microduino.exe|200px|left]]<br clear=all> | [[File:Arduino_Logo.png|link=http://microduinoinc.com/downloads/Arduino+IDE+1.6.9+for+Microduino.exe|200px|left]]<br clear=all> | ||
2. Double click on the setup file to start the installation process. Click <b>Next</b>. | 2. Double click on the setup file to start the installation process. Click <b>Next</b>. | ||
| − | [[File: | + | [[File:WinInstallLegacy_01.png|500px|left|thumb]]<br clear=all> |
| − | 3. The next window will allow you to select which options to install. Leave all checked and click <b> | + | 3. The next window will allow you to select which options to install. Leave all checked and click <b>Next</b>. |
| − | [[File: | + | [[File:WinInstallLegacy_02.png|500px|left|thumb]]<br clear=all> |
| − | 4. | + | 4. Select the location to install the software, or leave the default install location. Click <b>Next</b>. |
| − | [[File: | + | [[File:WinInstallLegacy_03.png|500px|left|thumb]]<br clear=all> |
| − | + | 5. Select the name for the shortcut in the Start Menu, or leave the default shortcut name. Click <b>Install</b>. | |
| − | [[File: | + | [[File:WinInstallLegacy_04.png|500px|left|thumb]]<br clear=all> |
| − | + | 6. The installation process will begin for the Arduino IDE. Wait until it completes. | |
| − | [[File: | + | [[File:WinInstallLegacy_05.png|500px|left|thumb]]<br clear=all> |
| − | + | 7. After the Arduino IDE has been installed, a window for driver installation will appear. Click <b>Extract</b>. | |
| − | [[File: | + | [[File:WinInstallLegacy_06.png|500px|left|thumb]]<br clear=all> |
| − | + | 8. Device Driver Installation Wizard will appear. Click <b>Next</b>. | |
| − | [[File: | + | [[File:WinInstallLegacy_07.png|500px|left|thumb]]<br clear=all> |
| − | + | 9. Device Driver Installation Wizard will complete. Click <b>Finish</b>. | |
| − | [[File: | + | [[File:WinInstallLegacy_08.png|500px|left|thumb]]<br clear=all> |
| − | + | 10. Another driver setup window should've appeared. Check your taskbar for the following window. Click <b>INSTALL</b> to install this driver.<br> | |
| − | [[File: | + | A message will appear once the driver has been installed. Close this window after the driver has successfully installed. |
| − | + | [[File:WinInstallLegacy_09.png|500px|left|thumb]]<br clear=all> | |
| − | [[File: | + | 11. Another window which displays the software has completed should've appeared. Check your taskbar for the following window. Click <b>Finish</b> to finish the installation process and launch the software. |
| + | [[File:WinInstallLegacy_10.png|500px|left|thumb]]<br clear=all> | ||
| + | 12. The software is now ready to be used! | ||
| + | [[File:WinInstallLegacy_11.png|500px|left|thumb]]<br clear=all> | ||
Latest revision as of 15:07, 23 May 2018
NOTE: This product is discontinued and no longer supported in the latest software package.
Please download the legacy software package here: http://microduinoinc.com/downloads/Arduino+IDE+1.6.9+for+Microduino.exe
IMPORTANT: If you have downloaded and installed the latest software package from the download page. Please uninstall it first before proceeding!
*Go to Control Panel > Uninstall a Program, then select "Arduino IDE for Microduino"
*Then delete the "C:\Program Files (x86)\Arduino IDE for Microduino" as some remaining files may cause issues.
1. Download the legacy Windows IDE: http://microduinoinc.com/downloads/Arduino+IDE+1.6.9+for+Microduino.exe
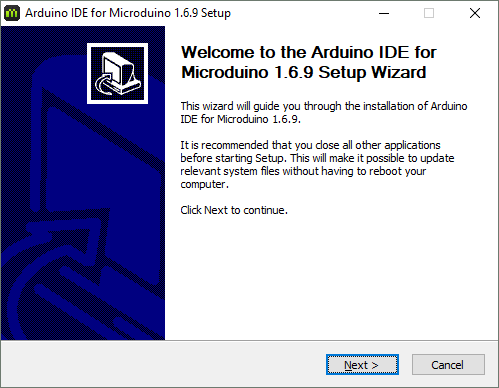
2. Double click on the setup file to start the installation process. Click Next.
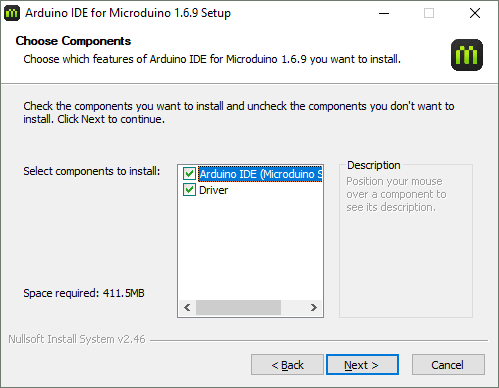
3. The next window will allow you to select which options to install. Leave all checked and click Next.
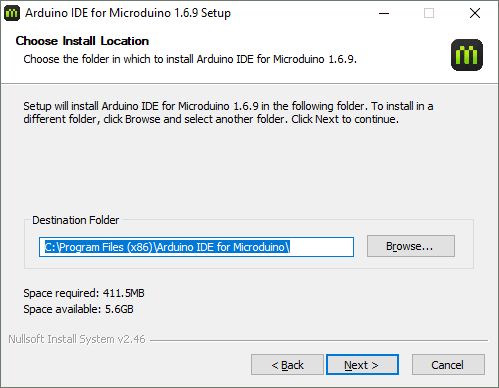
4. Select the location to install the software, or leave the default install location. Click Next.
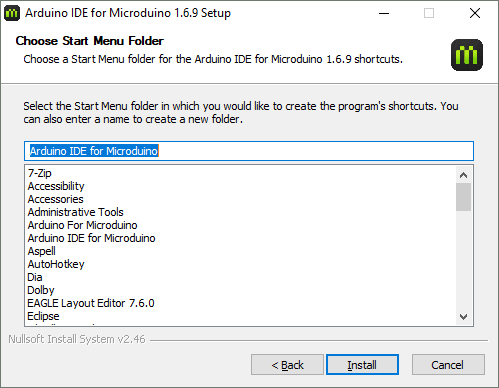
5. Select the name for the shortcut in the Start Menu, or leave the default shortcut name. Click Install.
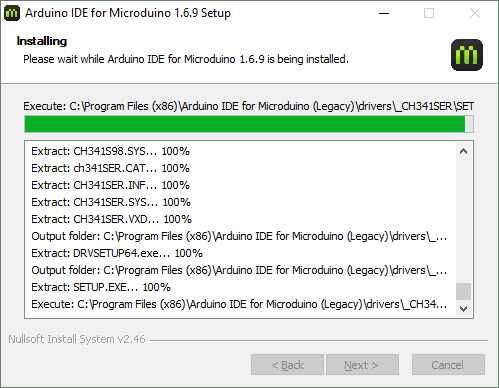
6. The installation process will begin for the Arduino IDE. Wait until it completes.
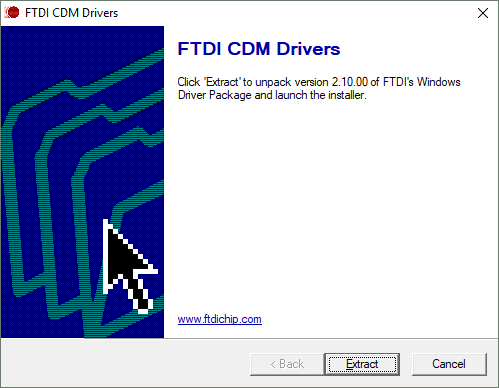
7. After the Arduino IDE has been installed, a window for driver installation will appear. Click Extract.
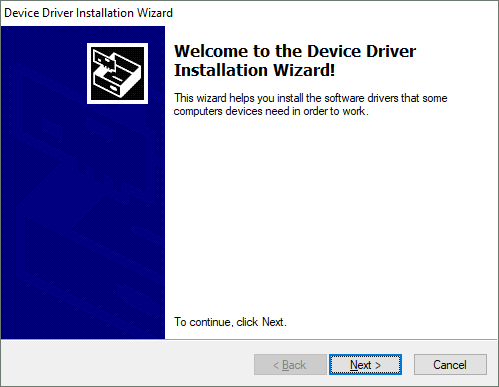
8. Device Driver Installation Wizard will appear. Click Next.
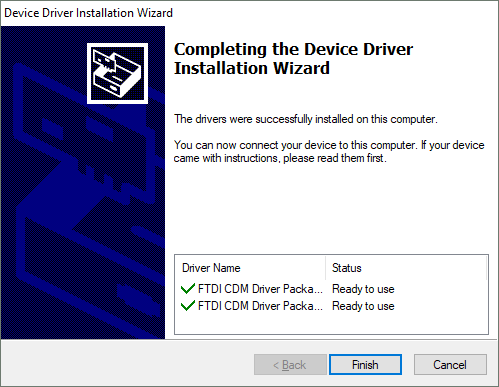
9. Device Driver Installation Wizard will complete. Click Finish.
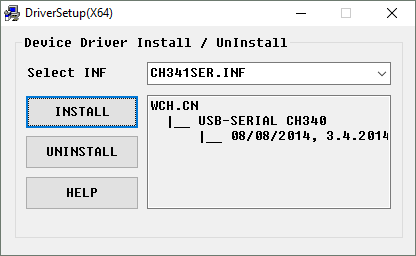
10. Another driver setup window should've appeared. Check your taskbar for the following window. Click INSTALL to install this driver.
A message will appear once the driver has been installed. Close this window after the driver has successfully installed.
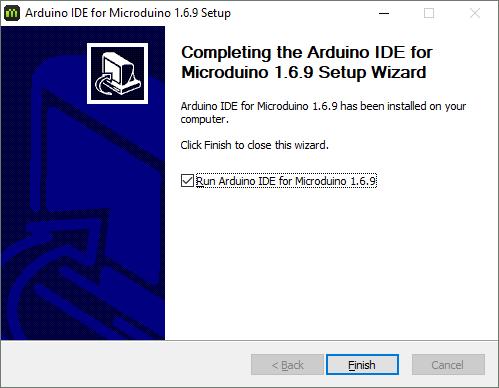
11. Another window which displays the software has completed should've appeared. Check your taskbar for the following window. Click Finish to finish the installation process and launch the software.
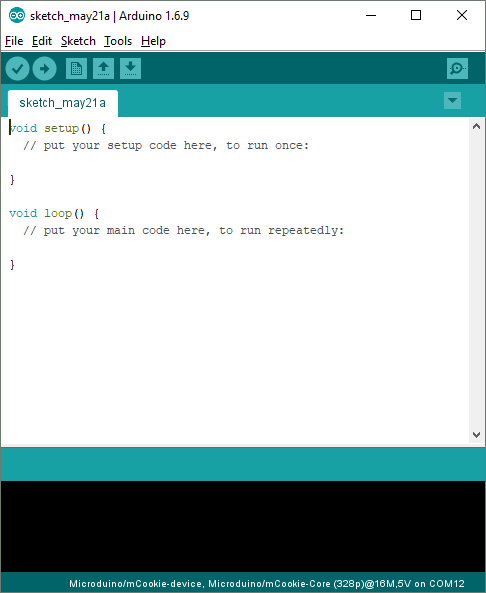
12. The software is now ready to be used!

