Difference between revisions of "Template:Setup CoreUSB Legacy (Windows)"
From Microduino Wiki
(Created page with "# Open the Microduino software. <br> thumb|75px|left<br clear=all> # Go to “Tools > Board” and select “Microduino/mCookie-device” <br> File:...") |
|||
| Line 2: | Line 2: | ||
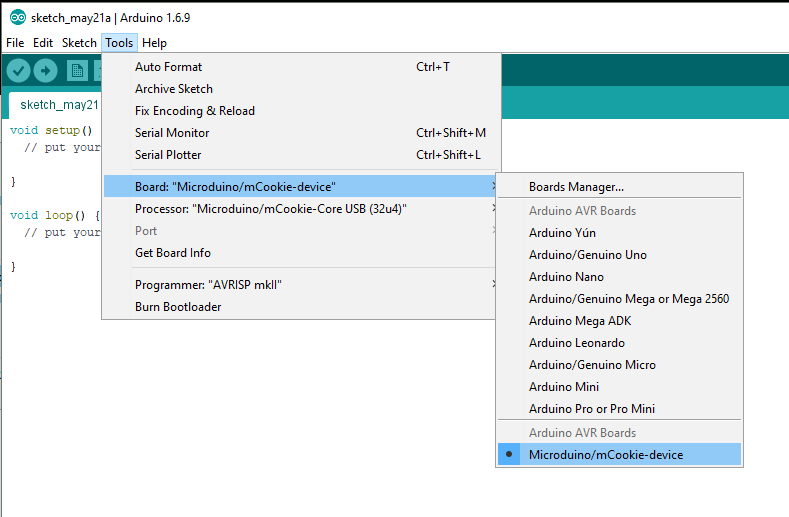
# Go to “Tools > Board” and select “Microduino/mCookie-device” <br> [[File:Select_Board_Legacy.png|frame|left]]<br clear=all> | # Go to “Tools > Board” and select “Microduino/mCookie-device” <br> [[File:Select_Board_Legacy.png|frame|left]]<br clear=all> | ||
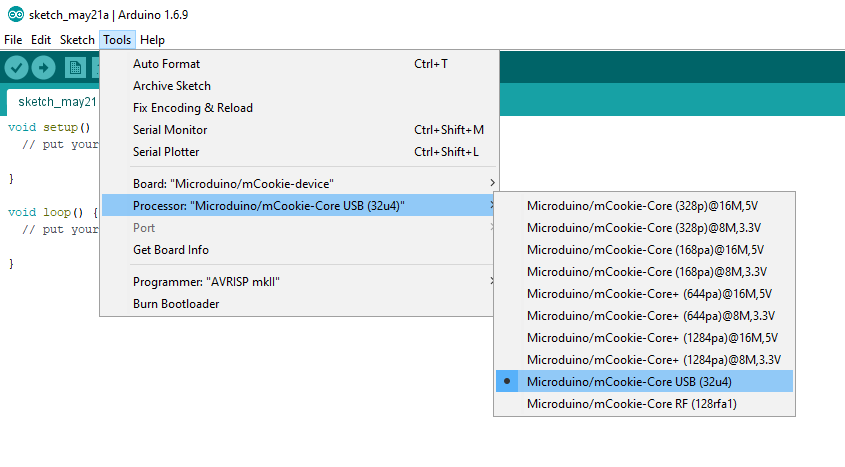
# Go to “Tools > Processor” and select “Microduino/mCookie-Core USB (32u4)” <br> [[File:Select_CoreUSB_Legacy.png|frame|left]]<br clear=all> | # Go to “Tools > Processor” and select “Microduino/mCookie-Core USB (32u4)” <br> [[File:Select_CoreUSB_Legacy.png|frame|left]]<br clear=all> | ||
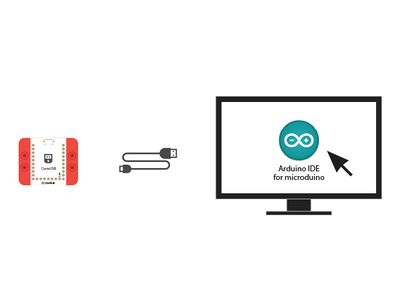
| − | # Connect the CoreUSB to your computer using a MicroUSB cable. DO NOT have any other modules stacked or connected. <br> [[ | + | # Connect the CoreUSB to your computer using a MicroUSB cable. DO NOT have any other modules stacked or connected. <br> [[File:CoreUSB_Ble_pc.jpg|thumb|left|400px]]<br clear=all> |
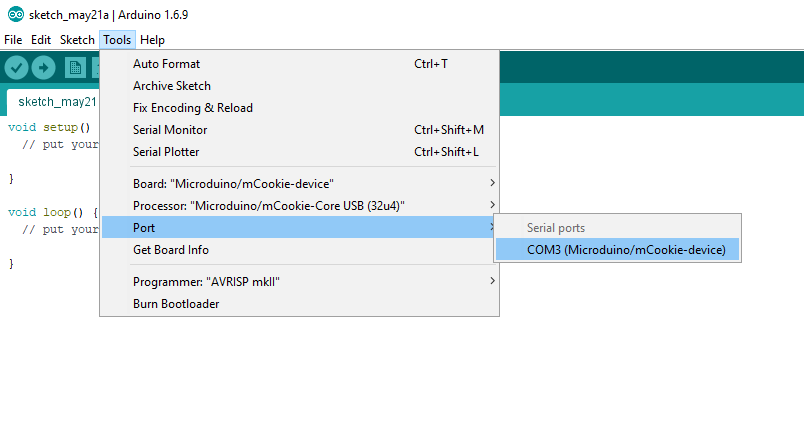
# Go to “Tools > Port” and select the port. It is usually the one that is select-able. <br> [[File:Select_CoreUSB_Port_Legacy.png|frame|left]]<br clear=all> | # Go to “Tools > Port” and select the port. It is usually the one that is select-able. <br> [[File:Select_CoreUSB_Port_Legacy.png|frame|left]]<br clear=all> | ||
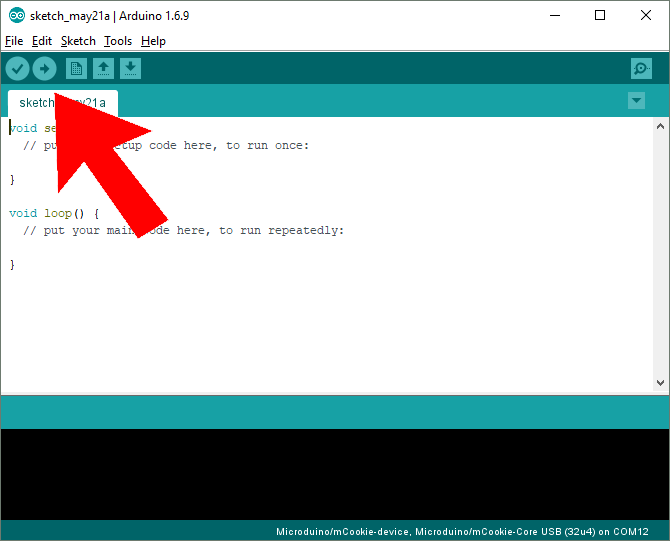
# With the default sample code. Hit upload (right arrow icon on the top left of the software). <br> [[File:Upload_CoreUSB_Legacy.png|frame|left]]<br clear=all> | # With the default sample code. Hit upload (right arrow icon on the top left of the software). <br> [[File:Upload_CoreUSB_Legacy.png|frame|left]]<br clear=all> | ||
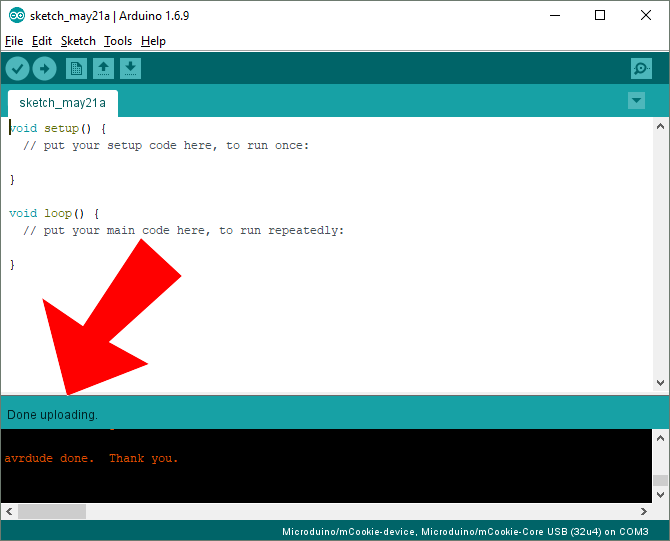
# The code will compile and will say upload complete if successful. Congratulations the software setup is complete! <br> [[File:Upload_CoreUSB_Complete_Legacy.png|frame|left]]<br clear=all> | # The code will compile and will say upload complete if successful. Congratulations the software setup is complete! <br> [[File:Upload_CoreUSB_Complete_Legacy.png|frame|left]]<br clear=all> | ||
Latest revision as of 15:22, 23 May 2018
- Open the Microduino software.
- Go to “Tools > Board” and select “Microduino/mCookie-device”
- Go to “Tools > Processor” and select “Microduino/mCookie-Core USB (32u4)”
- Connect the CoreUSB to your computer using a MicroUSB cable. DO NOT have any other modules stacked or connected.
- Go to “Tools > Port” and select the port. It is usually the one that is select-able.
- With the default sample code. Hit upload (right arrow icon on the top left of the software).
- The code will compile and will say upload complete if successful. Congratulations the software setup is complete!
