Difference between revisions of "Microduino LM4863 Music player -301KIT"
From Microduino Wiki
(Created page with "{| style="width: 800px;" |- | ==Outline== Project:Microduino LM4863 music player Objective:Use Microduino LM4863 play the music, use the button to achive the "start","sto...") |
|||
| (4 intermediate revisions by 2 users not shown) | |||
| Line 1: | Line 1: | ||
| + | {{Language|Microduino_LM4863_Music_player_-301KIT}} | ||
{| style="width: 800px;" | {| style="width: 800px;" | ||
|- | |- | ||
| | | | ||
==Outline== | ==Outline== | ||
| − | + | Project: Microduino-Amplifier Music Player | |
| − | + | Purpose: It adopts Microduino-Amplifier to play fixed music and controls the play or pause through a button. | |
| − | + | Difficulty: Elementary | |
| − | Time- | + | Time-consuming: Half an hour |
| − | + | Maker: Microduino Studio-YLB | |
|- | |- | ||
| | | | ||
==Bill of Materials== | ==Bill of Materials== | ||
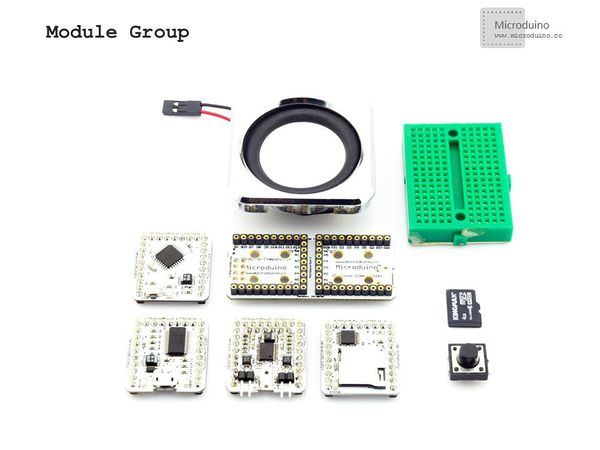
| − | *Microduino | + | *Microduino Equipment |
{|class="wikitable" | {|class="wikitable" | ||
|- | |- | ||
|Module||Number||Function | |Module||Number||Function | ||
|- | |- | ||
| − | |Microduino-Core||1||Core | + | |Microduino-Core||1||Core Board |
|- | |- | ||
| − | |Microduino-FT232R ||1|| | + | |Microduino-FT232R ||1||For downloading the program |
|- | |- | ||
| − | |Microduino-SD||1|| | + | |Microduino-SD||1||For storing the music file |
|- | |- | ||
| − | |Microduino-LM4863||1|| | + | |Microduino-LM4863||1||For audio play |
|- | |- | ||
| − | |Microduino Duo-V||1|| | + | |Microduino Duo-V||1||For ease of debugging |
|} | |} | ||
|- | |- | ||
| | | | ||
| − | *Other | + | *Other Equipment |
{|class="wikitable" | {|class="wikitable" | ||
|- | |- | ||
| − | | | + | |Loudspeaker||One |
|- | |- | ||
| − | | | + | |Breadboard||One |
|- | |- | ||
| − | |Breadboard | + | |Breadboard jumper||One box |
|- | |- | ||
| − | |Button|| | + | |Button||One |
|- | |- | ||
| − | | | + | |Memory card||One |
|- | |- | ||
| − | |micro | + | |micro USB cable||One |
|} | |} | ||
|- | |- | ||
| | | | ||
| − | [[File:301- | + | [[File:301-module.jpg|600px|center|thumb|301KIT module]] |
|- | |- | ||
| | | | ||
| − | == | + | ==File== |
| + | |||
| + | |||
| + | Test Code: | ||
| + | https://github.com/Microduino/Microduino_Tutorials/tree/master/Microduino_KIT/kit_LM4863_music | ||
| − | |||
| − | |||
==Debugging== | ==Debugging== | ||
| − | Step | + | Step 1: Build the circuit |
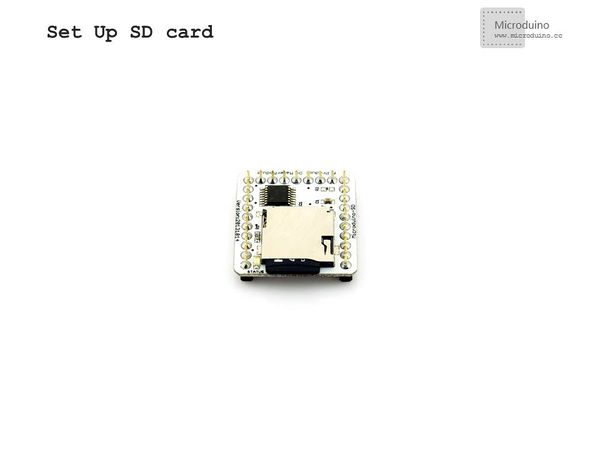
| − | *Insert the memory card into Microduino SD card slot | + | *Insert the memory card into Microduino-SD card slot |
|- | |- | ||
| | | | ||
| − | [[File:301KIT- | + | [[File:301KIT-SD.jpg|600px|center|thumb|301KIT-SD]] |
|- | |- | ||
| | | | ||
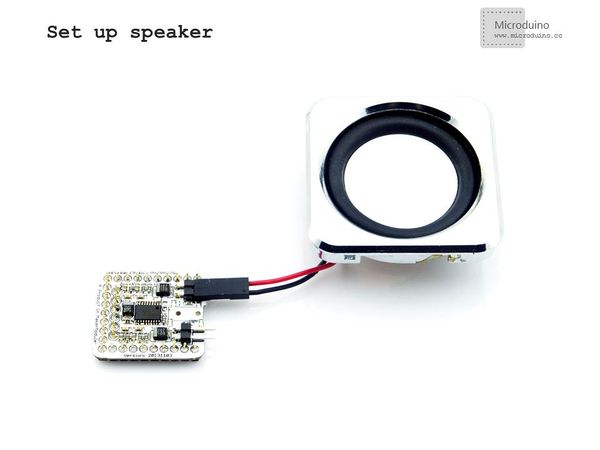
| − | *Connect the | + | *Connect the loudspeaker |
|- | |- | ||
| | | | ||
| − | [[File:301KIT- | + | [[File:301KIT-speaker.jpg|600px|center|thumb|301KIT-Speak]] |
|- | |- | ||
| | | | ||
| − | *Connect the button | + | *Connect the button |
|- | |- | ||
| | | | ||
| − | [[File:201KIT-button.jpg|600px|center|thumb|301KIT]] | + | [[File:201KIT-button.jpg|600px|center|thumb|301KIT-Button]] |
|- | |- | ||
| | | | ||
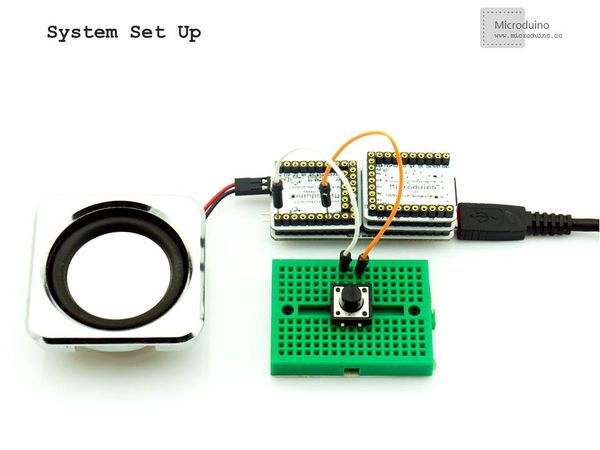
| − | * | + | *Stack all modules together to have an overall buildup. |
|- | |- | ||
| | | | ||
| − | [[File:301KIT- | + | [[File:301KIT-system.jpg|600px|center|thumb|301KIT-system]] |
|- | |- | ||
| | | | ||
| − | Step | + | Step 2: Maker audio |
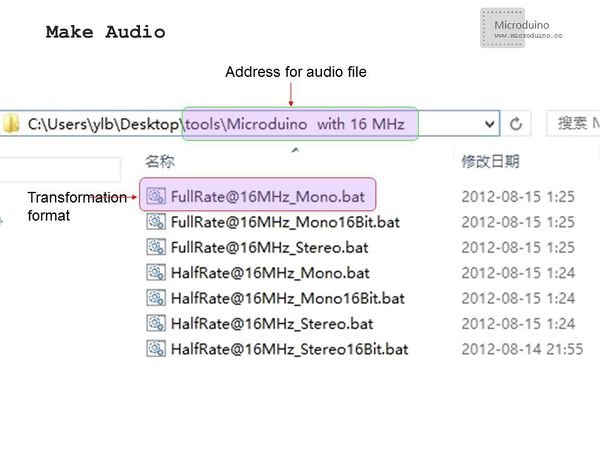
| − | * | + | *We'll need a tool based Sto oX and choose the right conversion program according to the work frequency of your Microduino modules; |
| − | * | + | |
| + | *Unzip the audio file, enter the folder "Microduino with 16 MHz", store the file into the folder and drag it to "FullRate@16MHz_Mono.bat" for batch processing; | ||
|- | |- | ||
| | | | ||
| − | [[File: | + | [[File:audio-1.jpg|600px|center|thumb|Audio]] |
|- | |- | ||
| | | | ||
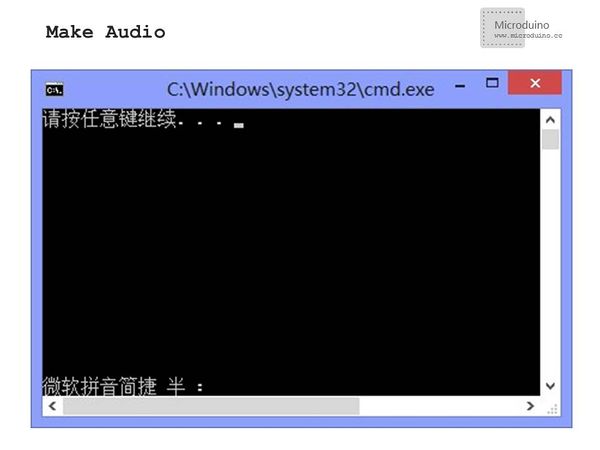
| − | * | + | *The program can be converted after the drag. A dialog box will pop up, showing "Enter Any Key to Continue..."; |
| + | |||
|- | |- | ||
| | | | ||
| − | [[File: | + | [[File:audio-2.jpg|600px|center|thumb|Audio]] |
|- | |- | ||
| | | | ||
| − | *After finished, you | + | *After it is finished, you will find a newly-created folder and the converted file is just inside it. If not, you can convert the original audio file to "wav format" and try again. |
|- | |- | ||
| | | | ||
| − | [[File: | + | [[File:audio-3.jpg|600px|center|thumb|Audio]] |
|- | |- | ||
| | | | ||
| − | * | + | *Cope the converted audio file to the memory card and insert the card into Microduino-SD card slot. |
| − | *Use | + | *Use IED to open the test program offered by Microduino, choose the board "Microduino Core (Atmega328P@16M,5V)" and download the program. Before the download, you should know: |
| − | ** | + | **Since some libraries may have different pin definition, please download the latest libraries to replace the former ones; |
| − | ** | + | **In the program, you need to change the name of the audio file to that of the generated audio file. |
==Result== | ==Result== | ||
| − | After download, press the button to play | + | After the download, just press the button to play music and one more press to pause the music. |
|- | |- | ||
| | | | ||
==Video== | ==Video== | ||
| − | + | ||
|} | |} | ||
Latest revision as of 08:16, 13 September 2016
| Language: | English • 中文 |
|---|
OutlineProject: Microduino-Amplifier Music Player Purpose: It adopts Microduino-Amplifier to play fixed music and controls the play or pause through a button. Difficulty: Elementary Time-consuming: Half an hour Maker: Microduino Studio-YLB | ||||||||||||||||||
Bill of Materials
| ||||||||||||||||||
| ||||||||||||||||||
FileTest Code: https://github.com/Microduino/Microduino_Tutorials/tree/master/Microduino_KIT/kit_LM4863_music DebuggingStep 1: Build the circuit
| ||||||||||||||||||
| ||||||||||||||||||
| ||||||||||||||||||
| ||||||||||||||||||
|
Step 2: Maker audio
| ||||||||||||||||||
| ||||||||||||||||||
| ||||||||||||||||||
ResultAfter the download, just press the button to play music and one more press to pause the music. | ||||||||||||||||||
Video |
