Difference between revisions of "Microduino-Module WIFI,CC3000"
(→Features) |
|||
| (13 intermediate revisions by 6 users not shown) | |||
| Line 4: | Line 4: | ||
| | | | ||
[[file:Microduino-cc3000-rect.jpg|400px|thumb|right|Microduino-CC3000]] | [[file:Microduino-cc3000-rect.jpg|400px|thumb|right|Microduino-CC3000]] | ||
| − | '''[[Microduino-CC3000]]''' is a well-equipped wireless network module, which can | + | '''[[Microduino-CC3000]]''' is a well-equipped wireless network module, which can simplify the implementation of the internet connection. Simple Link Wi-Fi can largely reduce MCU(Micro Controller Unit)'s software requirement of the host machine, making it ideal for using in any low-cost and low-power MCU of embedded applications. |
| Line 16: | Line 16: | ||
* Small, cheap, stackable and open; | * Small, cheap, stackable and open; | ||
* Open hardware circuit design and Arduino compatible programming development environment; | * Open hardware circuit design and Arduino compatible programming development environment; | ||
| − | * | + | * Uniform Microduino interface standard and rich peripheral modules, capable of having a fast and flexible connection and extension with other modules and sensors in accord with Microduino interface standard; |
* Easy to be integrated to pegboards with a 2.45-pitch female header connector interface. | * Easy to be integrated to pegboards with a 2.45-pitch female header connector interface. | ||
| Line 26: | Line 26: | ||
** IEEE 802.11 b/g | ** IEEE 802.11 b/g | ||
** Embedded IPv4 TCP/IP stack | ** Embedded IPv4 TCP/IP stack | ||
| − | * | + | * Best wireless performance in the industry |
| − | ** | + | ** Power of Tx:11Mbps CCK with +18dBm |
| − | ** Rx | + | ** Sensitivity of Rx: 11Mbps CCK with -82dBm |
| − | * Work together with a low-cost microcontroller which | + | * Work together with a low-cost microcontroller which uses a compact memory package and processes one million instruction per second (MIPS) |
** 2K bytes Flash | ** 2K bytes Flash | ||
** 250 bytes RAM | ** 250 bytes RAM | ||
* Low power consumption | * Low power consumption | ||
| − | ** Use the FET | + | ** Use the FET and own less than 5uA shutdown mode current |
* Operating temperature range | * Operating temperature range | ||
** -20°C ~ 70°C | ** -20°C ~ 70°C | ||
| Line 44: | Line 44: | ||
| | | | ||
===About SmartConfig=== | ===About SmartConfig=== | ||
| − | SimpleLink ™ Wi-Fi SmartConfig ™ technology | + | SimpleLink ™ Wi-Fi SmartConfig ™ technology can ensure a unique and fast activation of Wi-Fi. Developers or end-users could configure the current wireless network through other devices, such as smart phones, tablet PC SmartConfig App program installation. It can configure wireless network information of the current Wifi environment for hardware circuit equipped with CC3000 through the program, including SSID, wireless password, security authentication, and so on. Just one step can it make several devices without display connected to Wifi network and allow people to connect their home network and the Cloud wirelessly. |
|- | |- | ||
| Line 50: | Line 50: | ||
===Pins=== | ===Pins=== | ||
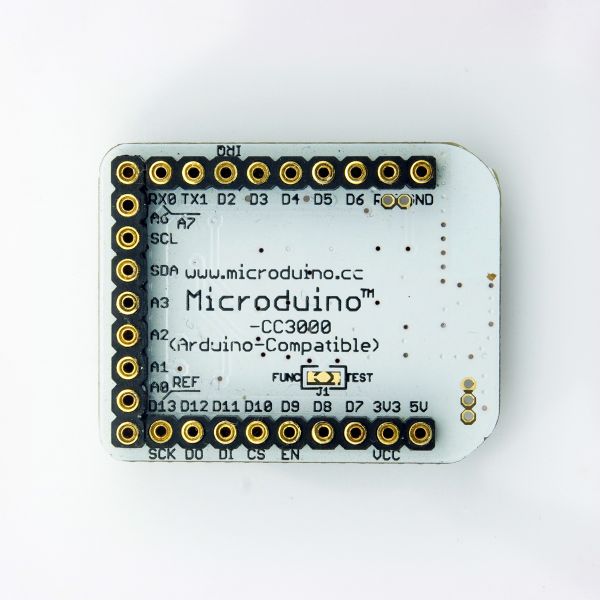
| − | * Microduino- | + | * We should know that Microduino-Wifi extension board is used as a slave machine, which communicates with Microduino host machine's SPI. |
:{|class="wikitable" | :{|class="wikitable" | ||
! Microduino-WiFi Module Pin | ! Microduino-WiFi Module Pin | ||
| Line 85: | Line 85: | ||
| 26 | | 26 | ||
| D9 | | D9 | ||
| − | | Microduino | + | | Microduino activates CC3000 by setting the pin to high level. |
|} | |} | ||
| Line 105: | Line 105: | ||
| | | | ||
==Development== | ==Development== | ||
| − | * Make sure +3.3 v | + | * Make sure the current(+3.3 v) can reach 200ma. It is not recommended for using FT232R to debug directly since the output current of FT232R is too small. The FT232R datasheet says you can draw up to 50 mA from its 3.3V output. |
| + | *Library for upgrade:[[File:CC3000Patch.zip]] | ||
| + | *CC3000Patch liberary is for firmware upgrade,develop liberary is _03_Microduino_WIFI_CC3000 and _03_Microduino_WIFI_CC3000_MDNS。 | ||
===Arduino library and supported package=== | ===Arduino library and supported package=== | ||
| Line 112: | Line 114: | ||
*https://github.com/Microduino/Microduino_Tutorials/tree/master/Microduino_Libraries/_01_Microduino_OLED_U8glib | *https://github.com/Microduino/Microduino_Tutorials/tree/master/Microduino_Libraries/_01_Microduino_OLED_U8glib | ||
| − | === | + | ===Notice for how to use the library=== |
| − | *CC3000 patch | + | *CC3000 patch library is used for upgrading the firmware and can't be activated with Adafruit_CC3000's libray at the same time. |
| − | *If you want to make these two libraries compatible Microduino Core+: | + | *If you want to make these two libraries compatible with Microduino Core+: |
| − | **You need open the “Adafruit_CC3000_4Patching.cpp”(CC3000Patch)or “Adafruit_CC3000.cpp”(Adafruit_CC3000)in library | + | **You need open the “Adafruit_CC3000_4Patching.cpp”(CC3000Patch)or “Adafruit_CC3000.cpp”(Adafruit_CC3000)in library directories firstly; |
| − | **Find line | + | **Find the line “#elif defined(__AVR_ATmega1281__) || defined(__AVR_ATmega2561__) || defined(__AVR_ATmega2560__) || defined(__AVR_ATmega1280__)” in the file; |
| − | **Add this “ || defined(__AVR_ATmega1284P__) || defined(__AVR_ATmega644P__) ” | + | **Add this “ || defined(__AVR_ATmega1284P__) || defined(__AVR_ATmega644P__) ” after the line. |
*CC3000Patch: | *CC3000Patch: | ||
| − | **When using CC3000PATCH, please make sure any other cc3000 library should be removed to avoid conflict. And recommend | + | **When using CC3000PATCH, please make sure any other cc3000 library should be removed to avoid conflict. And we recommend using "Arduino version 1.01 or higher", if you are using lower version, please re-install it again from zero. |
| − | **CC3000Patch can be used to | + | **CC3000Patch can be used to upgrade the firmware of CC3000,you need to copy the CC3000Patch.ino to "\examples\CC3000Patch\"; |
| − | **You need set the IRP,VBAT and CI correctly in your program,as follows:“#define CC3000_IRQ 2 | + | **You need to set the IRP,VBAT and CI correctly in your program,as follows:“#define CC3000_IRQ 2 ”, “#define ADAFRUIT_CC3000_VBAT 9”, “#define ADAFRUIT_CC3000_CS 10”; |
| − | ** | + | **More usage, please refer to [https://github.com/cmagagna/CC3000Patch/blob/master/README.md author's README] |
*Adafruit_CC3000: | *Adafruit_CC3000: | ||
| − | **You need set the IRP,VBAT and CI correctly in your program,as follows:“#define CC3000_IRQ 2 | + | **You need to set the IRP,VBAT and CI correctly in your program,as follows:“#define CC3000_IRQ 2 ”, “#define ADAFRUIT_CC3000_VBAT 9”, “#define ADAFRUIT_CC3000_CS 10” |
==Application== | ==Application== | ||
| − | ===Upgrade the | + | ===Upgrade the firmware of CC3000=== |
| − | * | + | *It is recommended to use CC3000 Patch library to upgrade the firmware of CC3000 to version 1.24. More information, please refer to [https://github.com/cmagagna/CC3000Patch/blob/master/README.md author's README] |
| − | ** | + | **(Note: Since the upgrade of firmware is operated by the serial monitor, so please set the new-line ending character of Arduino IDE serial monitor to "Newline and Enter". ) |
| − | *After | + | *After the upgrade, just delete the CC3000Patch library and start the Adafruit_CC3000 libray,then you can run the examples! |
===SimpleLink™ Wi-Fi SmartConfig™ Function=== | ===SimpleLink™ Wi-Fi SmartConfig™ Function=== | ||
*If you want to use SimpleLink™ Wi-Fi SmartConfig™ function: | *If you want to use SimpleLink™ Wi-Fi SmartConfig™ function: | ||
| − | **Take the IOS as example,download the "TI WIFI SMARTCINFIG" from App Store firstly; | + | **Take the IOS as example,download the "TI WIFI SMARTCINFIG" from the App Store firstly; |
| − | **Connect the IOS device to router,open the "TI WIFI SMARTCINFIG" | + | **Connect the IOS device to router,open the "TI WIFI SMARTCINFIG" and fill the route key in Password; |
**Download the SmartConfigCreate to Microduino from the Adafruit_CC3000 library's examples; | **Download the SmartConfigCreate to Microduino from the Adafruit_CC3000 library's examples; | ||
| − | **Open the serial port monitor(baud rade: | + | **Open the serial port monitor(baud rade:115200)till “Waiting for a SmartConfig connection (~60s) ...” shows,just click the "Start" of TI WIFI SMARTCINFIG and wait for the result. |
| − | == | + | ==FAQ== |
| + | *Does this module have the antenna? | ||
| + | **Yes | ||
| + | *CC3000 module can’t open the webpage, but the “ping” command works. Identify the root cause in software “www.fastrprint (F("GET "));”, how to resolve this issue? | ||
| + | **Need to burn the new firmware, please refer to following link:https://github.com/cmagagna/CC3000Patch/blob/master/README.md | ||
| + | |||
| + | ==Buy== | ||
==History== | ==History== | ||
Latest revision as of 04:27, 4 August 2017
| Language: | English • 中文 |
|---|
|
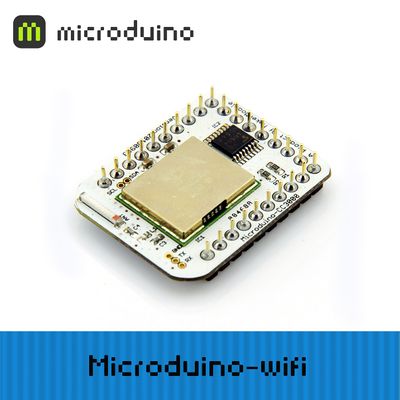
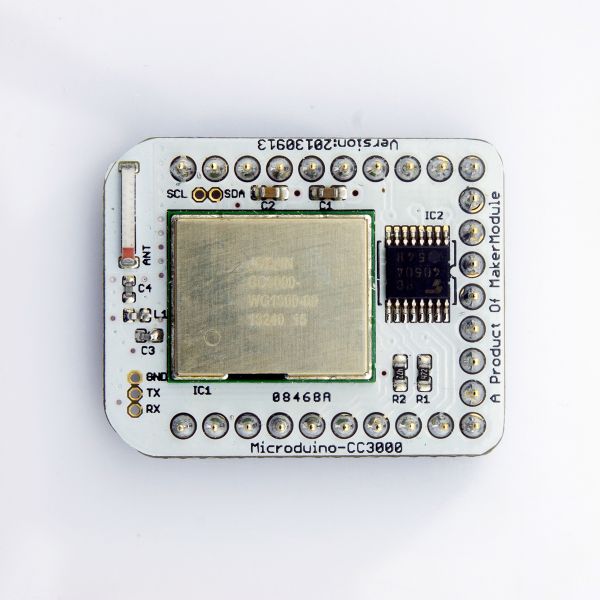
Microduino-CC3000 is a well-equipped wireless network module, which can simplify the implementation of the internet connection. Simple Link Wi-Fi can largely reduce MCU(Micro Controller Unit)'s software requirement of the host machine, making it ideal for using in any low-cost and low-power MCU of embedded applications.
| ||||||||||||||||||||||||||||
ContentsFeatures
SimpleLink? Wi-Fi SmartConfig™ technology can ensure a unique and fast Wi-Fi activation process;
| ||||||||||||||||||||||||||||
Specifications
| ||||||||||||||||||||||||||||
About SmartConfigSimpleLink ™ Wi-Fi SmartConfig ™ technology can ensure a unique and fast activation of Wi-Fi. Developers or end-users could configure the current wireless network through other devices, such as smart phones, tablet PC SmartConfig App program installation. It can configure wireless network information of the current Wifi environment for hardware circuit equipped with CC3000 through the program, including SSID, wireless password, security authentication, and so on. Just one step can it make several devices without display connected to Wifi network and allow people to connect their home network and the Cloud wirelessly. | ||||||||||||||||||||||||||||
Pins
| ||||||||||||||||||||||||||||
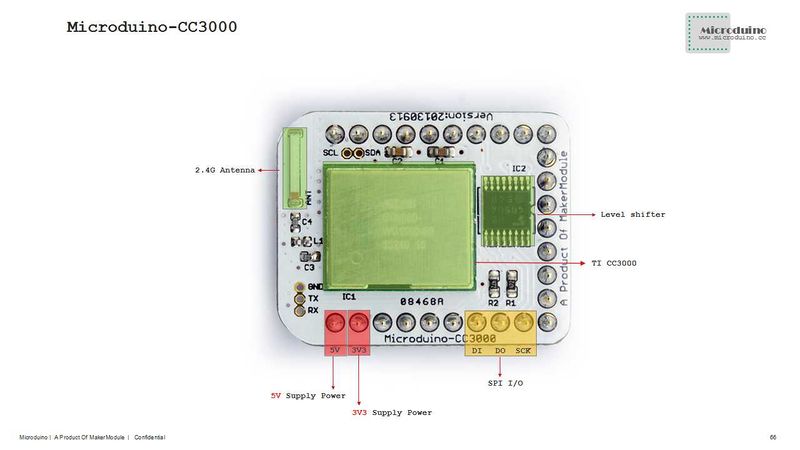
DocumentsEagle PCB File:Microduino-CC3000.zip Main Components
| ||||||||||||||||||||||||||||
Development
Arduino library and supported package
Notice for how to use the library
ApplicationUpgrade the firmware of CC3000
SimpleLink™ Wi-Fi SmartConfig™ Function
FAQ
BuyHistoryPictureVideo |


