Difference between revisions of "Main Page"
(Undo revision 16044 by Zhangfengfeng (talk)) |
|||
| Line 1: | Line 1: | ||
| − | { | + | {| style="width: 1000px;" |
| + | |- | ||
| + | | | ||
| + | |||
| + | <seo title="microduino" titlemode="append" keywords="microduino,mCookie,Arduino,maker,sensors,scratch,development boards,smart hardware,hardware prototype design,electronic prototype development,creativity realization" description="microduino wiki home page, design for palyers, designers, engineers, students and imaginative inventors and makers of all ages."></seo> | ||
| − | |||
| − | |||
| − | |||
| − | |||
| − | |||
| − | |||
| − | |||
| − | |||
{| class="titlebox" width="800px" style="border:2px solid #000000; -moz-border-radius:5px 5px 5px 5px; -webkit-border-radius:5px 5px 5px 5px;" cellspacing=0 cellpadding=0 | {| class="titlebox" width="800px" style="border:2px solid #000000; -moz-border-radius:5px 5px 5px 5px; -webkit-border-radius:5px 5px 5px 5px;" cellspacing=0 cellpadding=0 | ||
| − | ! style="background:#000000; border-radius:2px; padding:5px; color:#ffffff;" | <div style="font-size:180%;text-align:center;">Welcome to | + | ! style="background:#000000; border-radius:2px; padding:5px; color:#ffffff;" | <div style="font-size:180%;text-align:center;">Welcome to Microduino Wikipedia</div> |
|- | |- | ||
| | | | ||
{| | {| | ||
|- | |- | ||
| − | |[[file:wiki.jpg|800px|left | + | |[[file:wiki.jpg|800px|left]] |
|} | |} | ||
|- | |- | ||
| Line 21: | Line 17: | ||
{| | {| | ||
|- | |- | ||
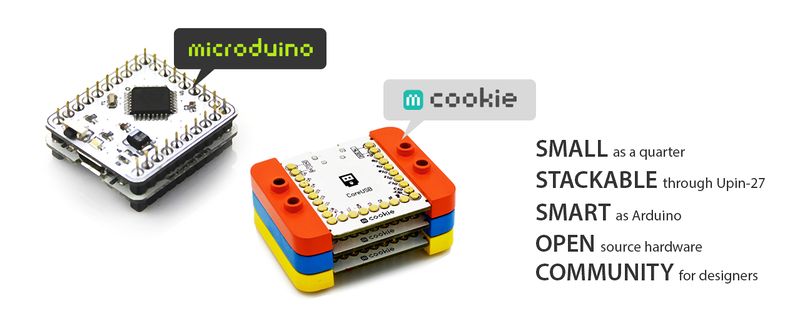
| − | | | + | |Small size, big energy! Microduino and mCookie bring small, powerful and stackable electronic hardware to players, engineers, designers, students and imaginative inventors of all ages. You can use them to set up open-source projects or create new plans. |
| − | + | ||
| − | + | |- | |
| − | + | |All Microduino and mCookie boards are Arduino-compatible. Veteran players can write programs under Arduino development environment and upload code through USB cable. Novices can drag the pre-written code through open-source Scratch. | |
| − | + | |- | |
| − | + | |Microduino holds the size and prototype design cost down mostly, improve the practicability and flexibility of Arduino-compatible boards, and brings better experience to players of all ages with different proficiency. Microduino and mCookie modules, sensors and the relevant kits are mainly applied to players’ creativity realization, electronic prototype development and production in limited quantities and other stages. | |
| − | |||
| − | |||
| − | |||
|} | |} | ||
|} | |} | ||
<br> | <br> | ||
| − | { | + | <br> |
| − | + | {| class="titlebox" width="810px" style="border:2px solid #000000; -moz-border-radius:5px 5px 5px 5px; -webkit-border-radius:5px 5px 5px 5px;" cellspacing=0 cellpadding=0 | |
| − | + | ! style="background:#000000; border-radius:2px; padding:5px; color:#ffffff;" | <div style="font-size:180%;text-align:center;">Please select the corresponding products: </div> | |
| − | + | |} | |
| − | + | <br> | |
| − | + | <br> | |
| + | <br> | ||
| − | + | {| border="0" cellpadding="10" width="80%" | |
| − | Microduino | + | |- |
| − | + | |width="25%" | | |
| − | + | <gallery widths=200px heights=200px mode="packed-hover"> | |
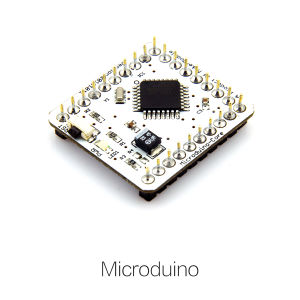
| − | + | Image:Microduino.jpg|link=[[Microduino_Series]]|''[[Microduino_Series|Microduino Series]]''<br>Microduino adopts pin-type connection method, and it is smart, flexible, and Arduino ecosystem-compatible. It can meet all requirements of designers to set up application program. And it is a secret weapon of top-level makers. | |
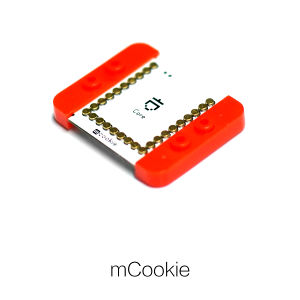
| − | + | Image:mCookie.jpg|link=[[MCookie_Series]]|''[[MCookie_Series|mCookie Series]]'' <br>mCookie adopts magnet+pogo pin connection. As a powerful brick, it supports Arduino and graphical programming. Whether for novices or professionals, it is a fantastic choice! mCookie is a favorite of creative ones! | |
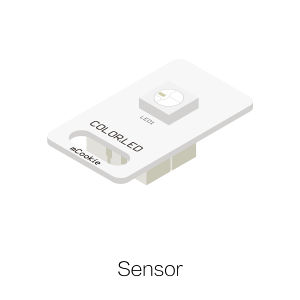
| + | Image:Sensor.jpg|link=[[MCookie Sensor Series]]|''[[MCookie Sensor Series| Sensor Series]]''<br>Compatible with any devices of Microduino and mCookie. They are for inducing all things ( in the environment), such as sound, light, temperature and so on. They can perform some instructions at the same time, such as emitting light and moving. Convert intangible to tangible. | ||
| + | </gallery> | ||
| + | |- | ||
| + | | | ||
| + | |} | ||
| + | <br> | ||
| + | <br> | ||
| + | {| border="0" cellpadding="10" width="80%" | ||
| + | |- | ||
| + | |width="25%" | | ||
| + | <gallery widths=200px heights=200px mode="packed-hover"> | ||
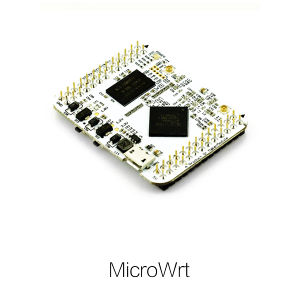
| + | Image:MicroWrt.jpg|link=[[MicroWrt_Series]]|''[[MicroWrt_Series|MicroWrt Series]]'' <br>MicroWRT is born for the Internet. You can take it as a router, and it is compatible with OpenWRT perfectly; what is curtail is that we have designed Microduino interfaces for MicroWRT so that you can use Microduino modules on it. Everything is possible! | ||
| + | Image:MicroCookie.jpg|link=[[MicroPi_Series]]|''[[MicroPi_Series|MicroNux Series]]'' <br> | ||
| + | Image:blank.jpg | ||
| + | </gallery> | ||
| + | |- | ||
| + | | | ||
| + | |} | ||
<br> | <br> | ||
| + | <br> | ||
| + | |||
| + | =Microduino Community & Data Download= | ||
| + | Microduino Getting Started:【'''[[AVR Core: Getting started |Quick Start]]'''】 | ||
| + | <br> | ||
| + | Arduino Syntax Manual: 【'''[[Arduino Syntax Manual | Arduino Syntax Manual]]'''】 | ||
| + | <br> | ||
| + | Frequently Asked Questions:【'''[[FAQ]]'''】 | ||
| + | <br> | ||
| + | Fritzing: 【'''[[File:Microduino-Fritzing.zip]]''' 】 | ||
| + | <br> | ||
| + | Microduino APP Source for Andriod: 【[https://github.com/iascchen/android-microduino APP Source]】 | ||
| + | <br> | ||
| + | <gallery widths=200px heights=200px perrow=4 mode="nolines"> | ||
| + | Image:mSerial.png|<br>[https://wiki.microduino.cn/download/mSerial.apk Android APP Serial debugging] | ||
| + | Image:mLight.png|<br>[https://wiki.microduino.cn/download/mLight.apk Android APP Light control] | ||
| + | Image:mRobot.png|<br>[https://wiki.microduino.cn/download/mRobots.apk Android APP Remote control for robot] | ||
| + | Image:mClock.png|<br>[https://wiki.microduino.cn/download/mClock.apk Android APP Calibrate clock] | ||
| + | |||
| + | </gallery> | ||
| + | <br> | ||
| + | <br> | ||
| + | <br> | ||
| + | <br> | ||
| + | |||
| + | =Welcome to Microduino Community= | ||
| + | [[file:二维码.png|850px|left]] | ||
| + | <br style="clear: left"/> | ||
| + | <br> | ||
| + | Microduino Microblog: https://www.microduino.cc/blog | ||
| + | <br> | ||
| + | MicroduinoS Store: https://www.microduino.cc/store | ||
| + | <br> | ||
| + | Microduino QQ group: 123972320 | ||
| + | <br> | ||
| + | <br style="clear: left"/> | ||
<br> | <br> | ||
{| class="wikitable" style="width:800px;border:2px solid #000000; -moz-border-radius:5px 5px 5px 5px; -webkit-border-radius:5px 5px 5px 5px;" cellspacing=0 cellpadding=0 | {| class="wikitable" style="width:800px;border:2px solid #000000; -moz-border-radius:5px 5px 5px 5px; -webkit-border-radius:5px 5px 5px 5px;" cellspacing=0 cellpadding=0 | ||
| | | | ||
| − | + | Microduino technical wikipedia was built on '''11th November, 2012 ''', here: | |
| + | <br>gather '''{{NUMBEROFARTICLES}}''' technical articles and project strategy. | ||
| + | <br>has '''{{NUMBEROFFILES}}''' technical documents uploaded. | ||
| + | <br>There are '''{{NUMBEROFACTIVEUSERS}}''' friends completing '''{{NUMBEROFEDITS}}''' times of emendation work. | ||
<br> | <br> | ||
| − | <br>Technical | + | <br>To learn new condition of this wiki, please click '''[[Special:RecentChanges|Recent Changes]]''' |
| − | <br> | + | <br> |
| + | <br>Technical support: support(@)microduino.cc | ||
| + | <br>Promotion cooperation: sales(@)microduino.cc | ||
| + | |} | ||
| + | |- | ||
| + | | | ||
|} | |} | ||
Revision as of 07:51, 23 February 2017
|
<seo title="microduino" titlemode="append" keywords="microduino,mCookie,Arduino,maker,sensors,scratch,development boards,smart hardware,hardware prototype design,electronic prototype development,creativity realization" description="microduino wiki home page, design for palyers, designers, engineers, students and imaginative inventors and makers of all ages."></seo>
Microduino Community & Data DownloadMicroduino Getting Started:【Quick Start】
Welcome to Microduino Community
| |||||||||||||
