|
Step 1: Arduino IDE Download and Installation
*Arduino compatible, first install the basic IDE
Download the Microduino IDE (based on a modified version ArduinoIDE):
- We have Microduino compatible hardware support packages and libraries integrated in the IDE. The next step will be to verify that it is installed correctly
Step 2: Verify IDE
|
*Verifying hardware support package
- The Microduino IDE has an integrated hardware support package for all cores availables:
- This package allows Microduino hardware to be displayed in the “Board” menu
- Like the official Arduino hardware, you can download other codes and reprogram the bootloader
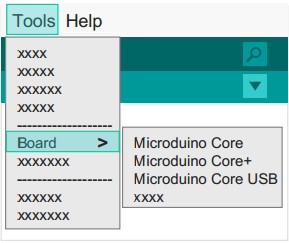
- 启动Arduino IDE,单击"Tools"菜单
- 您将会在"Board"菜单下看到Microduino系列.
|
|
|
*验证程序库
- Microduino针对数十种不同的功能模块,整理出了兼容的程序库支持包;
- 这里面包含Arduino官方原版的部分支持包
- 我们只是对其文件夹改名,便于整理分类
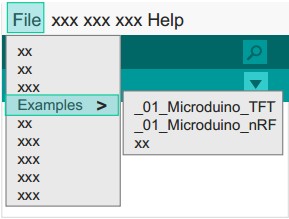
- 启动Arduino IDE,单击"File"菜单
- 您将会在"Examples"菜单下找到程序示例.
- 注意:1.6.3版本的IDE要先在"Board"菜单下选择好板卡才能找到Microduino的示例程序
|
|
Step 3: 驱动程序
*开发环境配置好之后,开始安装驱动程序
*下载驱动
*安装驱动
Step 4: 连接硬件
- 用Micro-USB 线连接mCookie-CoreUSB到您的PC/Mac上;
|
*Windows
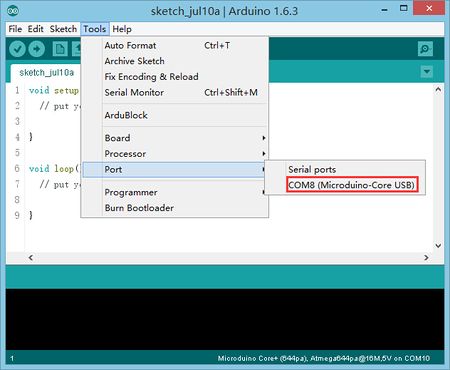
- 打开IDE,在菜单"Tools"里的"Serial Port"
- 你将看到"COMXX"
|
|
|
*Mac OS
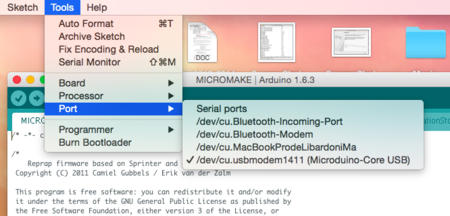
- 打开IDE,在菜单"Tools"里的"Serial Port"
- 你将看到"dev/tty.usbmodemXX"
|
|
附录
|


