Sensor-Buzzer

From Microduino Wiki
Revision as of 09:27, 10 November 2016 by Fengfeng (talk)
Jump to: navigation, search
Language: English  • 中文
Sensor-Buzzer

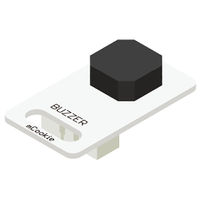
The product number of Sensor-Buzzer is: MSDO11

Sensor-Buzzer is a passive buzzer. Like a magnetic speaker, it needs voltage with different frequency so that it can make sound accordingly. The pitch becomes louder when the frequency gets higher.

Introduction of Pins

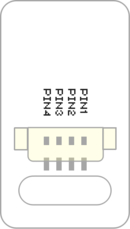
Sensor backpin.png
  • Pins of the sensor:
    • PIN1: GND
    • PIN2: VCC
    • General signal pins:
      • PIN3(IO1): digital/analog signal
      • PIN4(IO2): NC(null)
    • Special signal pins:
      • If it is IIC: IO1/IO2 are respectively SDA/SCL.
      • If it is soft serial port: IO1/IO2 are respectively tx/rx.
  • Special to Sensor-Buzzer sensor pins
    • PIN1: GND
    • PIN2: VCC
    • PIN3(IO1): Output pin
    • PIN4(IO2): NC


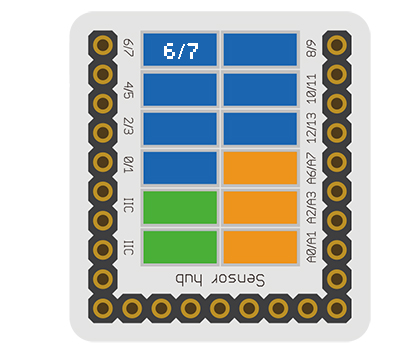
Microduino sensor can communicate with core module through the connection with Microduino-Module Sensor Hub.


Features

  • Controllable sound frequency (eg: You can achieve the effect of piano spectrum with it. )
  • Small size which is easy to install.

Specification

  • Voltage
    • 3.3V~5V working voltage
  • Size
    • Size of the board: 23.5mm*13mm
    • 1.27mm-spacing 4Pin interface connected with sensorhub.
    • The CAD drawing of the sensor: File:Sensor CAD.zip
  • Technical parameters
    • Drive with 2K~5K square wave
    • The sound frequency is controllable.
  • Connection
    • This sensor can be connected to the following interfaces of core: A0~A7,D2~D13


Document

Development

Program Download

Programming

  • Follow the Software Getting Started Guide.
  • Select the Board, Processor and Port.
  • Click [File]->[Open], browse to the project program address, and click "Sensor-Buzzer Test.ino" to open the program.
  • After confirming all these items are correct, click "→" to download the program to the development board.

Hardware Setup

  • Referring to the following diagram, connect the Sensor-Buzzer to digital pin D6 of Microduino-Sensorhub.


Microduino-sensorhub Shake.JPG


Result

  • After download, you can hear the alarming sound.

Application

#define buzzer_pin 6
void setup()
{
  pinMode(buzzer_pin,OUTPUT);
}
 
void loop()
{
  for(int i=200;i<=800;i++)  //Increase the frequency from 200HZ to 800HZ circularly. 
  {
    tone(buzzer_pin,i);    //Output frequency in the port. 

    delay(5);      //The frequency lasts for 5ms.  
  }
  delay(1000);     //The highest frequency lasts for 1s. 
  for(int i=800;i>=200;i--)
  {
    tone(buzzer_pin,i);
    delay(10); //The frequency lasts 10ms.   
  }
}
  • Stack all the modules and then connect the interface on the back of BUZZER to the D6 digital port of Sensorhub.
  • Open IDE, copy the program to IDE, choose the right board, compile and download.
  • You can hear the alarm after download.


Purchase

History

Image

  • Front
Microduino-Cube-Station Front
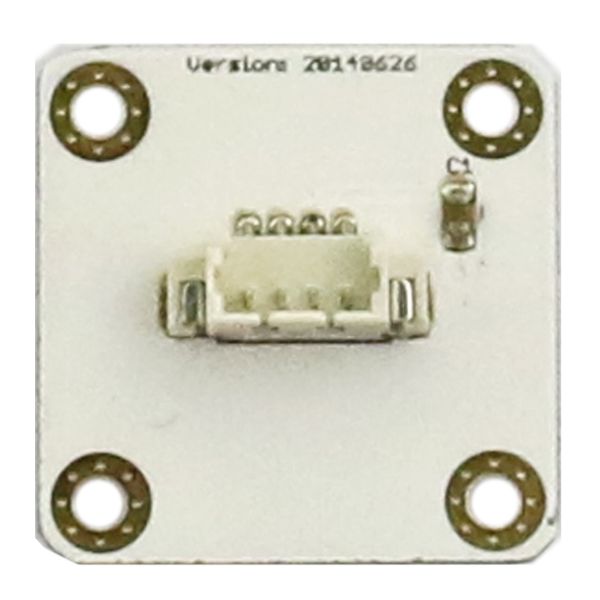
  • Back
Microduino-Cube-Station Back