Maple Lesson 07 - Control RGB LED
Contents[hide]ObjectiveYou have learned several LED experiment, then go on studying the RGB LED that is display different color by a RGB LED, including the breathing lamp's effect. EquipmentMicroduino-CoreSTM32 is an ARM development board using STM32F103CBT6 chip. It use special Upin7 interface, the size is similar with a coin and fully compatible other Microduino modules.
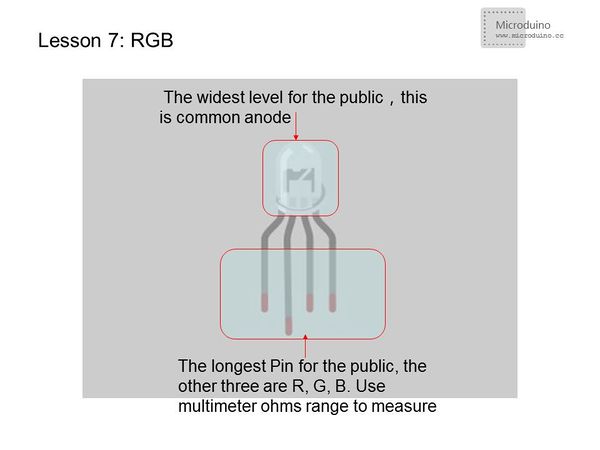
RGBRGB LED contains three LEDs, one is red, the other is green and another it blue. By controlling three LED's brightness, you can mix up almost any color you want. Connection method
SchematicThe following connection uses method 1 and uses pin D4、D11 and D12. You also can use PWM pin:0,1,4,11,12,14(A0),15(A1),16(A2),17(A3),18(SDA),19(SCL),20(A6),21(A7). Programint redPin = 4;
int greenPin = 11;
int bluePin = 12;
void setup()
{
pinMode(redPin, PWM);
pinMode(greenPin, PWM);
pinMode(bluePin, PWM);
}
void loop()
{
setColor(65535, 0, 0); // Red
delay(1000);
setColor(0, 65535, 0); // Green
delay(1000);
setColor(0, 0, 65535); // Blue
delay(1000);
setColor(65535, 65535, 0); // Yellow
delay(1000);
setColor(80, 0, 80); // Purple
delay(1000);
setColor(65535, 65535, 65535);//White
delay(1000);
setColor(0, 0, 0); //Black
delay(1000);
for(int i=0;i<65535;i+=1285)//Red coming on
{
setColor(i, 0, 0);
delay(30);
}
delay(100);
for(int i=65535;i>0;i-=1285)//Red coming off
{
setColor(i, 0, 0);
delay(30);
}
delay(100);
for(int i=0;i<65535;i+=1285)//Blue coming on
{
setColor(0, i, 0);
delay(30);
}
delay(100);
for(int i=65535;i>0;i-=1285)//Blue coming off
{
setColor(0, i, 0);
delay(30);
}
delay(100);
for(int i=0;i<65535;i+=1285)//Green coming on
{
setColor(0, 0, i);
delay(30);
}
delay(100);
for(int i=65535;i>0;i-=1285)//Green coming off
{
setColor(0, 0, i);
delay(30);
}
delay(100);
}
void setColor(int red, int green, int blue)//Color display program
{
pwmWrite(redPin, 65535-red); //A total of anode RGB, low level light red LED using 65535-red
pwmWrite(greenPin, 65535-green);
pwmWrite(bluePin, 65535-blue);
}ResultIn a light can be seen on red, green, blue, yellow, purple, black, white, and the effect like a breathing lamp. Video |
