|
|
| (57 intermediate revisions by 8 users not shown) |
| Line 1: |
Line 1: |
| − | {| style="width: 800px;" | + | {| class="titlebox" width="100%" style="border:2px solid #000000; -moz-border-radius:5px 5px 5px 5px; -webkit-border-radius:5px 5px 5px 5px;" cellspacing=0 cellpadding=0 |
| − | |-
| + | ! style="background:#000000; border-radius:2px; padding:5px; color:#ffffff;" | <div style="font-size:180%;text-align:center;">Microduino Wiki</div> |
| − | | | + | |} |
| − | ==Overview== | |
| − | *Project name:Microduino open source player
| |
| − | *Objective:to read the songs in the SD card.
| |
| − | *Difficulty: medium
| |
| − | *Time consuming: 2 hours
| |
| − | *Producer:
| |
| − | *Introduction:
| |
| − | **Open source music player is an open source speaker which can read SD card and decode it.
| |
| − | ** Appearance concise, simple button design, OLED screen display, easy to use
| |
| − | **This system is fully realized by Microduino, and the user can experience the fun of manual DIY
| |
| | | | |
| | | | |
| − | ==Bill of materials==
| + | {| class="titlebox" width="300px" style="border:2px solid #000000; -moz-border-radius:10px 10px 10px 10px; -webkit-border-radius:10px 10px 10px 10px;" cellspacing=0 cellpadding=0 |
| − | {| border="0" cellpadding="10" width="100%" | + | ! style="background:#FFFFFF; border-radius:10px; padding:10px; color:#000000;" | <div style="font-size:140%;text-align:center;">Software Setup</div> |
| − | |-
| |
| − | |width="50%" valign="top" align="left"|
| |
| − | ===Microduino devices===
| |
| − | {|class="wikitable"
| |
| − | |-
| |
| − | |Module||Number||Function
| |
| − | |-
| |
| − | |[[Microduino-Core]]||1||Core-board
| |
| − | |-
| |
| − | |[[Microduino-USBTTL]] ||1||Download programs
| |
| − | |-
| |
| − | |[[Microduino-Audio]](with shield) ||1||Decode,store music files | |
| − | |-
| |
| − | |[[Microduino-Amplifier]] ||1||Attack release
| |
| − | |-
| |
| − | |[[Microduino-OLED]] ||1||Display
| |
| − | |-
| |
| − | |[[Microduino-Cube-S1]] ||1||The OLED interface of extension board
| |
| | |} | | |} |
| − | |width="50%" valign="top" align="left"| | + | {{Clickable_headed_image_table_box_small|header=Arduino for Microduino|link=Software Setup: Arduino|image=File:Arduino_Logo.png|image_size=140px|table_width=175px|table_height=150px}} |
| − | ===Other devices===
| + | {{Clickable_headed_image_table_box_small|header=mDesigner|link=Software Setup: mDesigner|image=File:mDesigner Logo.png|image_size=140px|table_width=175px|table_height=150px}} |
| − | {|class="wikitable" | + | {{Clickable_headed_image_table_box_small|header=Mixly|link=Software Setup: Mixly|image=File:Microduino-Mixly-rect.jpg|image_size=140px|table_width=175px|table_height=150px}} |
| − | |- | + | {{Clickable_headed_image_table_box_clear}} |
| − | |Module||Number||Function | + | |
| − | |- | + | {| class="titlebox" width="300px" style="border:2px solid #000000; -moz-border-radius:10px 10px 10px 10px; -webkit-border-radius:10px 10px 10px 10px;" cellspacing=0 cellpadding=0 |
| − | |Fixed plate||1||Fix structure | + | ! style="background:#FFFFFF; border-radius:10px; padding:10px; color:#000000;" | <div style="font-size:140%;text-align:center;">Guides</div> |
| − | |- | |
| − | |OLED connecting line||1||Connect
| |
| − | |-
| |
| − | |Micro-USB line ||1||Download programs、supply power | |
| − | |-
| |
| − | |Speaker||2||Play audio
| |
| − | |-
| |
| − | |MicroSD card(optional) ||1||Store music files
| |
| − | |-
| |
| − | |M2 Nylon screw ||8||To fix
| |
| − | |-
| |
| − | |M2 Nylon stud ||4||To fix
| |
| − | |-
| |
| − | |M2 Nylon nut ||8||To fix
| |
| − | |}
| |
| − | |}
| |
| − | {| border="0" cellpadding="10" width="100%" | |
| − | |-
| |
| − | |width="50%" valign="top" align="left"|
| |
| − | [[File:Musicmaterial1.jpg||450px|center]]
| |
| − | |width="50%" valign="top" align="left"|
| |
| − | [[File:Musicmaterial2.jpg||450px|center]]
| |
| | |} | | |} |
| | | | |
| − | ==Programs to download== | + | {{Clickable_headed_image_table_box_small|header=Itty Bitty Buggy|link=Itty_Bitty_Buggy_Tutorials|image=File:IBB.png|image_size=140px|table_width=175px|table_height=150px}} |
| − | *The code of music player Github:'''[https://github.com/Microduino/Simple_player_V2 Simple_Player_v2]'''
| + | {{Clickable_headed_image_table_box_small|header=Itty Bitty City|link=Itty_Bitty_City|image=File:IBC.png|image_size=140px|table_width=175px|table_height=150px}} |
| | + | {{Clickable_headed_image_table_box_clear}} |
| | + | {{Clickable_headed_image_table_box_small|header=mCookie 101 Basic|link=MCookie_Basic_Kit_Tutorials|image=File:mCookie_Basic_Kit.png|image_size=140px|table_width=175px|table_height=150px}} |
| | + | {{Clickable_headed_image_table_box_small|header=mCookie 201 Advanced|link=MCookie_Advanced_Kit_Tutorials|image=File:mCookie_Advanced_Kit.png|image_size=140px|table_width=175px|table_height=150px}} |
| | + | {{Clickable_headed_image_table_box_small|header=mCookie 301 Expert|link=MCookie_Expert_Kit_Tutorials|image=File:mCookie_Expert_Kit.png|image_size=140px|table_width=175px|table_height=150px}} |
| | + | {{Clickable_headed_image_table_box_clear}} |
| | + | {{Clickable_headed_image_table_box_small|header=mCookie 102 Basic|link=MCookie_102_Basic_Kit_Tutorials|image=File:mCookie_102_Basic_Kit.png|image_size=140px|table_width=175px|table_height=150px}} |
| | + | {{Clickable_headed_image_table_box_small|header=mCookie 202 Advanced|link=MCookie_202_Advanced_Kit_Tutorials|image=File:mCookie_202_Advanced_Kit.png|image_size=140px|table_width=175px|table_height=150px}} |
| | + | {{Clickable_headed_image_table_box_small|header=mCookie 302 Expert|link=MCookie_302_Expert_Kit_Tutorials|image=File:mCookie_302_Expert_Kit.png|image_size=140px|table_width=175px|table_height=150px}} |
| | + | {{Clickable_headed_image_table_box_clear}} |
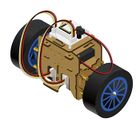
| | + | {{Clickable_headed_image_table_box_small|header=Cube Car|link=Cube_Robot|image=File:CubeCar.jpg|image_size=130px|table_width=175px|table_height=150px}} |
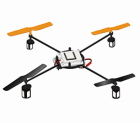
| | + | {{Clickable_headed_image_table_box_small|header=Quadcopter|link=Quadcopter_Kit:_Quickstart_Guide|image=File:Quadcopter_Small.png|image_size=140px|table_width=175px|table_height=150px}} |
| | + | {{Clickable_headed_image_table_box_small|header=Self-Balancing Robot|link=Open_Source_Self-balance_Robot_System|image=File:Balancestep7-1.jpg|image_size=140px|table_width=175px|table_height=150px}} |
| | + | {{Clickable_headed_image_table_box_small|header=Weather Station|link=Open_Source_WiFi_Weather_Station_System|image=File:WeatherStation.jpg|image_size=130px|table_width=175px|table_height=150px}} |
| | + | {{Clickable_headed_image_table_box_clear}} |
| | | | |
| − | ==Program writing== | + | {| class="titlebox" width="300px" style="border:2px solid #000000; -moz-border-radius:10px 10px 10px 10px; -webkit-border-radius:10px 10px 10px 10px;" cellspacing=0 cellpadding=0 |
| − | *Stack '''[[Microduino-Core]]''' and '''[[Microduino-USBTTL]]''' together.
| + | ! style="background:#FFFFFF; border-radius:10px; padding:10px; color:#000000;" | <div style="font-size:140%;text-align:center;">Series Information</div> |
| − | ** Connect the'''[[Microduino-USBTTL]]'''ready to upload program with a data line.
| + | |} |
| − | **Note:It is best not to put all modules stacked together and then upload.
| + | {{Clickable_headed_image_table_box_small|header=mCookie|link=MCookie_Modules|image=File:MCookie1.jpg|image_size=140px|table_width=175px|table_height=150px}} |
| − | *Open Arduino IDE for Microduino, environment, (Reference of the set-up:'''[[The core of AVR:Getting started]]''')
| + | {{Clickable_headed_image_table_box_small|header=Microduino|link=Microduino_Modules|image=File:Microduino1.jpg|image_size=140px|table_width=175px|table_height=150px}} |
| − | *Click'''【Instrument】''', assure the '''board card(Microduino-Core) processor(Atmega328P@16M,5V)''' selected correctly, and select the corresponding '''port number(COMX)'''
| + | {{Clickable_headed_image_table_box_small|header=Sensors & Trinkets|link=MCookie_Sensor_Modules|image=File:Sensor1.jpg|image_size=140px|table_width=175px|table_height=150px}} |
| − | *Click'''【File】'''->'''【Open】''', browse to the project program address, and click '''’Simple_player_V2.ino’''' to open program
| + | {{Clickable_headed_image_table_box_clear}} |
| − | *After all these items are correct, click the button '''"→"'''to download the program to the development board
| |
| | | | |
| − | ==Store audio== | + | {{Clickable_headed_image_table_box_small|header=MicroNux|link=NoLink|image=File:MicroNux1.jpg|image_size=140px|table_width=175px|table_height=150px}} |
| − | *Audio files need to be stored in a container in advance, then the player can play on them. There are two types of storage:
| + | {{Clickable_headed_image_table_box_small|header=MicroWrt|link=MicroWrt_Series|image=File:MicroWrt1.jpg|image_size=140px|table_width=175px|table_height=150px}} |
| − | **The module board FLASH:'''[[Microduino-Audio]]''' has boarded the 4MByte FLASH
| + | {{Clickable_headed_image_table_box_clear}} |
| − | ***Audio storage method please refer to the following page: '''[https://www.microduino.cn/wiki/index.php/Microduino-Module_Audio #.E5.BC.80.E5.8F.91 Download audio]'''
| |
| − | **SD outside enlarge capacity: Use the '''Shield''' module of the '''[[Microduino-Audio]]'''module to realize '''MicroSD card dilatation'''
| |
| − | ***SD card supports 32GB capacity maximumly
| |
| | | | |
| − | ==Steps of the set-up==
| + | {| class="titlebox" width="300px" style="border:2px solid #000000; -moz-border-radius:10px 10px 10px 10px; -webkit-border-radius:10px 10px 10px 10px;" cellspacing=0 cellpadding=0 |
| − | {| border="0" cellpadding="10" width="100%" | + | ! style="background:#FFFFFF; border-radius:10px; padding:10px; color:#000000;" | <div style="font-size:140%;text-align:center;">App Download</div> |
| − | |-
| |
| − | |width="50%" valign="top" align="left"|
| |
| − | *'''Step1:'''
| |
| − | *According to the picture 1-1, fix '''[[Microduino-OLED]]''' on''Structure-A1''' with '''nylon screw''' and '''nylon nut''' .
| |
| − | *'''Note: '''Pay attention to the installation direction of the OLED display screen, and please take the LOGO'''”Microduino”''' as a reference, the LOGO located in the ''positive direction''' saying it installed in the right direction.
| |
| − | |width="50%" valign="top" align="left"|
| |
| − | [[File:Musicstep1-1.jpg||450px|center]]
| |
| − | |}
| |
| − | {| border="0" cellpadding="10" width="100%"
| |
| − | |-
| |
| − | |width="50%" valign="top" align="left"|
| |
| − | *After the installation of the OLED display screen, please put nthe sensor lin access to the interface on the reverse of the OLED.
| |
| − | |width="50%" valign="top" align="left"|
| |
| − | [[File:Musicstep1-2.jpg||450px|center]]
| |
| − | |}
| |
| − | {| border="0" cellpadding="10" width="100%"
| |
| − | |-
| |
| − | |width="50%" valign="top" align="left"|
| |
| − | *'''Step2:'''
| |
| − | *According to the picture 2-1, insert '''structure-D1''' into the corresponding interface of the '''structure-B1'''.
| |
| − | |width="50%" valign="top" align="left"|
| |
| − | [[File:Musicstep2-1.jpg||450px|center]]
| |
| − | |}
| |
| − | {| border="0" cellpadding="10" width="100%"
| |
| − | |-
| |
| − | |width="50%" valign="top" align="left"|
| |
| − | *According to the picture 2-2, insert '''structure-C2''' into the corresponding interface of the '''structure-B1'''.
| |
| − | |width="50%" valign="top" align="left"|
| |
| − | [[File:Musicstep2-2.jpg||450px|center]]
| |
| − | |}
| |
| − | {| border="0" cellpadding="10" width="100%"
| |
| − | |-
| |
| − | |width="50%" valign="top" align="left"|
| |
| − | *After step2, the '''player skeleton''' forms
| |
| − | |width="50%" valign="top" align="left"|
| |
| − | [[File:Musicstep2-3.jpg||450px|center]]
| |
| − | |}
| |
| − | {| border="0" cellpadding="10" width="100%"
| |
| − | |-
| |
| − | |width="50%" valign="top" align="left"|
| |
| − | *'''Step3:'''
| |
| − | *According to the picture 3-1, embed the ''horn''' into the position as shown in the picture, taking care of the installation direction of the '''horn''', the '''horn line''' needing threading to the behind of the '''structure-B1''' in advance.
| |
| − | |width="50%" valign="top" align="left"|
| |
| − | [[File:Musicstep3-1.jpg||450px|center]]
| |
| − | |}
| |
| − | {| border="0" cellpadding="10" width="100%"
| |
| − | |-
| |
| − | |width="50%" valign="top" align="left"|
| |
| − | *According to the picture 3-2, splice the '''structure-A1''' installed with OLED display screento the front of the '''player skeleton'', then put the '''structure-D3''' into the slot in '''structure-A1''' and '''structure-B1'''.
| |
| − | |width="50%" valign="top" align="left"|
| |
| − | [[File:Musicstep3-2.jpg||450px|center]]
| |
| − | |}
| |
| − | {| border="0" cellpadding="10" width="100%"
| |
| − | |-
| |
| − | |width="50%" valign="top" align="left"|
| |
| − | *After step3, the front of the player has been assembled
| |
| − | |width="50%" valign="top" align="left"|
| |
| − | [[File:Musicstep3-3.jpg||450px|center]]
| |
| − | |}
| |
| − | {| border="0" cellpadding="10" width="100%"
| |
| − | |-
| |
| − | |width="50%" valign="top" align="left"|
| |
| − | *'''Step4:'''
| |
| − | *According to the picture 4-1, turn to the back of the player, stuck '''structure-D2''' with the slot of '''structure-D3'''
| |
| − | ** Pay attention to the force evenly, avoid too much force to break, and at the same time thread the two '''horn''' line and OLED line out from the hole on the back
| |
| − | |width="50%" valign="top" align="left"|
| |
| − | [[File:Musicstep4-1.jpg||450px|center]]
| |
| − | |}
| |
| − | {| border="0" cellpadding="10" width="100%"
| |
| − | |-
| |
| − | |width="50%" valign="top" align="left"|
| |
| − | *According to the picture 4-2, fix the baseboard of the '''[[Microduino-Cube-S1]]''' on the '''structure-C2''' with '''nylon screw''', '''nylon stud''' and '''nylon nut'''
| |
| − | **Note that the USB port in the baseboard of the '''[[Microduino-Cube-S1]]''needs to be out
| |
| − | |width="50%" valign="top" align="left"|
| |
| − | [[File:Musicstep4-2.jpg||450px|center]]
| |
| − | |}
| |
| − | {| border="0" cellpadding="10" width="100%"
| |
| − | |-
| |
| − | |width="50%" valign="top" align="left"|
| |
| − | *After step4, the construction picture is as follow:
| |
| − | |width="50%" valign="top" align="left"|
| |
| − | [[File:Musicstep4-3.jpg||450px|center]]
| |
| − | |}
| |
| − | {| border="0" cellpadding="10" width="100%"
| |
| − | |-
| |
| − | |width="50%" valign="top" align="left"|
| |
| − | *'''Step5:'''
| |
| − | *According to the picture 5-1, insert '''structure-C1''' into the back of the player
| |
| − | |width="50%" valign="top" align="left"|
| |
| − | [[File:Musicstep5-1.jpg||450px|center]]
| |
| − | |}
| |
| − | {| border="0" cellpadding="10" width="100%"
| |
| − | |-
| |
| − | |width="50%" valign="top" align="left"| | |
| − | *According to the picture 5-2, stick '''structure-D4''' to the corner of the '''structure-C1'', and at the same time thread the two '''horn''' lines and OLED line out from the hole in the '''structure-C1'''
| |
| − | |width="50%" valign="top" align="left"|
| |
| − | [[File:Musicstep5-2.jpg||450px|center]]
| |
| − | |}
| |
| − | {| border="0" cellpadding="10" width="100%"
| |
| − | |-
| |
| − | |width="50%" valign="top" align="left"|
| |
| − | *According to the picture 5-3, overlay the following module on the baseboard of the '''[[Microduino-Cube-S1]]''', paying attention to that install the '''MicroSD card''' on the module '''Shield''' of the '''[[Microduino-Module Audio]]''' in advanced
| |
| − | **'''[[Microduino-Core]]'''
| |
| − | **'''[[Microduino-Module Audio]]'''
| |
| − | **'''[[Microduino-Module Amplifier]]'''
| |
| − | |width="50%" valign="top" align="left"|
| |
| − | [[File:Musicstep5-3.jpg||450px|center]]
| |
| − | |}
| |
| − | {| border="0" cellpadding="10" width="100%"
| |
| − | |-
| |
| − | |width="50%" valign="top" align="left"|
| |
| − | *'''Step6:'''
| |
| − | *According to the picture 6-1, connect the OLED line to the IIC interface(there are SCL,SDA near the interface)on the left of the baseboard of the '''[[Microduino-Cube-S1]]''
| |
| − | *Then connect the two '''horn''' lines to the audio interface in the '''[[Microduino-Module Amplifier]]'''module
| |
| − | |width="50%" valign="top" align="left"|
| |
| − | [[File:Musicstep6-1.jpg||450px|center]]
| |
| − | |}
| |
| − | {| border="0" cellpadding="10" width="100%"
| |
| − | |-
| |
| − | |width="50%" valign="top" align="left"|
| |
| − | *Now open source music player has been set up completely
| |
| − | |width="50%" valign="top" align="left"|
| |
| − | [[File:Musicstep6-2.jpg||450px|center]]
| |
| | |} | | |} |
| | + | {{Clickable_headed_image_table_box_small|header=mSerial|link=http://wiki.microduinoinc.com/File:mSerial.png|image=File:mSerial.png|image_size=140px|table_width=175px|table_height=150px|optional_text=<center>Android App for serial debugging: [http://microduino.oss-cn-hangzhou.aliyuncs.com/download/download/mserial.apk DL]</center>}} |
| | + | {{Clickable_headed_image_table_box_small|header=mLight|link=http://wiki.microduinoinc.com/File:mLight.png|image=File:mLight.png|image_size=140px|table_width=175px|table_height=150px|optional_text=<center>Android app for light control: [http://microduino.oss-cn-hangzhou.aliyuncs.com/download/download/mlight.apk DL]</center>}} |
| | + | {{Clickable_headed_image_table_box_small|header=mRobot|link=http://wiki.microduinoinc.com/File:mRobot.png|image=File:mRobot.png|image_size=140px|table_width=175px|table_height=150px|optional_text=<center>App for robot control: [https://www.microduino.cn/resources/download/2017-12-28/2.html DL]</center>}} |
| | + | {{Clickable_headed_image_table_box_small|header=mDock|link=http://wiki.microduinoinc.com/File:mDock.png|image=File:mDock.png|image_size=140px|table_width=175px|table_height=150px|optional_text=<center>App for mDock: [https://www.microduino.cn/resources/download/2017-12-28/3.html DL]</center>}} |
| | | | |
| − | ==Operating instruction==
| |
| − | ===Player power supply===
| |
| − | *According to the following picture, connect the USB power supply line to the USB interface in the baseboard of the '''[[Microduino-Cube-S1]]''.
| |
| − | **USB power supply can use computer USB port, USB charger, mobile power supply, and other forms.
| |
| − | [[File:Musicpower.jpg||600px|center]]
| |
| | | | |
| − | ===Players use===
| + | {{Clickable_headed_image_table_box_clear}} |
| − | *There is a thumb wheel switch in the '''shield'''module of the '''[[Microduino-Module Audio]]''', and you can control music playing through this switch. The method is as follow:
| + | Technical Support: support(@)microduino.cc |
| − | {|class="wikitable" | |
| − | |-
| |
| − | |The use way of the thumb wheel switch||Function
| |
| − | |-
| |
| − | |Click on the wheel||Music play and pause switch
| |
| − | |-
| |
| − | |Long press on the wheel||Play mode switch, such as looping, single play, etc.
| |
| − | |-
| |
| − | |Left dial the wheel once||Switch to playing the last one
| |
| − | |-
| |
| − | |Right dial the wheel once||Switch to playing the next one
| |
| − | |-
| |
| − | |Left long dial the wheel||The volume reduces
| |
| − | |-
| |
| − | | Right long dial the wheel||The volume increases
| |
| − | |}
| |
| − | * Player energized the default is the first song in the SD card selected, and in a suspended state, can press a allocated round to start playing music
| |
| − | *The volume range of the player is 0~30. The bigger the number is, the bigger the volume is. Player chooses the volume 20 by default.
| |
| − | | |
| − | ==Code instruction==
| |
| − | *The '''’userDef.h’''' is our configuration file.
| |
| − | *The following code can set the thumbwheel switch threshold
| |
| − | <source lang = "cpp">
| |
| − | #define PUSH_BUTTON 50
| |
| − | #define LEFT_BUTTON 100
| |
| − | #define RIGHT_BUTTON 200
| |
| − | </source>
| |
| − | *In the event of:The volume can only be increased and can’t be reduced, the number of the song can only be increased and can’t be reduced, or on the contrary.
| |
| − | Cause:The thumbwheel switches threshold setting is not reasonable in the “userDef.h”.
| |
| − | {|class="wikitable"
| |
| − | |-
| |
| − | |The action of the thumbwheel||A6 measured voltage(V)||The corresponding code(voltage/5*1023)||Threshold setting
| |
| − | |-
| |
| − | |Default||3.3||675.18||>600
| |
| − | |-
| |
| − | |Downward ||0||0||0~50
| |
| − | |-
| |
| − | |Towards the left||1.6||327.36||150~400
| |
| − | |-
| |
| − | |Towards the right ||2.6||531.96||450~600
| |
| − | |}
| |
| − | Please change the threshold in the “userDef.h” to the actual using value of the thumbwheel
| |
| | | | |
| − | ==video==
| + | Sales: sales(@)microduino.cc |


![[1]](http://wiki.microduinoinc.com/File:mSerial.png%7CmSerial)
![[2]](http://wiki.microduinoinc.com/File:mLight.png%7CmLight)
![[3]](http://wiki.microduinoinc.com/File:mRobot.png%7CmRobot)
![[4]](http://wiki.microduinoinc.com/File:mDock.png%7CmDock)