Difference between revisions of "Manually Installing Drivers in Windows"

From Microduino Wiki
Jump to: navigation, search
(Created page with "{| style="width: 800px;" |- | =Connecting hardware= *Connection between the Microduino-USBTTL and computer via MicroUSB data line; =Install the driver= *You will see rec...")
 
 
(No difference)

Latest revision as of 20:35, 30 June 2015

Connecting hardware

  • Connection between the Microduino-USBTTL and computer via MicroUSB data line;


Install the driver

  • You will see recognize the new hardware.Then the system will begin to look for drivers.If you do not find the driver, you will need to manually install。


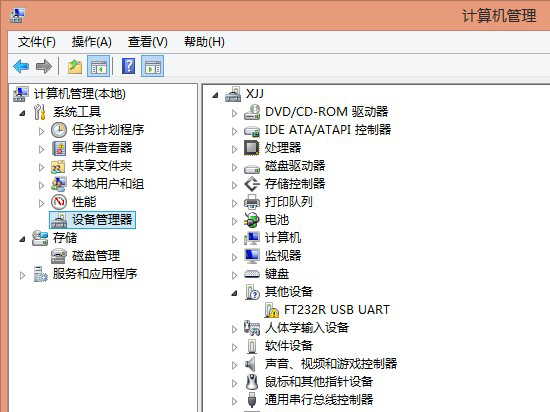
  • Right click on the computer, point management, open the Device Manager, you can see an unrecognized hardware with exclamation point hit 。
MicroduinoDriver1.jpg


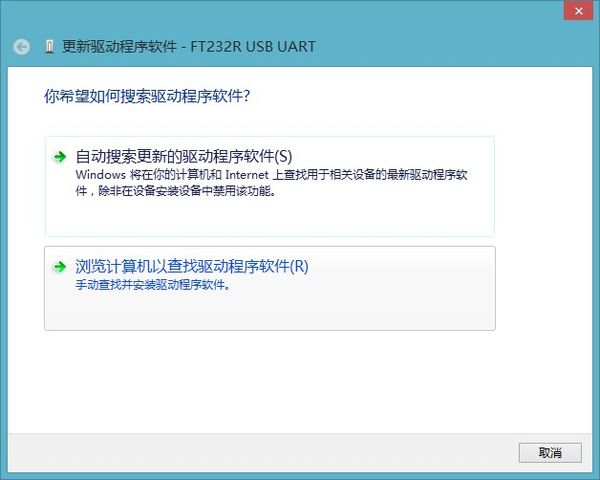
  • Right click on recognized hardware and select Update Driver Software. In the dialog box, select Browse my computer for driver software
MicroduinoDriver2.jpg


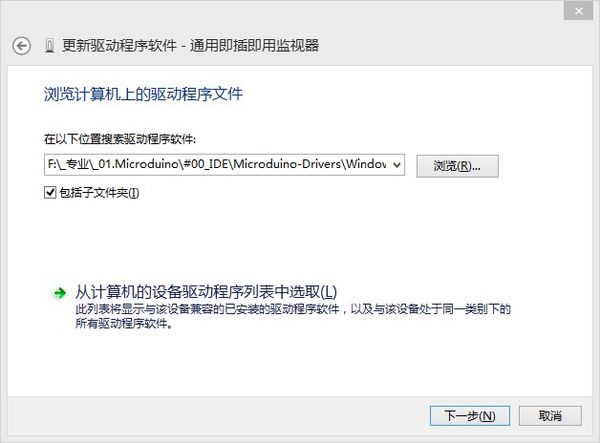
  • Then select the directory: Download driver when extracting Windows folder
MicroduinoDriver3.jpg


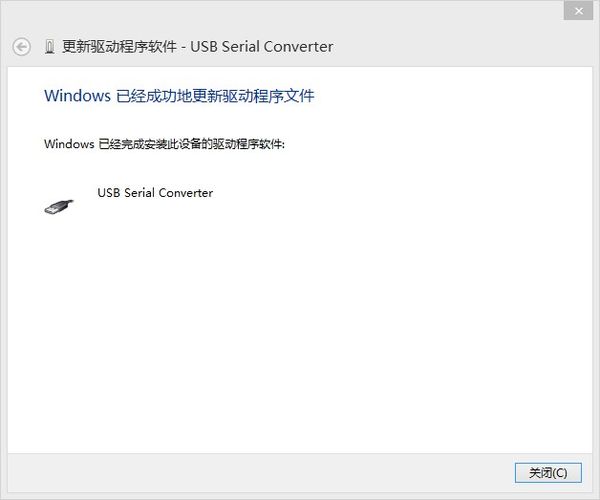
  • Click Next, you can installed the drivers。
MicroduinoDriver4.jpg


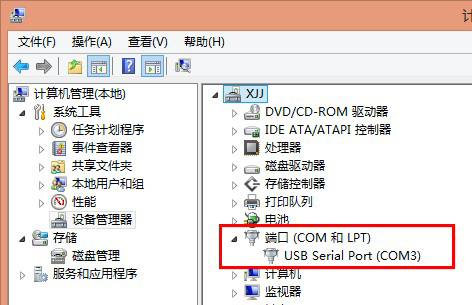
  • After installing the driver, you can display a COM port。
MicroduinoDriver5.jpg