Difference between revisions of "Microduino BLE IOS-202KIT"
| (2 intermediate revisions by 2 users not shown) | |||
| Line 4: | Line 4: | ||
| | | | ||
==Outline== | ==Outline== | ||
| − | + | Project: Communication between Microduino-BT and IOS devices. | |
| − | + | Objective: To get the running time of Microduino-Core and Microduino-BT passed through to IOS devices via the serial port. | |
| − | + | Difficulty: Primary. | |
| − | + | Tim-consuming: 30mins | |
| − | + | Maker: Microduino Studio-YLB | |
|- | |- | ||
| | | | ||
| − | ==Bill of | + | ==Bill of Material == |
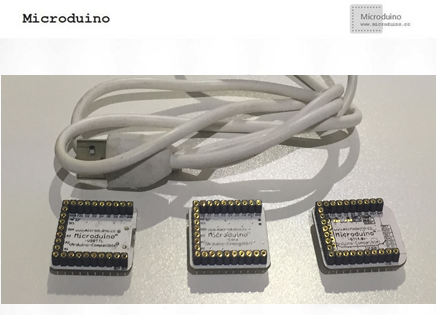
| − | *Microduino | + | *Microduino Equipment |
{|class="wikitable" | {|class="wikitable" | ||
|- | |- | ||
| − | |Module||Number||Function | + | |Module||Number||Function |
|- | |- | ||
| − | |Microduino-Core||1||Core board | + | |[[Microduino-Core]]||1||Core board |
|- | |- | ||
| − | |Microduino- | + | |[[Microduino-USBTTL]] ||1||Program download |
|- | |- | ||
| − | |Microduino-BT||1||Bluetooth communication | + | |[[Microduino-BT]]||1||Bluetooth communication |
|} | |} | ||
|- | |- | ||
| | | | ||
| − | [[File: | + | [[File:Android-202KIT2-module.png|600px|center|thumb|202KIT图片]] |
|- | |- | ||
| | | | ||
| − | *Software | + | *Software Equipment |
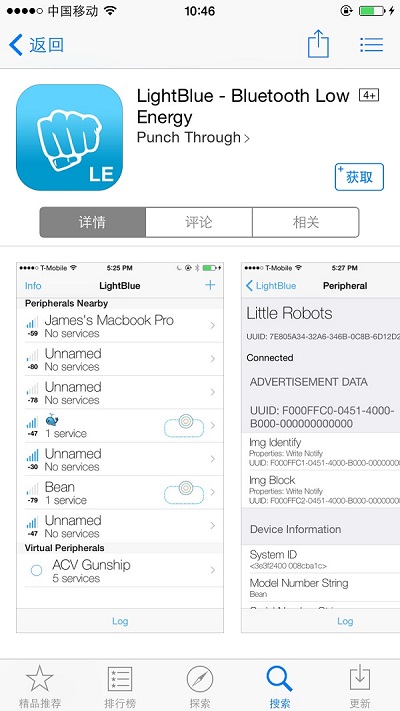
| − | Arduino IDE(1.0 | + | Arduino IDE(version 1.0 and higher), LightBlue downloaded from App Store; |
[[File:LightBlue.jpg|600px|center|thumb|LightBlue]] | [[File:LightBlue.jpg|600px|center|thumb|LightBlue]] | ||
| − | *Other | + | *Other Equipment |
| − | ** | + | **Support Bluetooth 4.0 IOS devices(iPhone 4s and higher, iPod touch 5 and higher, iPad 3 and higher as well as iPad mini and higher) |
| − | ** | + | **Micro USB cable |
==Document== | ==Document== | ||
| − | + | Test program download:[[File:BT.zip]] | |
| − | + | ||
==Debugging== | ==Debugging== | ||
|- | |- | ||
| | | | ||
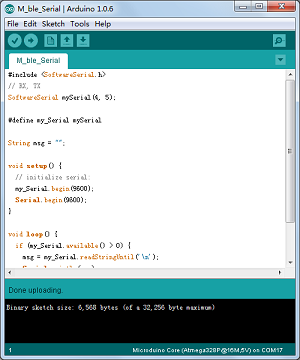
| − | Step | + | Step 1: Stack Microduino-Core and Microduino-USBTTL together, connect them to a computer with a USB cable, start Arduino IDE, open test program M_ble_Serial.ino, select Microduino Core (Atmega328P@16M,5V) from (tools)-> (Board) and choose the corresponding serial port from(tools)-> (Serial) . After that, please click the button "√" on the top left of IDE, compile the program, and then click "√" to burn the program into the board; |
|- | |- | ||
| | | | ||
| − | [[File:ble- | + | [[File:ble-Download2.png|600px|center|thumb|Download]] |
| − | Step | + | |
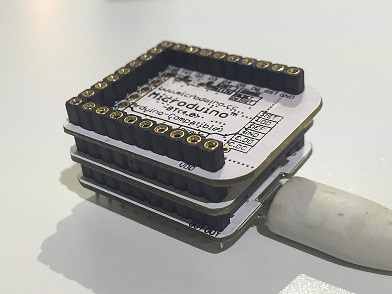
| + | Step 2: Stack all modules after the download, connect them to the computer with a USB cable and install after power-off. | ||
|- | |- | ||
| | | | ||
| − | [[File:202KIT- | + | [[File:202KIT-android-system1.jpg|600px|center|thumb|202KIT-OK]] |
| − | |||
| − | Step | + | Step 3: Start to set IOS device, get the Bluetooth function activated, install and open LightBlue App, then open the serial monitor in the IDE on the Computer Client. |
| − | + | ||
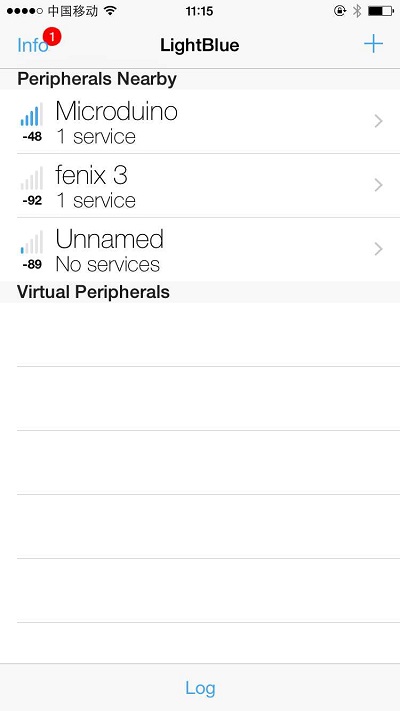
| − | + | Step 4: Open LightBlue, enter Bluetooth device searching interface, find Microduino Bluetooth device from " Peripherals Nearby" and click to connect. | |
|- | |- | ||
| | | | ||
| − | [[File:ble-Connection.jpg|600px|center|thumb| | + | [[File:ble-Connection.jpg|600px|center|thumb|Connection1]] |
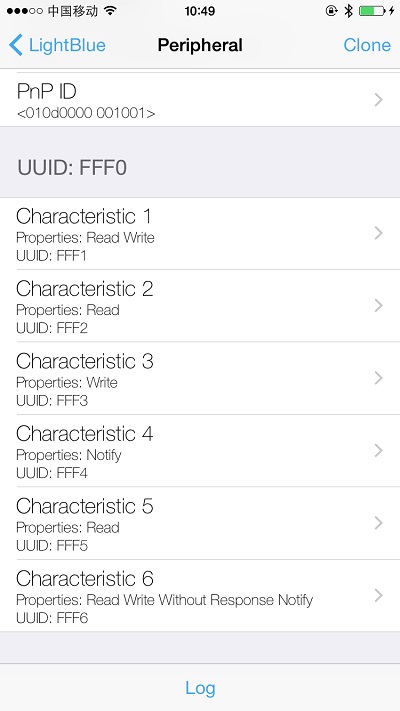
| − | + | Enter the following interface after the connection: | |
| − | | | + | [[File:ble-Connection1.jpg|600px|center|thumb|Connection2]] |
| − | + | ||
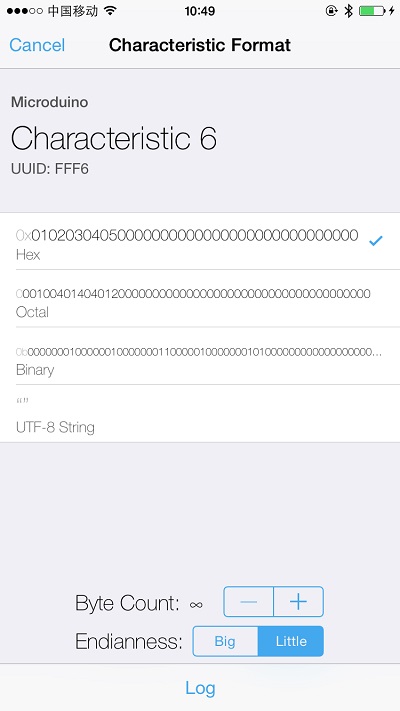
| − | [[File: | + | Step 5: Select and click " Characteristic 6", watch the encoding format on the top right. If you see character string, please click Hex button (The default is Hex16 band encoding.) and choose UT-8 encoding format, then click " Listen for notifications " to enter monitoring state. |
| + | [[File:ble-Connection5.jpg|600px|center|thumb|修改编码方式]] | ||
| + | |||
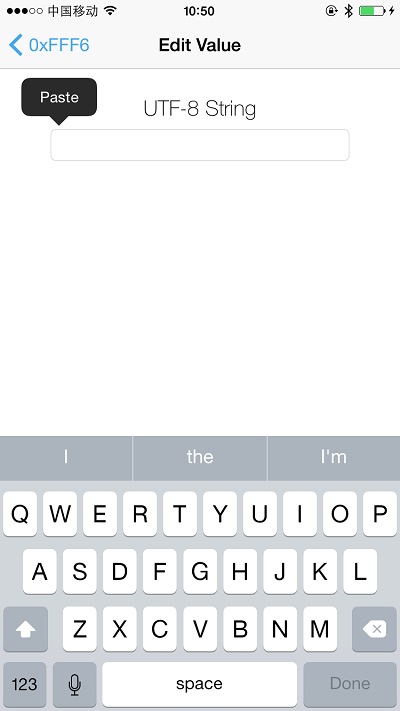
| + | Step 6: Click "Write new value" and pop up text editing interface. | ||
| + | [[File:ble-Connection2.jpg|600px|center|thumb|文本编辑页面]] | ||
| + | Enter an character string composed of letters and numbers, and watch result on the phone and the serial port. | ||
==Result== | ==Result== | ||
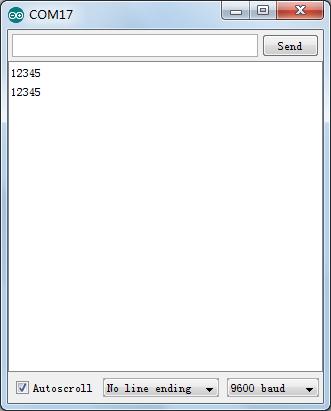
| − | + | [[File:ble-Connection3.jpg|600px|center|thumb|串口显示结果]] | |
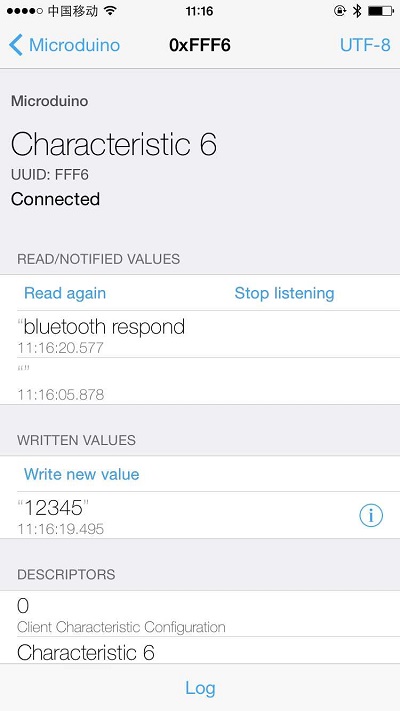
| − | [[File: | + | [[File:ble-Connection4.jpg|600px|center|thumb|手机端显示结果]] |
| + | From the pictures above, you can see the serial port receives phone data "12345" and the phone also gets the Bluetooth data "Bluetooth respond", which means Bluetooth communication is bidirectional. | ||
| − | == | + | ==Caution== |
| − | *If keep the jumper( | + | *If you keep the default jumper wire (RX0,TX1), please unplug the Microduion-BT module while downloading, then power off and install after the download. |
| − | *If | + | *If adopting jumper wire changing method, then you can change the serial connection of Microduino-BT and Microduino-Core from TX-RX-, RX-TX1 to: |
| − | **TX- | + | **TX-D2, RX-D3(Serial1 for Core+) |
| − | **TX- | + | **TX-D4, RX-D5(You can use SoftwareSeria library to handle it.) |
[[File:Bluetooth-Connection.jpg|600px|center|thumb|Bluetooth-Connection]] | [[File:Bluetooth-Connection.jpg|600px|center|thumb|Bluetooth-Connection]] | ||
|} | |} | ||
Latest revision as of 05:37, 30 September 2016
| Language: | English • 中文 |
|---|
OutlineProject: Communication between Microduino-BT and IOS devices. Objective: To get the running time of Microduino-Core and Microduino-BT passed through to IOS devices via the serial port. Difficulty: Primary. Tim-consuming: 30mins Maker: Microduino Studio-YLB | ||||||||||||
Bill of Material
| ||||||||||||
Arduino IDE(version 1.0 and higher), LightBlue downloaded from App Store;
DocumentTest program download:File:BT.zip Debugging | ||||||||||||
Step 1: Stack Microduino-Core and Microduino-USBTTL together, connect them to a computer with a USB cable, start Arduino IDE, open test program M_ble_Serial.ino, select Microduino Core (Atmega328P@16M,5V) from (tools)-> (Board) and choose the corresponding serial port from(tools)-> (Serial) . After that, please click the button "√" on the top left of IDE, compile the program, and then click "√" to burn the program into the board; | ||||||||||||
Step 2: Stack all modules after the download, connect them to the computer with a USB cable and install after power-off. | ||||||||||||
|
Step 3: Start to set IOS device, get the Bluetooth function activated, install and open LightBlue App, then open the serial monitor in the IDE on the Computer Client. Step 4: Open LightBlue, enter Bluetooth device searching interface, find Microduino Bluetooth device from " Peripherals Nearby" and click to connect. | ||||||||||||
|
Enter the following interface after the connection: Step 5: Select and click " Characteristic 6", watch the encoding format on the top right. If you see character string, please click Hex button (The default is Hex16 band encoding.) and choose UT-8 encoding format, then click " Listen for notifications " to enter monitoring state. Step 6: Click "Write new value" and pop up text editing interface. Enter an character string composed of letters and numbers, and watch result on the phone and the serial port. ResultFrom the pictures above, you can see the serial port receives phone data "12345" and the phone also gets the Bluetooth data "Bluetooth respond", which means Bluetooth communication is bidirectional. Caution
File:Bluetooth-Connection.jpg Bluetooth-Connection |
