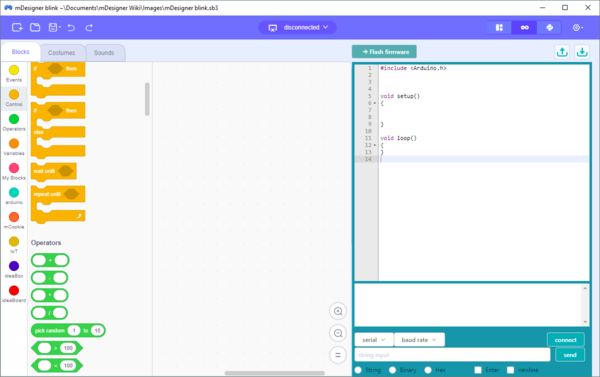
MDesigner: Arduino mode
The primary methods of using Microduino modules with mDesigner is with Live and Arduino mode. Each mode as it own pros and cons. Determining the right mode is up to the user per use case. Although, it is recommended to start with "Live" mode for testing then switching to "Arduino" mode later.
Live mode is regular Scratch, but with added blocks which are designed to interact with Microduino modules. This means the user has access to the stage and actor blocks. Projects (hardware) need to be connected to the computer running mDesigner. mDesigner communicates with the project (hardware), namely the Core module, in "real time" over the USB connection by sending commands for the Core module to perform. This means that "Live" mode requires a constant connection with the computer running mDesigner.
Arduino mode acts as a "visual" drag and drop coding editor. The script (code) is converted to "Arduino" code and then compile and uploaded to the attached Core module. This means that code can run even when detached from the computer. The stage and actor are disabled in this mode since the code runs independent of mDesigner.
| Capability | Live Mode | Arduino Mode |
|---|---|---|
| Drag & Drop programming | Yes | Yes |
| Supports Microduino modules | Yes | Yes |
| Stage and actor enabled | Yes | No |
| Real time code testing | Yes | No |
| Code compiled and uploaded | No | Yes |
| Can run WITHOUT being connect to computer | No | Yes |
Contents
Overview
Arduino is a special mode which can be enabled in mDesigner. It acts as a drag and drop editor for programming. The Stage and Actor is disabled and many Block Categories cannot be used.
The main advantage of using Arduino Mode is that code is generated, compile, and uploaded. This means that the user can disconnect the project (hardware) from a computer and it can still work.
Arduino mode is a mode which compiles a user's script (program) and uploads it directly onto the Core module or mCenter+. This means the user's script (program) actually resides on the Core module or mCenter+. As a result, a user's script (program) will still run on the Core module or mCenter+ even when NOT connected to the computer running mDesigner.
When using Arduino mode, scripts need to be compiled and uploaded onto the Core module or mCenter+. Compiling and uploading takes time. Whenever a modification is made to the script, it will be necessary to compile and upload in order see or observe the changes. This can be time consuming if constant changes are made in the user's script.
Optimal strategy when developing scripts would first to use Live mode to develop and test the script. Once the script is mostly tested and finalized, then translate from "Live mode script" to an "Arduino mode script" (some Live mode blocks cannot be used in Arduino mode).
Arduino mode also does not supports particular blocks. Blocks which interact with the actors and stages cannot be used. Other blocks will also be incompatible. Incompatible blocks must be removed or compiling will fail.
Programming Overview
The programming of a script (program) is outlined below.
| Note: After uploading the compiled code onto the Core/Core+ the project can be disconnected and can run independent of the computer and mDesigner. |
 
| ||
| Core/Core+: Compiled script (program) is programmed directly onto the Core/Core+ module and can run independently of a computer and mDesigner. | ||
Preparation
Hardware Preparation
- Ensure drivers are properly installed by following the mDesigner getting started guides.
- Connect to the computer with a USB cable with either a:
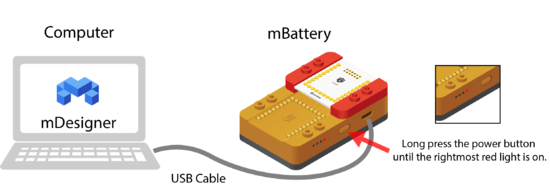
- mBattery with a stacked Core / Core+ module.
- mCenter+
- Ensure that mBattery / mCenter+ is powered on.
Software Preparation
In order to use Arduino mode it must be switched to in mDesigner.
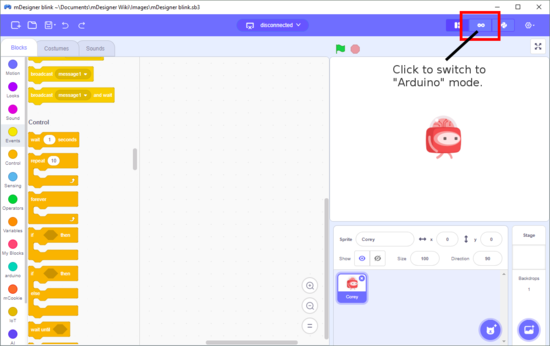
- With mDesigner open. Click on the Arduino icon.
:
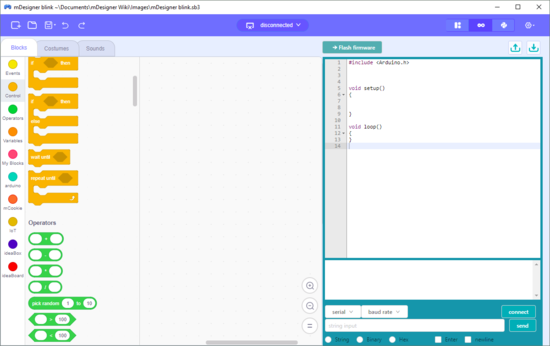
- mDesigner will now switch to Arduino mode.
:
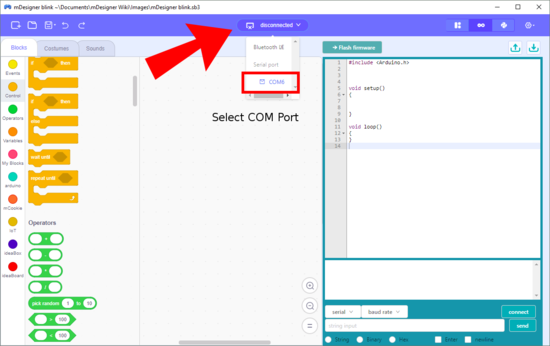
- Select the COM port that mBattery/mCenter+ is connected to.
:
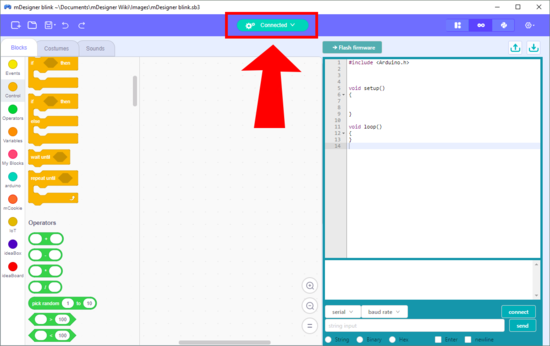
- Ready or Connected should display.
:
Usage
To compile your script (program) and upload it to your Core/Core+ module. Follow the steps below.
| Note: Using Arduino mode and uploading a program to the Core/Core+ module will overwrite the current firmware. Which includes the special firmware used in Live mode. Thus, re-programming of the special firmware will be necessary in order to use Live mode again. |
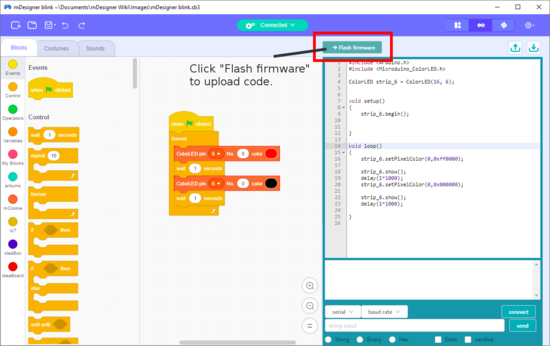
- Once your script (code) is assembled and ready. Click on the "Flash firmware" button on the top right of the mDesigner window.
:
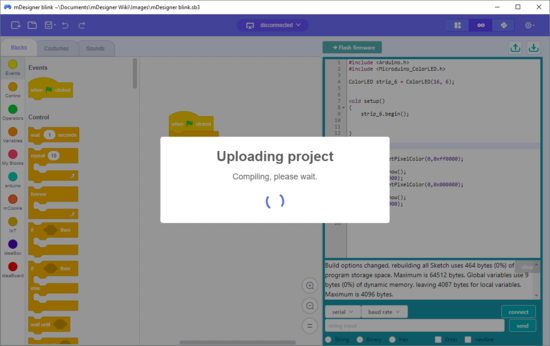
- mDesigner will compile and start uploading the compiled script.
:
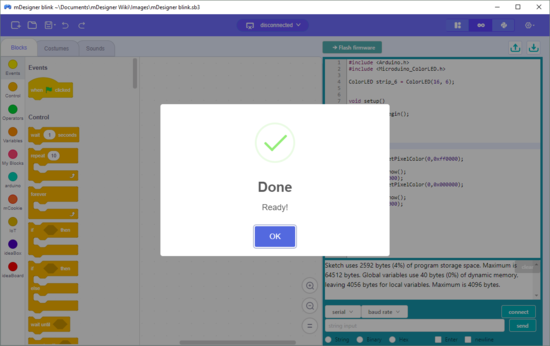
- If there is no errors, then the uploading will complete and a "Done" message will appear.
:
| Note: After uploading the compiled code onto the Core/Core+ the project can be disconnected and can run independent of the computer and mDesigner. |
Uploading Errors
| Error Message | Possible Solution |
|---|---|
| Disconnected, please reconnect it! | Reconnect the hardware (mBattery or mCenter+). Ensure the hardware is switched on. Select the COM port. |
Limitations
Incompatible Blocks
Due to the nature of how Arduino mode works. The Actor and Stage features are not accessible in Arduino mode.
Therefore, blocks related to the actor and stage cannot be used in Arduino mode.
Other additional blocks may not be usable in Arduino mode. Some block categories will be missing or contain different blocks.
| Block Category | Live Mode | Arduino Mode |
|---|---|---|
| Motion | Yes | No |
| Looks | Yes | No |
| Sound | Yes | No |
| Events | Yes | Yes |
| Control | Yes | Yes |
| Sensing | Yes | No |
| Operators | Yes | Yes |
| Variables | Yes | Yes |
| My Blocks | Yes | Yes |
| arduino | Yes | Yes |
| mCookie | Yes | Yes |
| IoT | Yes | Yes |
| AI | Yes | No |
| ideaBox | Yes | Yes |
| ideaBoard | Yes | Yes |
