Microduino OLED temperature and humidity meter(DHT11, SHT10, AM2321)
| Language: | English • 中文 |
|---|
ContentsObjectiveThis tutorial teach you how to use three temperature and humidity sensors, DHT11, SHT10 and AM2321, and use the OLED to display result. Equipment
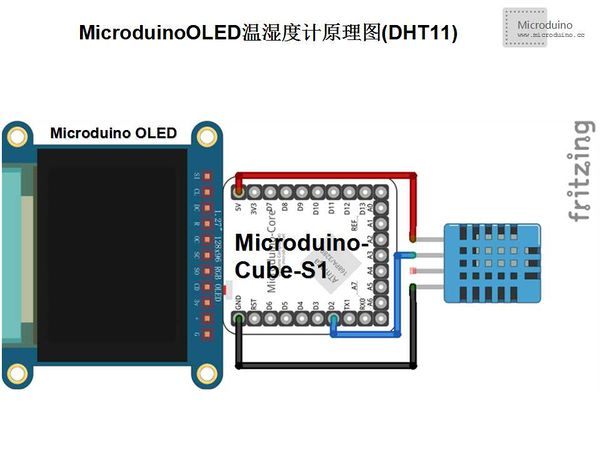
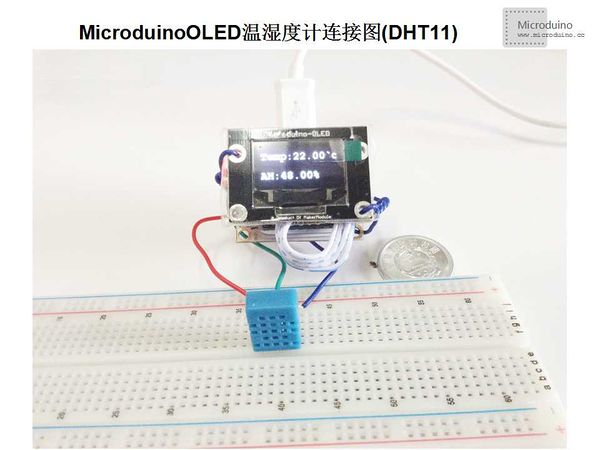
First Experiment (DHT11)SchematicMicroduino-OLED's wire connects to Microduino-Cube-S1's slot, and then connects to sensor. ProgramDownload program: https://github.com/Microduino/Microduino_Tutorials/tree/master/Microduino_Sensor/OLED_DHT11 DebugStep 1: Download DHTlib library, and unzip it to the libraries folder of Arduino IDE, and then restart IDE. https://github.com/RobTillaart/Arduino/tree/master/libraries/DHTlib Step 2: Copy code to IDE and compile it. Step 3: Set up circuit, as follows: Step 4: Run program. Step 5: Observe the OLED. Find a hot object to close the temperature sensor or blowing on the sensor, the OLED will display the result. ResultAfter DHT11 sensor near the heat source, the OLED displayed value will rise, leave the heat source temperature will gradually reduce. Blowing on the sensor, the number will rise too.
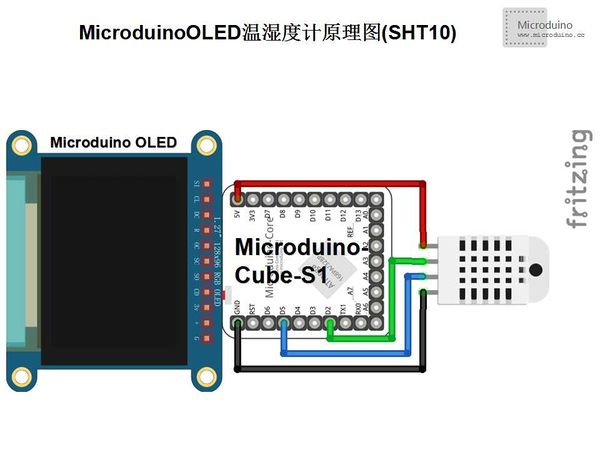
Second Experiment(SHT10)SchematicMicroduino-OLED's wire connects to Microduino-Cube-S1's slot, and then connects to sensor. ProgramDownload program: https://github.com/Microduino/Microduino_Tutorials/tree/master/Microduino_Sensor/OLED_SHT10 DebugStep 1: Download SHT10 library, and uncompress it to libraries folder of Arduino IDE, then restart IDE. https://github.com/practicalarduino/SHT1x Step 2: Copy the code to IDE and compile it. Step 3: Set up circuit, as follows: Step 4: Run program. Step 5: Observe the OLED. Find a hot object to close the temperature sensor or blowing on the sensor, the OLED will display the result. ResultAfter SHT10 sensor near the heat source, the OLED displayed value will rise, leave the heat source temperature will gradually reduce. Blowing on the sensor, the number will rise too.
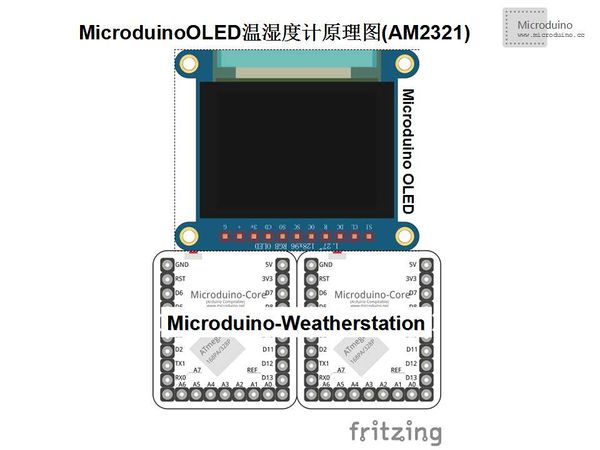
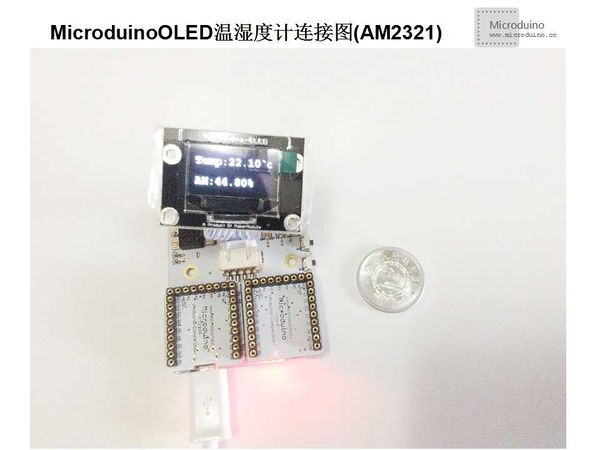
Third Experiment(AM2321)SchematicProgramDownload program: https://github.com/Microduino/Microduino_Tutorials/tree/master/Microduino_Sensor/OLED_AM2321 DebugStep 1: Download AM2312 library, and uncompress it to libraries folder of Arduino IDE, then restart IDE. https://github.com/wangdong/AM2321 Step 2: Copy the code to IDE and compile it. Step 3: Set up circuit, as follows: Plug in Microduino-Core and Microduino-FT232R to Microduino-Weatherstation's two slots. Step 4: Run program. Step 5: Observe the OLED. Find a hot object to close the temperature sensor or blowing on the sensor, the OLED will display the result.
ResultAfter AM2321 sensor near the heat source, the OLED displayed value will rise, leave the heat source temperature will gradually reduce. Blowing on the sensor, the number will rise too. VIDEO |
