Objective
To know Microduino-OlED and learn how to use libraries to drive the OLED screen.
Equipment
Program
Program download: Microduino_OLED
Experiment One
- Display characters including specified and data changed characters.
Open OLED_Text test program, select the right board(CoreUSB) and download via the serial port.
Result:
- The specified character "*_*Microduino*_*" is displayed on the first line;
- The specified character "Time:"is displayed on the second line;
- The third shows mills() function. Here we adopt millisecond as the time unit and keep two decimal fractions.
- Grammar:
- u8g.setFont(XXX) function is used for setting font. If there is no default font, you have to define one.
- u8g.setPrintPos(X,Y) is used for specified coordinate. "X" means horizontal coordinate and "Y" means vertical coordinate. The Y values on the top line cannot be "0" and must bigger than the height of the display font;
- u8g.print(XXX) is for displaying characters. Static characters have to be noted with””and the changed data needn't;
- u8g.drawStr(X, Y,XXX) can be used for displaying specified characters and can't be adopted for displaying changed data;
- u8g.setRot180() is for font rotation. You can change the rotation angle from 180 to 90 or 270. The default is 0.
- If you want to change the font or coordinate, you need to re-add font or coordinate functions before the displayed functions.
- Changing font can refer to the file u8g.h under U8glib\utility.
Experiment Two
Open OLED_Paint test program. (A straight line, a solid round, round, rectangular hollow, hollow rectangular or a rectangular angle as well as apex angle bending rectangular can be achieved here.) We adopt system timing to simulate the second pointer of the pointer meter.
- Grammar:
- u8g.drawLine(X,Y,M,N) is used for drawing straight line;
- X:Starting horizontal coordinate. Y:Starting vertical coordinate. M:End vertical coordinate.
- u8g.drawDisc(X,Y,D) is used for drawing solid round.
- X:Horizontal coordinate. Y: Vertical coordinate. D: Diameter.
- u8g.drawCircle(X,Y,D) is for drawing hollow round;
- X:Horizontal coordinate. Y: Vertical coordinate. D: Diameter.
- u8g.drawFrame(X,Y,I,W) is for drawing hollow rectangular;
- X:Horizontal coordinate. Y: Vertical coordinate. D: Diameter. L: Length. W: Width.
- u8g.drawBox(X,Y,I,W) is for drawing solid rectangular;
- X:Horizontal coordinate. Y: Vertical coordinate. D: Diameter. L: Length. W: Width.
- u8g.drawRFrame(X,Y,I,W,B) is for drawing apex angle bending rectangular;
- X:Horizontal coordinate. Y: Vertical coordinate. D: Diameter. L: Length. W: Width.
Experiment Three
- Display of Chinese characters, pictures and dynamic text:
- Character display can be printed by calling the library and the pictures and Chinese characters have to be printed out by modulus operation
Modulus operation will need the Windows: File:PCtolCD.zip
- Take Chinese character as an example:
- Make Chinese character modulus code:
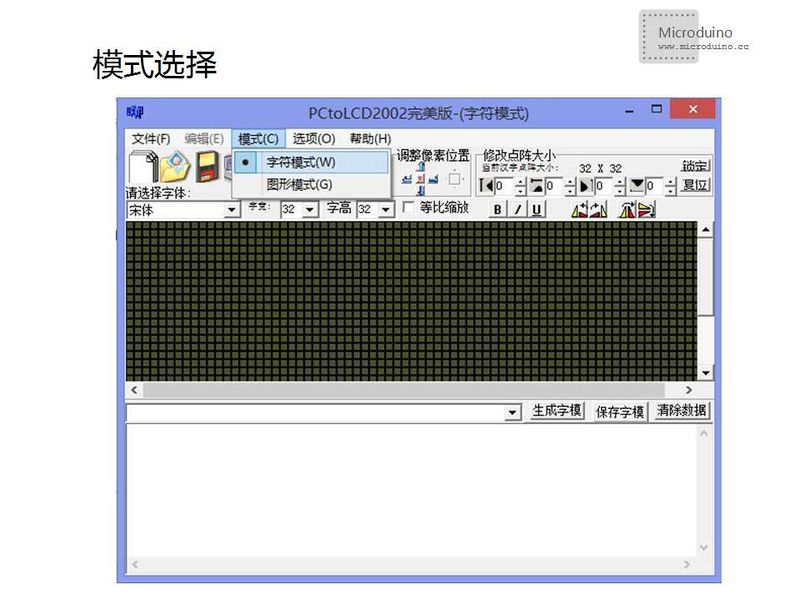
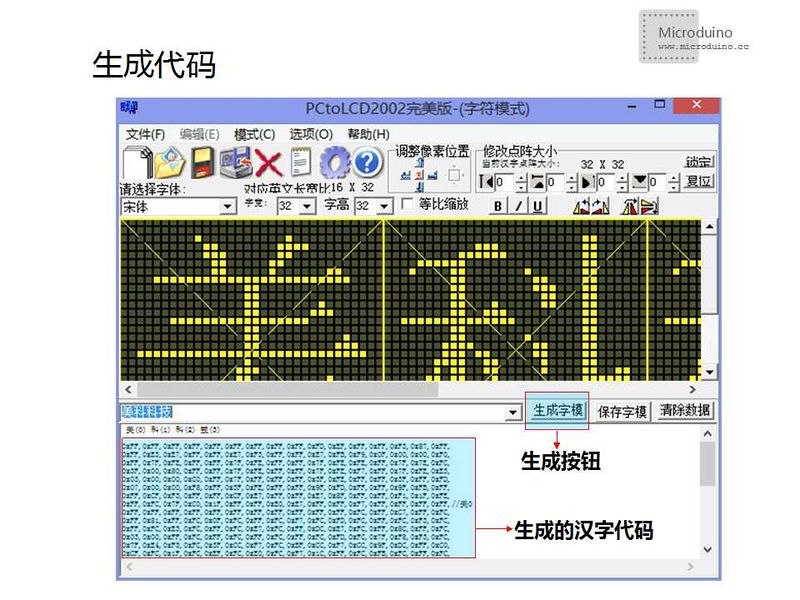
Step1: Open modulus software and choose character mode:
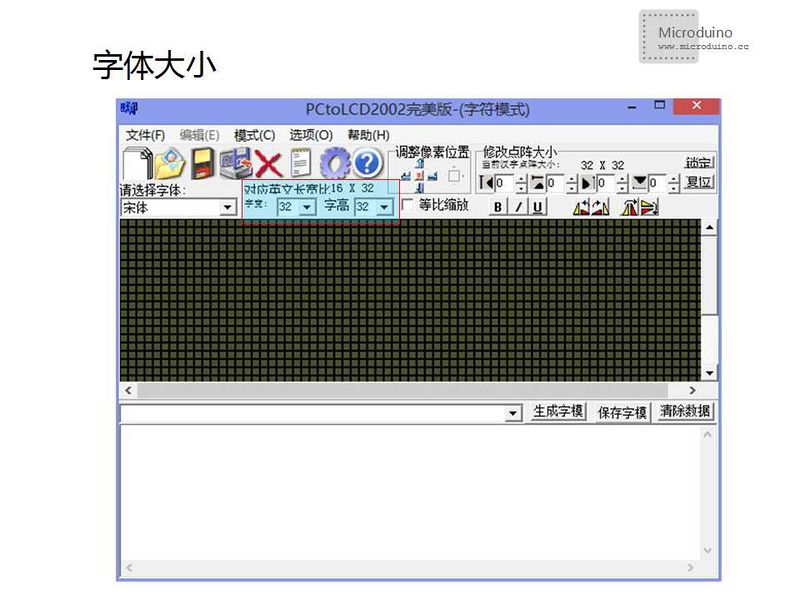
Step 2: Set 32*32 font;
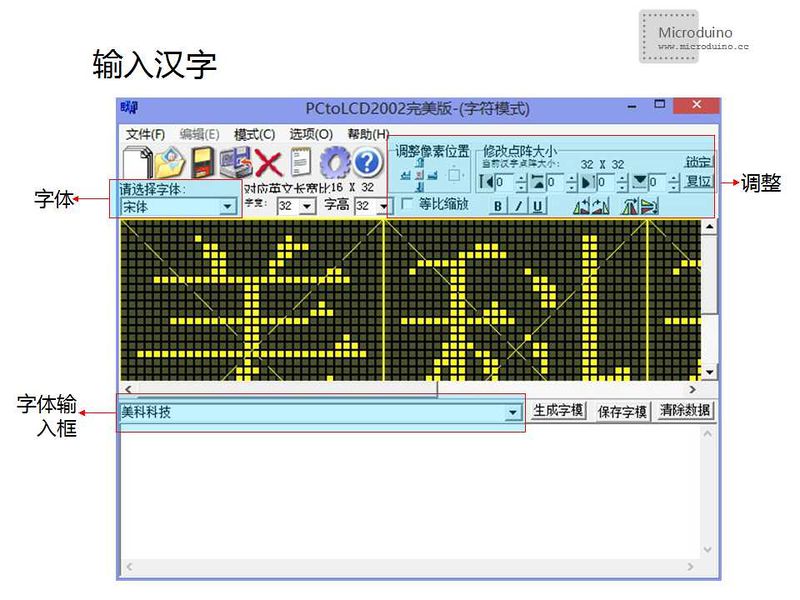
Step 3: Enter Chinese character and you can select font;
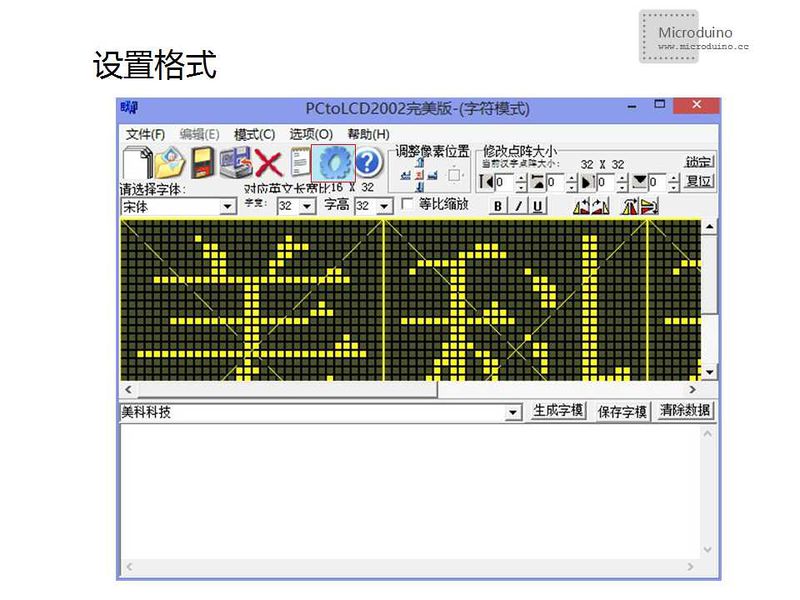
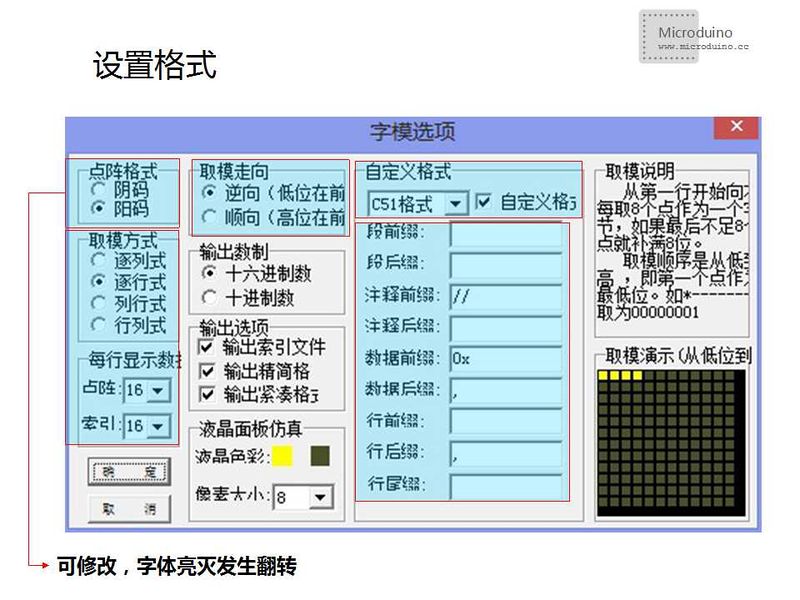
Step 4: Set modulus format;
Step 5: Generate code after setting.
Step6: Change the original Chinese character code to the generated code.
Grammar:
- u8g.drawXBMP( X, Y, I, W, XXXX);
- X:Horizontal coordinate. Y: Vertical coordinate. D: Diameter. L: Length. W: Width. XXXX: Array name of Chinese character code.
Video
|
