|
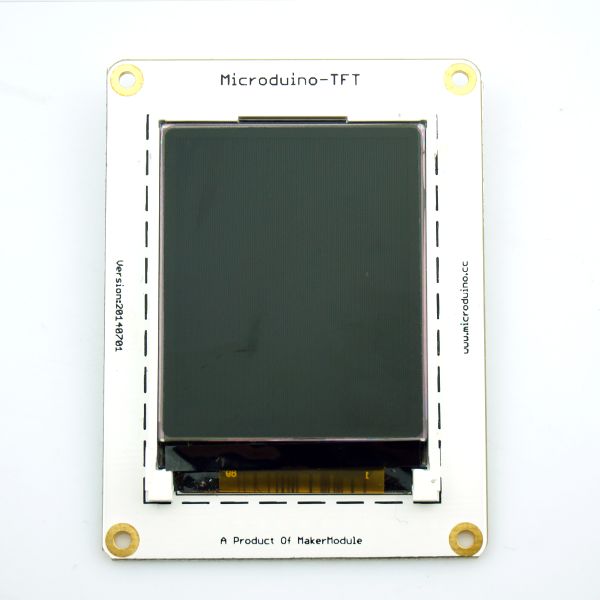
Microduino-TFT is the 1.8-inch 128*160 colorful display module based on ST7735, adopting SPI interface and 3.3V power supply.
Features
- 128×160 color pixel
- Display images inside the memory card by combining with Microduino-SD module
- Low voltage drive and low power consumption
- Adopt 4-wire SPI communication and own its pixel addressing frame buffer
- Few pin and small memory make it suitable for microprocessor use
- Open hardware circuit design and Arduino compatible programming development environment
Specification
- Resolution ratio: 128*160
- Power: 3.3V
- Interface: SPI communication and JST_XH connector
| TFT pin |
Microduino pin |
Function
|
| BL |
Microduino digital interface/3V3 |
Backlight control
|
| RST |
Microduino digital interface /RST |
Screen reset
|
| DC |
Microduino digital interface |
|
| MOSI |
11 |
Data output pin
|
| SCK |
13 |
SPI clock
|
| CS |
Microduino digital interface |
|
Document
Development
The two libraries must be used together.
Application
- All the hardware needed: Microduino USBTTL, Microduino Core and Microduino TFT;
- All the software needed: libraries needed in development and Arduino IDE (version 1.0 and higher)
- Open IDE and choose the board Microduino-Core (Atmega328P@16M, 5V)
- Basic usage of TFT_ST7735 library example program
- Put the two downloaded libraries into Arduino IDE installation folder. (Close all the Arduino IDE windows opened before resetting the Arduino IDE.)
- Text and drawings:
- You can open your first "graphicstest" test program and meantime, you can connect the wire according the pin description
- The program can be used to display different color, size and text, and also can be used to draw pictures.
- Display images inside the memory card
- Prepare a 128*160 bmp picture and put it into the memory car;
- Put the memory card into Microduino-SD modules and stack it with Microduino core module;
- If you want to open the last but one "spitftbitmapt" test program, you need to change "#define SD_CS 4" to "#define SD_CS 7" and meantime, connect the wire according to pin description and then change the name of "bmpDraw("parrot.bmp", 0, 0);".
- After the compiling, you can upload the program to the core board through Microduino-USBTTL and then you can see the picture displayed on the screen.
Purchase
History
Pictures
 Microduino-Cube-Station Front 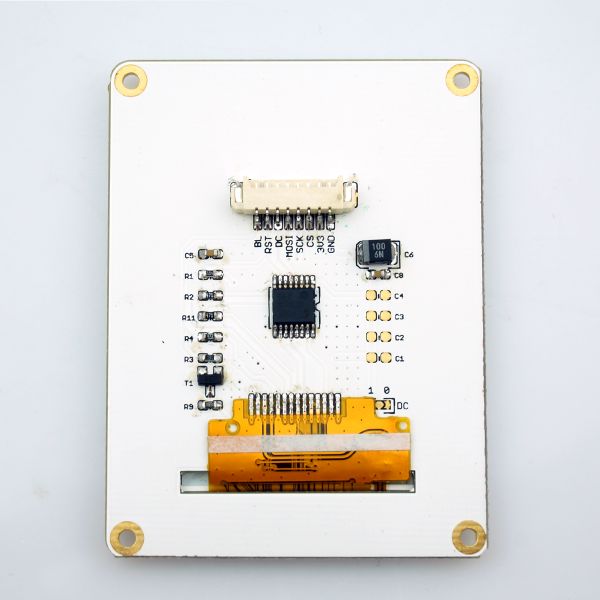 Microduino-Cube-Station Back Video
|


