|
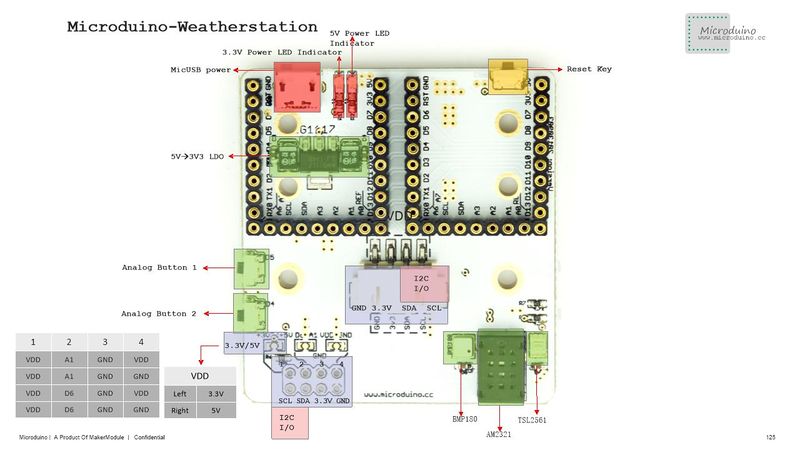
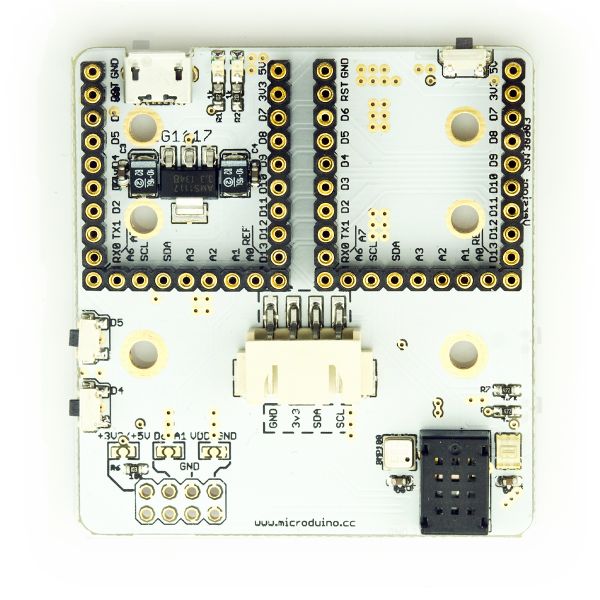
Microduino Weather module integrates three types of sensors, which are light intensity sensor (TSL2561), digital pressure sensor (BMP180), digital temperature and humidity sensor (AM2321). Using the I2C interface connects to the core module. It is widely used in weather monitoring.
Features
- Integrate three sensors, adopt IIC interface and save IO port;
- Small, cheap, stackable and open;
- Open hardware circuit design and Arduino compatible programming development environment;
- Uniform Microduino interface standard and rich peripheral modules, capable of having a fast and flexible connection and extension with other modules and sensors in accord with Microduino interface standard;
- Easy to be integrated to pegboards with a 2.45-pitch female header connector interface.
Specifications
Light Intensity Sensor:TSL2561
- Programmable interruption, with which users can define the maximum and minimum values;
- 6-bit digital output and 400kHz frequency of operation in fast mode;
- Programmable analog gain and integration time;
- Reject 50/60-Hz illumination automatically ;
- Low active power (0.75 mW typically) and power-down mode;
- Conform to RoHS.
Digital pressure sensor:BMP180
- BMP180 comprises the Resistance type pressure transducer, AD converter and a control unit;
- The control unit includes E2PROM and I2C interfaces. BMP180 transfers the temperature and pressure values without compensation. EEPROM stores 176-bit separate standard data which are used to compensate temperature dependence and the other sensor parameters.
- Measuring range available:300hPa to 1100hPa (corresponding to the sea level from -500m to +9000m);
- The lowest absolute accuracy can be 0.03hPa;
- UP=presssure data (16 to 19bit)
- UT=temperature data (0 to 15bit);
Digital temperature and humidity sensor:AM2321
- Standard IIC interface;
- Digital signal output, precise calibration and low power consumption;
- Electrical Characteristics
- Power supply is 2.6-5.5V, standard value is 5V;
- Sleep mode, current consumption 8uA and measurement mode 500mA;
- Sampling period can reach to 2 seconds.
- Temperature Performance
- Resolution:0.1℃;
- Scale range:-40-80℃;
- Accuracy:±0.3℃;
- Response time:Less than 5 seconds.
- Humidity Performance
- Resolution:0.1%RH;
- Scale range:0-99.9%RH;
- Accuracy:Below 25℃±3%RH;
- Response time:less than 5 seconds.
Extended Pin
- Onboard reset button;
- MicroUSB power supply;
- Onboard 3.3V regulated voltage and (5V or 3.3V) power indicator;
- VDD selects the 5V or 3.3V power via jumpers;
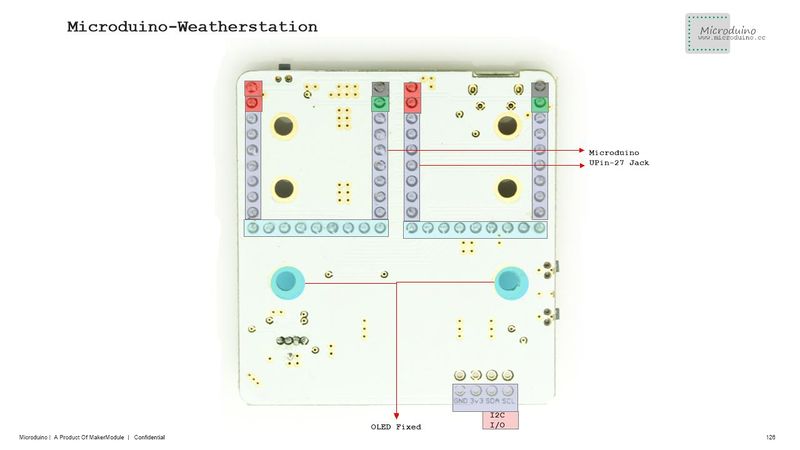
- Onboard Microduino OLED interface;
- Two digital buttons connected to D4 and D5 respectively;
- IIC interface;
- External expansion Sensor Interface:
- VDD, A1, GND, VDD or VDD, A1, GND, GND or VDD, D6, GND, VDD or VDD, D6, GND, GND. You can connect them by yourself.
 Microduino-Cube-Stations-Pinout  Microduino-Cube-Stations-Pinout Document
Eagle PCB local download
Main components:
Development
You may need the following libraries:
Application
- You can download the Microduino test program, which together with OLED can test the function of Microduino-Weather, File:Microduino-Stations-Text.zip
- Prepared hardware:Microduino-FT232R, Microduino-Core, Microduino-Weather and Microduino-OLED;
- Prepared software:Microduino test program (Arduino part) and Arduino IDE(version 1.0 and higher);
- Open the example program in IDE, select the board "Microduino Core (Atmega328P@16M,5V)", then download directly;
- After the download, please watch the OLED for a while:
- The first line is used for testing AM2321 and you can see the temperature data;
- The middle line is used for testing BMP180 and you can see the related pressure data;
- The last line is used for testing TSL2561 and you can see the light intensity data.
FQA
- Does this module have the sensor on it? Is this module powered on using BM module?
- The sensor was fixed inside the board and also can be stacked to other sensor module. It can be powered by the BM module, but the time can’t be long, because it needs a high power consumption.
Buy
History
Picture
Front
 Microduino-Cube-Station Front Back
 Microduino-Cube-Station Back Video
|


