Difference between revisions of "Colored LED"
From Microduino Wiki
m |
|||
| (12 intermediate revisions by one other user not shown) | |||
| Line 2: | Line 2: | ||
|- | |- | ||
| | | | ||
| + | |||
| + | [[file:ColoredLed.jpg|thumb|400px|right]] | ||
| + | |||
==Outline== | ==Outline== | ||
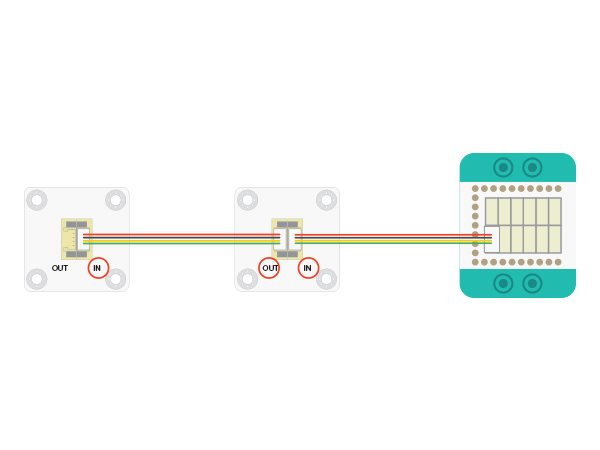
Microduino-Color LED is a colored LED light with an built-in IC control chip, which can be cascaded arbitrarily. With only one I/O port, you can control all the lights. Each light can be controlled separately. | Microduino-Color LED is a colored LED light with an built-in IC control chip, which can be cascaded arbitrarily. With only one I/O port, you can control all the lights. Each light can be controlled separately. | ||
==Features== | ==Features== | ||
| − | *The chip adopts 5050 package | + | *The chip adopts a 5050 package that includes a control circuit and RGB chip inside. |
| − | *With single bus control, you only need one I/O port to receive data and decode | + | *With single bus control, you only need one I/O port to receive data and decode. |
| − | * | + | *Built-in IC control and serial cascading interface for cascade control. |
| − | *Each pixel's trichromatic color can achieve 256- | + | *Each pixel's trichromatic color can achieve 256-levels of brightness, completing a full display of 16,777,216 colors and with a scanning frequency greater than 400Hz/s; |
| − | * | + | *Built-in power-on and off reset circuits; |
*Ultra low power and ultra long life. | *Ultra low power and ultra long life. | ||
| Line 35: | Line 38: | ||
[[file:mCookie-strandtext-pc.JPG|600px|center]] | [[file:mCookie-strandtext-pc.JPG|600px|center]] | ||
| − | ===Experiment One: | + | ===Experiment One: Change LED Colors === |
The LED will change color between red, green, and blue every 500ms. <br> | The LED will change color between red, green, and blue every 500ms. <br> | ||
| Line 74: | Line 77: | ||
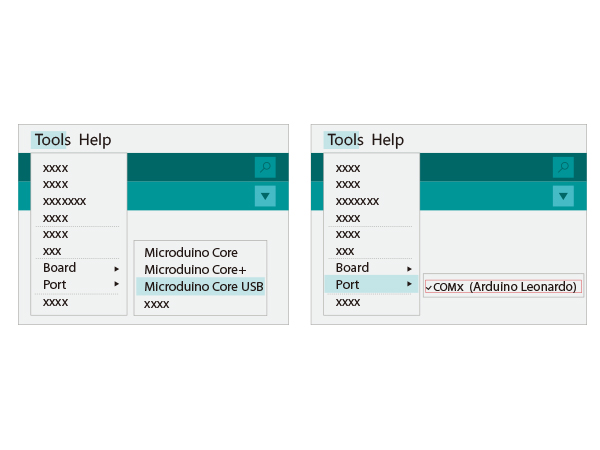
*Download | *Download | ||
**Download after compiling, you can see the finishing notice. | **Download after compiling, you can see the finishing notice. | ||
| − | [[file:Picture1.png|thumb| | + | [[file:Picture1.png|thumb|600px|center]] |
| − | ===Program Debugging=== | + | ====Program Debugging==== |
| − | * | + | *"#define PIN 6": Defines D6 as the control pin the LED is connected to. |
| − | * | + | *"#define PIN_NUM 2": Defines the max number of LEDs allowed in sequence. |
| − | * | + | *"colorWipe(uint32_t c, uint8_t wait)" - Function Description: |
| − | ** | + | **"uint32_t c": Defines the color of the light with the format " strip.Color(R, G, B)" |
| − | *** | + | ***R:(0-255) |
| − | *** | + | ***G:(0-255) |
| − | *** | + | ***B:(0-255) |
| − | ** | + | **"uint8_t wait": Defines the duration time of each light in ms. |
**Example: colorWipe(strip.Color(255, 0, 0), 500); Displays red light for 500ms. | **Example: colorWipe(strip.Color(255, 0, 0), 500); Displays red light for 500ms. | ||
**Users can change the color of the LED by adjusting the RGB values. | **Users can change the color of the LED by adjusting the RGB values. | ||
| Line 136: | Line 139: | ||
*In result, the red, green and blue lights "breath" in loop. | *In result, the red, green and blue lights "breath" in loop. | ||
| − | ===Program Debugging=== | + | ====Program Debugging==== |
| − | * | + | *"rainbowCycle( int r, int g, int b, uint8_t wait)" - Function Description: |
| − | ** | + | **r:(0-255) |
| − | ** | + | **g:(0-255) |
| − | ** | + | **b:(0-255) |
| − | ** | + | **"uint8_t wait": Define breathing speed in ms. The smaller the value is, the faster the LED will "breathe". |
==Specifications== | ==Specifications== | ||
Latest revision as of 06:33, 30 September 2016
ContentsOutlineMicroduino-Color LED is a colored LED light with an built-in IC control chip, which can be cascaded arbitrarily. With only one I/O port, you can control all the lights. Each light can be controlled separately. Features
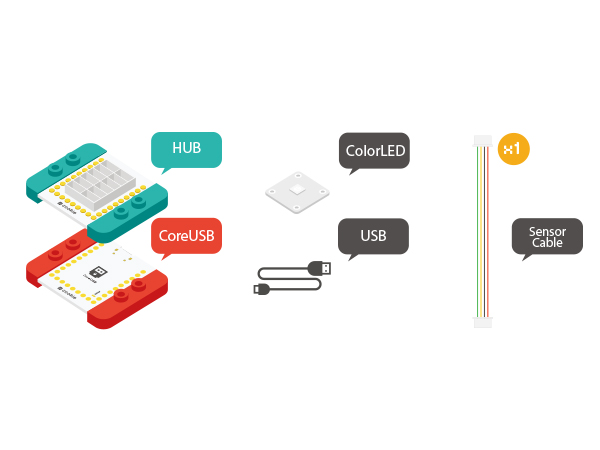
Materials
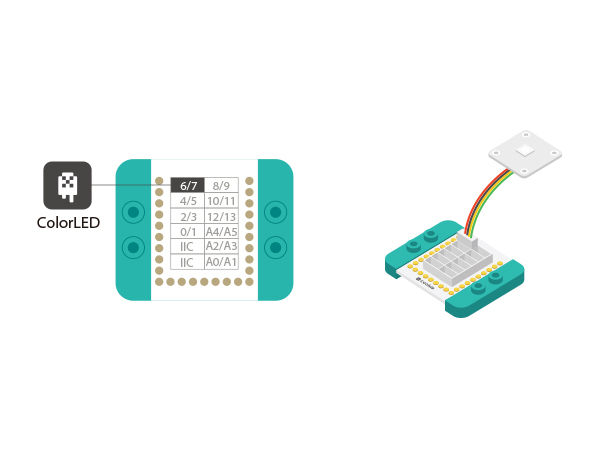
Instructions
Experiment One: Change LED ColorsThe LED will change color between red, green, and blue every 500ms.
#include <Adafruit_NeoPixel.h>

#define PIN 6   //led control pin
#define PIN_NUM 2 //Light number allowed

Adafruit_NeoPixel strip = Adafruit_NeoPixel(PIN_NUM, PIN, NEO_GRB + NEO_KHZ800);

void setup() {
  strip.begin();
  strip.show();
}

void loop() {
  colorWipe(strip.Color(255, 0, 0), 500); // The first light goes read and after 500ms, the second light will go red.
  colorWipe(strip.Color(0, 255, 0), 500); // The first light goes read and after 500ms, the second light will go green.
  colorWipe(strip.Color(0, 0, 255), 500); // The first light goes read and after 500ms, the second light will go blue.
}

// Fill the dots one after the other with a color
void colorWipe(uint32_t c, uint8_t wait) {
  //Let each light turn to a specific color in loop. "C" indicates color; "wait" represents the time duration of each light .
  for (uint16_t i = 0; i < strip.numPixels(); i++) {
    strip.setPixelColor(i, c);
    strip.show();
    delay(wait);
  }
}
Program Debugging
Experiment Two: Breathing Light
#include <Adafruit_NeoPixel.h>

#define PIN 6   //LED light control pin
#define PIN_NUM 2 //LED light number allowed

#define val_max 255
#define val_min 0

Adafruit_NeoPixel strip = Adafruit_NeoPixel(PIN_NUM, PIN, NEO_GRB + NEO_KHZ800);

void setup() {
  strip.begin();
  strip.show();
}

void loop() {
  rainbowCycle( 255, 0, 0, 10);//Red breathing
  rainbowCycle( 0, 255, 0, 10);//Green breathing
  rainbowCycle( 0, 0, 255, 10);//Blue breathing
}

void colorSet(uint32_t c) {
  for (uint16_t i = 0; i < strip.numPixels(); i++) {
    strip.setPixelColor(i, c);
  }
  strip.show();
}

void rainbowCycle( int r, int g, int b, uint8_t wait) {
  for (int val = 0; val < 255; val++)
  {
    colorSet(strip.Color(map(val, val_min, val_max, 0, r), map(val, val_min, val_max, 0, g), map(val, val_min, val_max, 0, b)));
    delay(wait);
  }
  for (int val = 255; val >= 0; val--)
  {
    colorSet(strip.Color(map(val, val_min, val_max, 0, r), map(val, val_min, val_max, 0, g), map(val, val_min, val_max, 0, b)));
    delay(wait);
  }
}
Program Debugging
Specifications
Additional Specs: File:Ws2812.pdf
Applications
|


