Difference between revisions of "Bluetooth Lamp"
From Microduino Wiki
(Created page with "{{Language| Bluetooth Lamp}} {| style="width: 800px;" |- | ==Purpose== Use Android phone and Microduino-BT to communicate with Microduino-CoreUSB to control the color of a lam...") |
(→Purpose) |
||
| Line 4: | Line 4: | ||
| | | | ||
==Purpose== | ==Purpose== | ||
| − | Use | + | Use a phone and Microduino-BT to communicate with Microduino-CoreUSB to control the color of a lamp. |
==Principle== | ==Principle== | ||
Revision as of 08:54, 12 August 2015
| Language: | English • 中文 |
|---|
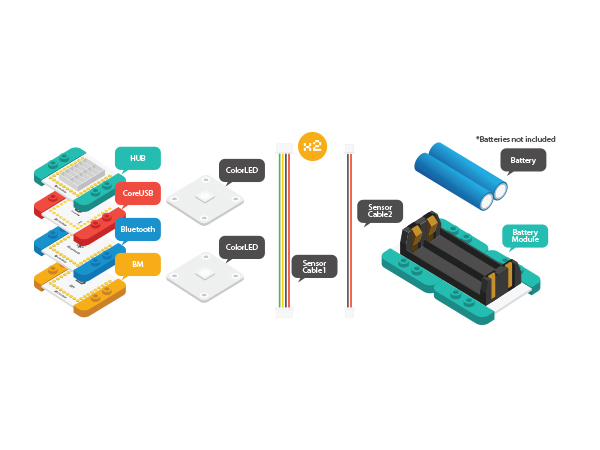
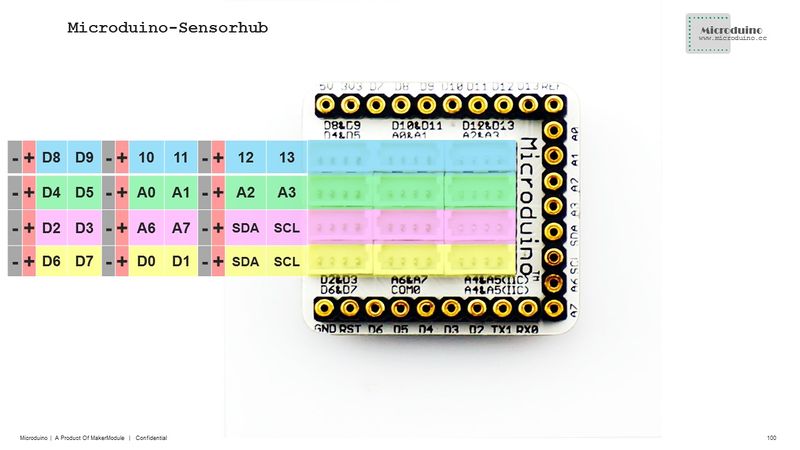
ContentsPurposeUse a phone and Microduino-BT to communicate with Microduino-CoreUSB to control the color of a lamp. PrincipleEquipment
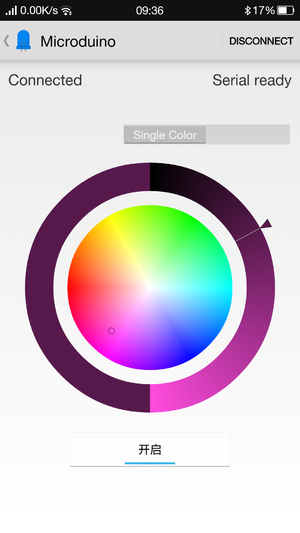
DocumentAndroid Client: Caution: The new BT 4.0 version can only be supported by Android 4.3 and higher. Here we offer Android App. APP download:'File:Microduino-LAMP-APP.zip Hardware Buildup
Software Debugging
The use of BT serial port is baseed on the selection of serial jumper on the board. The default serial port is 0:Serial. #define my_Serial Serialvoid ble()
{
while (my_Serial.available())
{
char c = my_Serial.read();
delay(2);
if (c == 'C')
buffer_sta = true;
if (c == '\n')
{
color_en = true;
safe_ms = millis();
}
if (buffer_sta)
{
buffer[buffer_num] = c;
buffer_num++;
}
// Serial.println(c);
//Serial.println(color_en);
}
if (buffer_sta)
{
buffer_sta = false;
sscanf((char *)strstr((char *)buffer, "C:"), "C:%d,%d,%d,%d", &sta[0], &sta[1], &sta[2], &sta[3]);
for (int a = 0; a < buffer_num; a++)
buffer[a] = NULL;
buffer_num = 0;
for (int i = 0; i < 4; i++)
{
Serial.print(sta[i]);
Serial.print(",");
}
Serial.println(" ");
     if (-1 == sta[3]) {
      colorSet(strip.Color(sta[0], sta[1], sta[2]));
    }
    else if ((0 <= sta[3]) && (sta[3] < PIXEL_COUNT)) {
      colorSet(strip.Color(sta[0], sta[1], sta[2]), sta[3]);
    }
}
if (millis() - safe_ms > 3000)
{
safe_ms = millis();
color_en = false;
}
}
When there is Bluetooth connection, the color is: if (-1 == sta[3]) {
colorSet(strip.Color(sta[0], sta[1], sta[2]));
}
else if ((0 <= sta[3]) && (sta[3] < PIXEL_COUNT)) {
colorSet(strip.Color(sta[0], sta[1], sta[2]), sta[3]);
}Otherwise, it will control color automatically. if (!color_en)
{
rainbowCycle(10, 255, 0, 0, 0);
rainbowCycle(10, 255, 0, 0, 1);
rainbowCycle(10, 0, 255, 0, 0);
rainbowCycle(10, 0, 255, 0, 1);
rainbowCycle(10, 0, 0, 255, 0);
rainbowCycle(10, 0, 0, 255, 1);
rainbowCycle(10, 255, 0, 225, 0);
rainbowCycle(10, 255, 0, 225, 1);
rainbowCycle(10, 247, 139, 5, 0);
rainbowCycle(10, 247, 139, 5, 1);
rainbowCycle(10, 255, 255, 0, 0);
rainbowCycle(10, 255, 255, 0, 1);
rainbowCycle(10, 0, 255, 255, 0);
rainbowCycle(10, 0, 255, 255, 1);
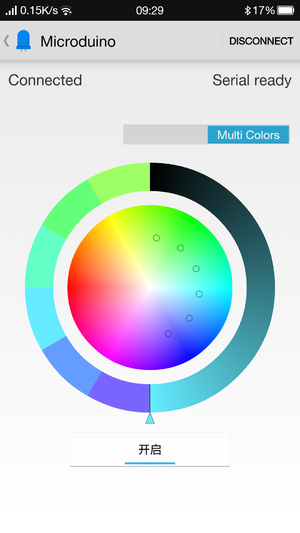
for (int i = 0; i < 3; i++)
rainbow(30);
}ResultBy Microduino, you can control colored lights through your phone and get any color you want. (You can build a beautiful frame with LEGO. ) Video |
