|
|
| (2 intermediate revisions by the same user not shown) |
| Line 48: |
Line 48: |
| | | | |
| | ==Programming== | | ==Programming== |
| − | ===Look at the New Program Block=== | + | ===Required Program Block=== |
| − | '''"Digital Write" Program Block''' | + | '''[["Digital write" program block]]''' |
| | <br> | | <br> |
| − | "Digital Write" program block is in "Input/Output" tab.
| |
| − | [[File:mixly-digitaloutput-where.jpg|600px|center]]
| |
| − | '''"Digital write" program block instruction'''
| |
| − | <br>
| |
| − | In terms of the choice of the pin of "digital write", we can choose the pin of even number, namely pin 2, 4, 6, 8, 10 or 12.
| |
| − | [[File:mixly-digitaloutput-explain.jpg|600px|center]]
| |
| − | '''Digital write pin of Hub'''
| |
| − | <br>
| |
| − | "Digital write" pin is for the connection of the sensors and extension modules. there are 6 digital signal pin on an extension module: 2/3, 4/5, 6/7, 8/9, 10/11, 12/13.
| |
| − | <br>
| |
| − | Pay attention to that there is no 0/1 pin. Because when download programs to core modules from the computer, the 0/1 port is occupied. If our devices occupies this port, the download of the programs will come across problems. It is recommended that don't use 0/1 port later on.
| |
| − | [[File:hub-digitaloutput-explain.jpg|600px|center]]
| |
| | | | |
| | ===Programming Thinking=== | | ===Programming Thinking=== |
| Line 112: |
Line 100: |
| | <br> | | <br> |
| | | | |
| − | There is no battery box in 102KIT, so what to do about it? | + | *There is no battery box in 102KIT, so what to do about it? |
| | **You can directly use USBTTL to supply power. | | **You can directly use USBTTL to supply power. |
| | **You can buy one on Taobao [https://microduino.taobao.com/ Taobao] | | **You can buy one on Taobao [https://microduino.taobao.com/ Taobao] |
| | | | |
| | |} | | |} |
|
Outline
Learn about how to turn a single-color LED on.
Suitable kits: mCookie102, mCookie202, mCookie302, IBC
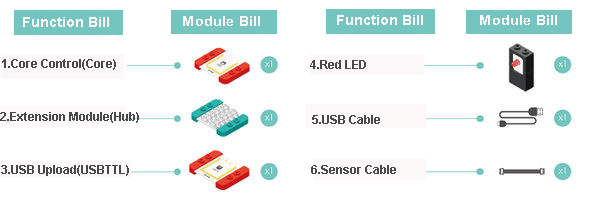
Module Bill
Module
Other Equipment
- USB cable*1
- Sensor cable*1
- Sensor shell*1
- Lego or other fixation structure
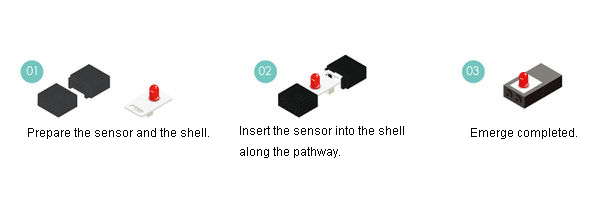
Sensor shell
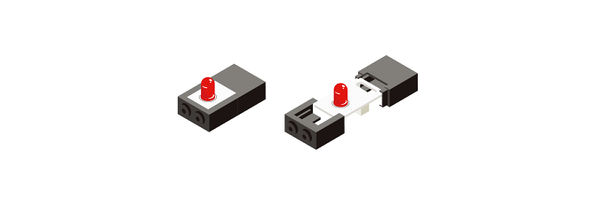
- Sensors can be inserted into the sensor shells and can be connected with Lego. The shell is composed of up and down two parts, and the height of one shell is equivalent to taht of 3 Lego.
If you want, you can also pick the sensor up from the connector.
Module Setup
Resemble modules and sensors up:
- Stick the red core module, USB upload module and the green extension module together;
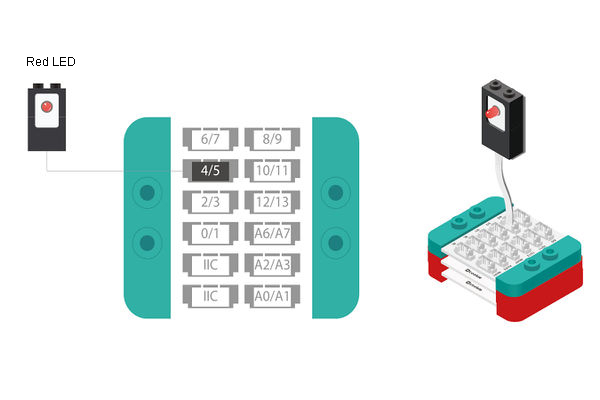
- Connect the red LED to pin 4/5 of the extension module;
- Insert one end of USB cable into the battery base, and connect the other to the computer;
Programming
Required Program Block
"Digital write" program block
Programming Thinking
Turn a LED on with mCookie.
Start Programming
- Programming through Mixly.
Drag the " digital write" program block to the editing area from "input/output" tab, and set the pin number to 4, the state to" high".
- Upload the program to the core module.
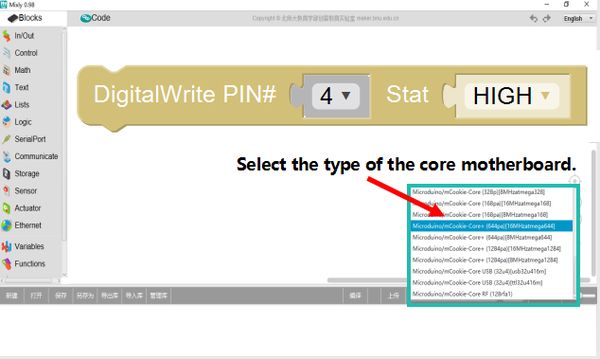
1. Choose the type of the core mainboard
Core module has many types to choose, the one in mCookie-102KIT, mCookie-202KIT is Core(328)[16MHzatmega328].
2. Choose COM port (program download channel)
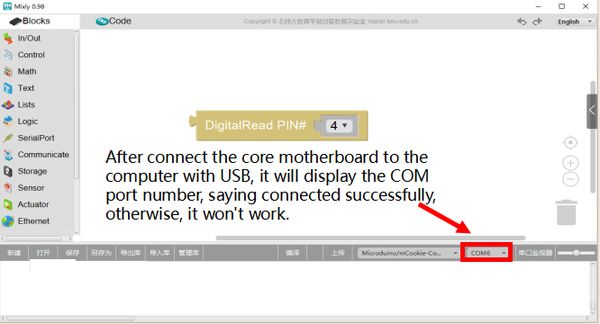
Connect the USB upload with USB cable to the computer, the "tool bar" in Mixly will automatically identify and display the COM port of the communication, which represents that the core module has been connected to the computer successively. Because of the difference between the device and computer, the COM port assigned out by each computer maybe different from others.
3. Upload program
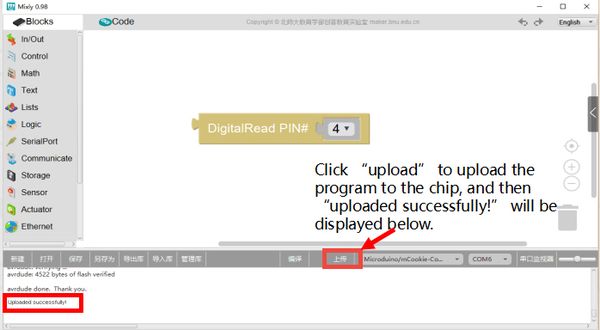
Click "upload" to start compiling, after the compile is passed, start to download. This procedure will be very long, so you must be patient about it. After upload, you can see letters such as "100%" and "Upload successively!".
- Test the result
- After the success of upload, you can see the LED is on!
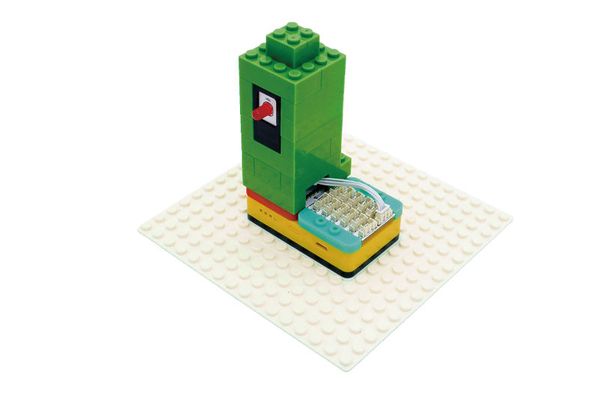
Set up a lighthouse with Lego, and put the LED on the top of it to make it illuminate the way.
Technical Specification
- The product number of the single-color LED: MSDL11
- GPIO controls the on and off of the LED directly.
- For details, please refer to Sensor-LED
Related Cases
FAQ
- What to do if the COM port can not be identified?
- Check whether the core module has been exactly connected to the computer, if it is, the core module will light red.
- Have you installed Arduino IDE. The address of download Software download
- Try another USB interface.
- What to do if the LED can't be on after the program is uploaded successively?
- Check whether the LED interface is identical with program interface.
- Check whether the sensor has touched exactly, and whether the connection is loose.
- Mixly will prompt upload successively, however only 100% appears has it been really uploaded successively, so, you are supposed to check if there are related letters. If there aren't, you should check if the boardcard and COM port are selected right.
- There is no battery box in 102KIT, so what to do about it?
- You can directly use USBTTL to supply power.
- You can buy one on Taobao Taobao
|
