Difference between revisions of "Selecting board, processor, and port"
(→Selecting the Board and Processor) |
(→Initial Setup) |
||
| (2 intermediate revisions by the same user not shown) | |||
| Line 1: | Line 1: | ||
In order to upload programs onto [[Core modules]], the correct board, processor and port needs to be selected. | In order to upload programs onto [[Core modules]], the correct board, processor and port needs to be selected. | ||
| + | |||
| + | =Initial Setup= | ||
| + | Follow the initial setup for your specific platform before proceeding: | ||
| + | {{Clickable software guide boxes}} | ||
| + | {{Clickable_headed_image_table_box_clear}} | ||
=Selecting the Board and Processor= | =Selecting the Board and Processor= | ||
| Line 70: | Line 75: | ||
* the hardware connections are secure and correct | * the hardware connections are secure and correct | ||
* the drivers are installed. | * the drivers are installed. | ||
| + | |||
| + | =Uploading Code= | ||
| + | #Select board type and processor. | ||
| + | #Select the port. | ||
| + | #Click upload. | ||
| + | |||
| + | |||
| + | *Note: If using mBattery to upload to a core module. Ensure that mBattery is "ON" and supplying power to the modules. There will be a red LED on. | ||
| + | [[File:MBattery-t.jpg|300px]] | ||
Latest revision as of 22:36, 30 March 2017
In order to upload programs onto Core modules, the correct board, processor and port needs to be selected.
Contents
Initial Setup
Follow the initial setup for your specific platform before proceeding:
Selecting the Board and Processor
Selecting the Board Type and Processor is required to compile the correct code for the core module.
Configuring the software is done under Tools > Board and Tools > Processor.
Below is the table which lists all the core modules with corresponding Board and Processor. The table also lists kits that contain specific core modules.
Example usage would be for the Core module in Itty Bitty City. Board is Microduino/mCookie-Core (328p) and Processor is Atmega328P@16M,5V.
| Name | Board | Processor | Contained in Kit |
|---|---|---|---|
| Core (168pa) | Microduino/mCookie-Core (168pa) | Atmega168pa@8M,3.3V | |
| Atmega168pa@16M,5V | |||
| Core (328p) | Microduino/mCookie-Core (328p) | Atmega328P@8M,3.3V | |
| Atmega328P@16M,5V | Itty Bitty City Kit, X02 Series Kits: 102 Basic Kit; 202 Advanced Kit; 302 Expert Kit | ||
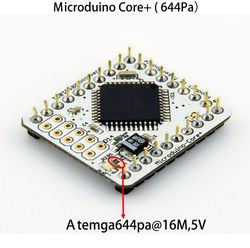
| Core+ (644pa) | Microduino/mCookie-Core+ (644pa) | Atmega644pa@16M,3.3V | |
| Atmega644pa@16M,5V | 302 Expert Kit | ||
| Core+ (1284pa) | Microduino/mCookie-Core+ (1284pa) | Atmega1284pa@8M,3.3V | |
| Atmega1284pa@16M,5V | |||
| CoreUSB | Microduino/mCookie-Core USB (32u4) | USB | X01 Series Kits: 101 Basic Kit; 201 Advanced Kit; 301 Expert Kit |
| CoreRF | Microduino/mCookie RF (128rfa1) |
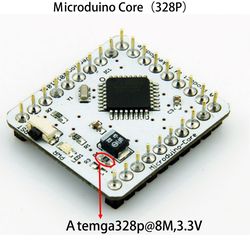
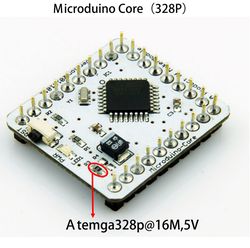
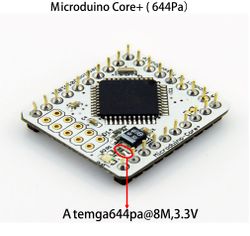
Determining Processor Variant
Core
Core+
Selecting the Port
Port selection is dependent on which programmer is connected. But it is usually the only select-able port in the list.
If there is no select-able port ensure that:
- the hardware connections are secure and correct
- the drivers are installed.
Uploading Code
- Select board type and processor.
- Select the port.
- Click upload.
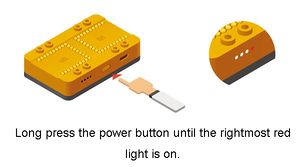
- Note: If using mBattery to upload to a core module. Ensure that mBattery is "ON" and supplying power to the modules. There will be a red LED on.
