Difference between revisions of "Infrared receiver"
From Microduino Wiki
(Created page with "{| style="width: 800px;" |- | ==Outline== Microduino-IR receiver is used to receive infrared signal from Infrared Transmission. It can receive infrared signal within 10m. ...") |
|||
| (2 intermediate revisions by 2 users not shown) | |||
| Line 3: | Line 3: | ||
| | | | ||
==Outline== | ==Outline== | ||
| − | Microduino-IR receiver is used to receive infrared signal from [[Infrared | + | Microduino-IR receiver is used to receive infrared signal from [[Infrared transmission]]. It can receive infrared signal within 10m. |
==Specification== | ==Specification== | ||
| Line 11: | Line 11: | ||
**Sensing distance:10m | **Sensing distance:10m | ||
*Size | *Size | ||
| − | **Size of the LED: | + | **Size of the LED: 5mm |
** Size of the board: 10mm*20mm | ** Size of the board: 10mm*20mm | ||
**1.27mm-pitch 4PIN interface | **1.27mm-pitch 4PIN interface | ||
*Connection Method | *Connection Method | ||
| − | **GND, VCC, signal port and NC. | + | **GND, VCC, signal port and NC. The signal port can be defined by users. |
==Development== | ==Development== | ||
===Equipment=== | ===Equipment=== | ||
| Line 30: | Line 30: | ||
[[File:IR receiver-module.jpg|center|600px]] | [[File:IR receiver-module.jpg|center|600px]] | ||
===Preparation=== | ===Preparation=== | ||
| − | Setup | + | Setup 1: Connect the IR receiver's interface with the Hub's D10 digital port. |
[[file:mCookie-IR receiver-sensor.JPG|600px|center]] | [[file:mCookie-IR receiver-sensor.JPG|600px|center]] | ||
| − | *Setup | + | *Setup 2: Connect the core, Hub and IR receiver to a computer with a USB cable. |
[[file:mCookie-strandtext-pc.JPG|600px|center]] | [[file:mCookie-strandtext-pc.JPG|600px|center]] | ||
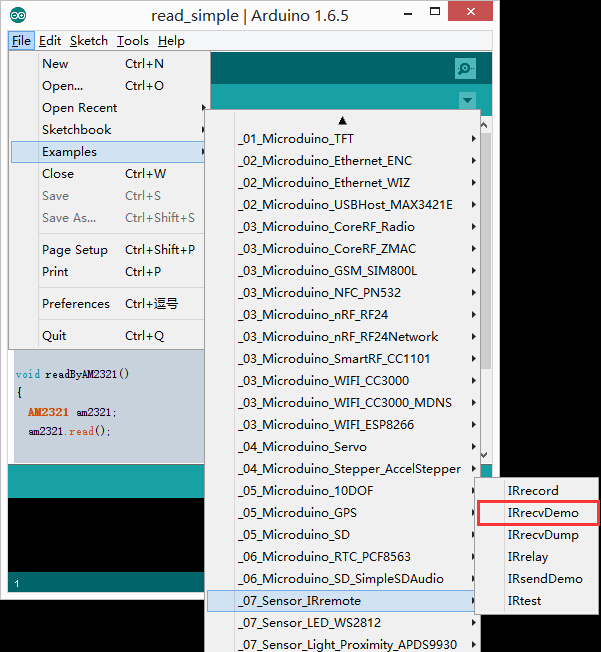
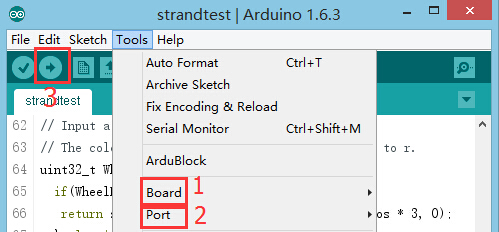
===Debugging=== | ===Debugging=== | ||
Latest revision as of 08:40, 4 August 2017
ContentsOutlineMicroduino-IR receiver is used to receive infrared signal from Infrared transmission. It can receive infrared signal within 10m. Specification
DevelopmentEquipment
PreparationSetup 1: Connect the IR receiver's interface with the Hub's D10 digital port.
Debugging
 if (irrecv.decode(&results)) {
   Serial.println(results.value, HEX);
   irrecv.resume();
 }
ApplicationIt can be used in infrared remote control, which is able to be matched with all kinds of infrared remote controller. You need to make sure the infrared signal type and protocol format before using. |


