Difference between revisions of "Lesson 6--Microduino Simple Frequency Meter (serial monitor)"
| (2 intermediate revisions by one other user not shown) | |||
| Line 1: | Line 1: | ||
| − | {{Language| 第六课-- | + | {{Language| 第六课--Microduino_简单频率计(串口监视)}} |
{| style="width: 800px;" | {| style="width: 800px;" | ||
|- | |- | ||
| Line 8: | Line 8: | ||
| − | + | Features: | |
1. Measured the signal of 20 ~ 20 KHZ, error is bigger and bigger once out of this range. | 1. Measured the signal of 20 ~ 20 KHZ, error is bigger and bigger once out of this range. | ||
| Line 29: | Line 29: | ||
==Program== | ==Program== | ||
| + | Download program: | ||
| + | https://github.com/Microduino/Microduino_Tutorials/tree/master/Microduino_Advanced/MicroduinoSimpleFrequencyMeter | ||
| + | |||
<source lang="cpp"> | <source lang="cpp"> | ||
Latest revision as of 07:58, 12 September 2016
| Language: | English • 中文 |
|---|
ObjectiveThis lesson will teach you measure the frequency of a sound by Microduino. Want to measure the frequency of a sound or duty cycle, but no frequency meter? We can use Microduino to finish this work.
2. Error is roughly + 5%. Just to play. 3. Output results are: frequency, duty cycle, cycle, high level, low level of time. 4. Only measure single frequency, can't used for complex waveform. Equipment
SchematicProgramDownload program: https://github.com/Microduino/Microduino_Tutorials/tree/master/Microduino_Advanced/MicroduinoSimpleFrequencyMeter /*
Arduino Frequency meter
Ansifa
2013/1/5
*/
int divider[6] = {0, 1, 8, 64, 256, 1024};
int prescaler = 5;
double count = 0;
double middle = 0;
char x = 0;
ISR(TIMER1_OVF_vect)
{
if (prescaler < 4)
{
prescaler++;
}
}
void interrupt()
{
if (!x)
{
count = TCNT1;
TCNT1 = 0x000;
TCCR1B = prescaler;
attachInterrupt(0, interrupt, FALLING);
}
else
{
middle = TCNT1;
attachInterrupt(0, interrupt, RISING);
}
x = ~x;
}
void setup()
{
Serial.begin(57600);
TIMSK1 = 0x01;
TCCR1A = 0x00;
attachInterrupt(0, interrupt, RISING);
}
void loop()
{
Serial.print("Freq: ");
Serial.print(16000000.0 / divider[prescaler] / count);
Serial.print(" Hz\t\tDuty: ");
Serial.print(middle / count * 100);
Serial.print(" %\t\tPeriod: ");
Serial.print(0.0000625 * divider[prescaler]*count);
Serial.print(" ms\t\tH-time: ");
Serial.print(0.0000625 * divider[prescaler]*middle);
Serial.print(" ms\t\tL-time: ");
Serial.print(0.0000625 * divider[prescaler]*(count - middle));
Serial.println(" ms");
if (prescaler > 1)
{
prescaler--;
delay(200);
}
delay(100);
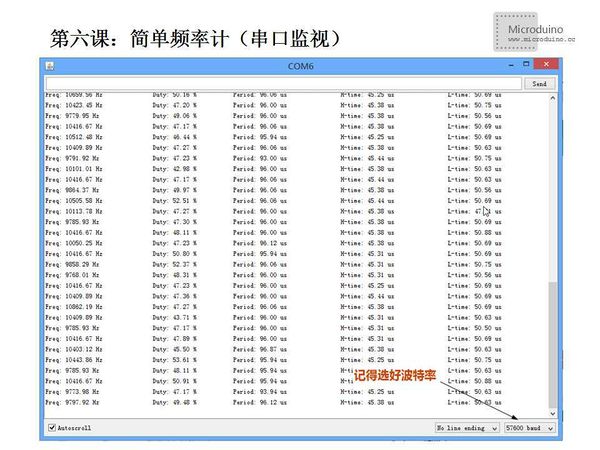
}DebugOpen the serial monitor, set the baud rate to 57600, display the result. Because there is no any anti interference measures, please ignore particularly large deviation result. You also can extend this circuit performance:
ResultOpen the serial monitor, set the baud rate to 57600, observe the result Video |
