Difference between revisions of "Microduino Electronic welcome device"
(Created page with "{{Language | Microduino 电子迎宾器}} {| style="width: 800px;" |- | ==Outline== *Project:Microduino Electronic Welcome Device *Objective:Use Microduino core and two py...") |
|||
| (2 intermediate revisions by 2 users not shown) | |||
| Line 4: | Line 4: | ||
| | | | ||
==Outline== | ==Outline== | ||
| − | * | + | *Project: Microduino Electronic Welcome Device |
| − | * | + | *Objective: Use Microduino core and two pyroelectric infrared sensor to identify the human body in and out, then use the Microduino LM4863 to play different audio. |
| − | * | + | *Difficulty: High |
| − | *Time- | + | *Time-consuming: 5 hours |
| − | * | + | *Maker: Microduino Studio-YLB |
==Bill of Materials== | ==Bill of Materials== | ||
| Line 36: | Line 36: | ||
|9_Pin Row needles||3|| Fix Microduino core | |9_Pin Row needles||3|| Fix Microduino core | ||
|- | |- | ||
| − | | | + | |Horn||1|| play audio |
|- | |- | ||
|Soldering iron||1||welding tool | |Soldering iron||1||welding tool | ||
| Line 49: | Line 49: | ||
|} | |} | ||
==Document== | ==Document== | ||
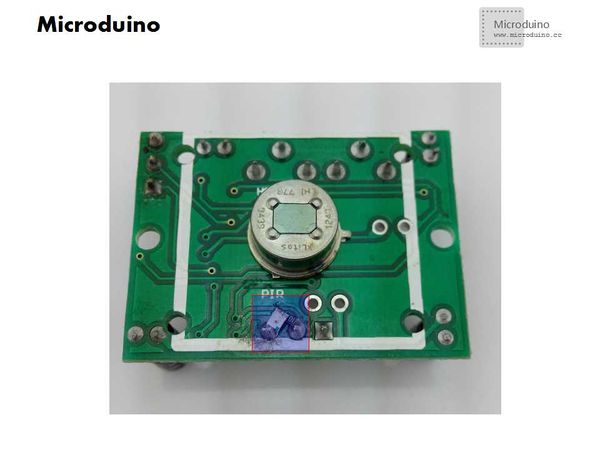
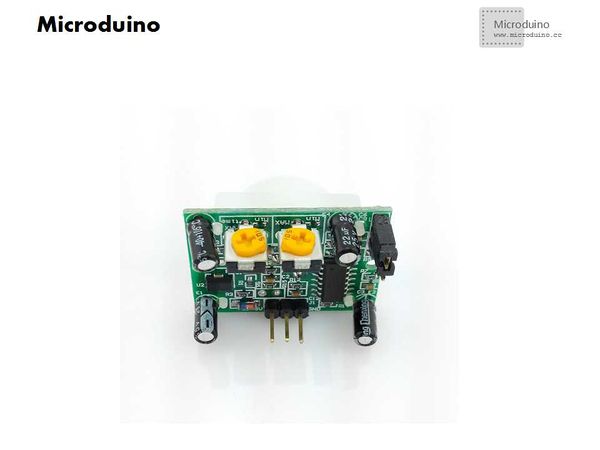
| − | Download pyroelectric infrared sensor HC-sr501 | + | Download pyroelectric infrared sensor HC-sr501 material: |
==Debug== | ==Debug== | ||
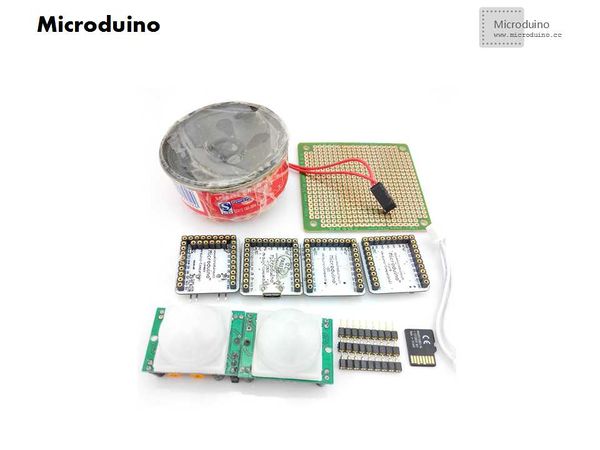
| − | *Step | + | *Step 1: Prepare the experiment equipment |
[[File:Welcome_devicesjpg_all.jpg|600px|center|thumb]] | [[File:Welcome_devicesjpg_all.jpg|600px|center|thumb]] | ||
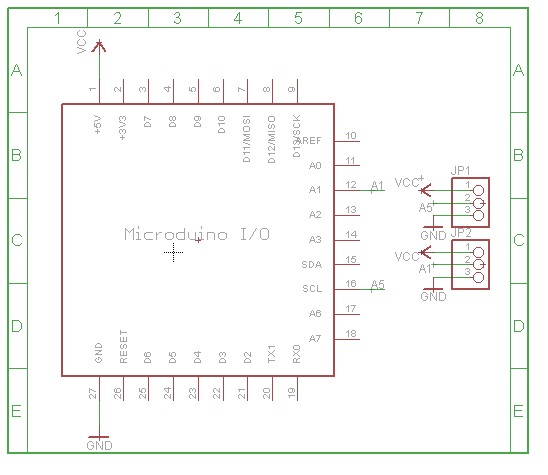
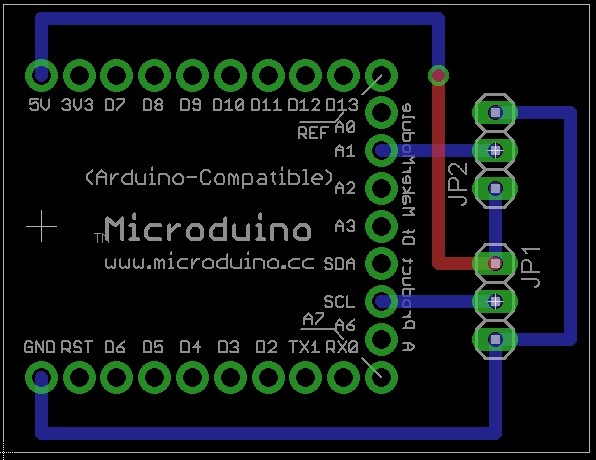
| − | *Step | + | *Step 2: Welding circuit |
[[File:Welcome_devicesjpg_Schematics1.jpg||600px|center|thumb]] | [[File:Welcome_devicesjpg_Schematics1.jpg||600px|center|thumb]] | ||
[[File:Welcome_devicesjpg_Schematics2.jpg||600px|center|thumb]] | [[File:Welcome_devicesjpg_Schematics2.jpg||600px|center|thumb]] | ||
| Line 61: | Line 61: | ||
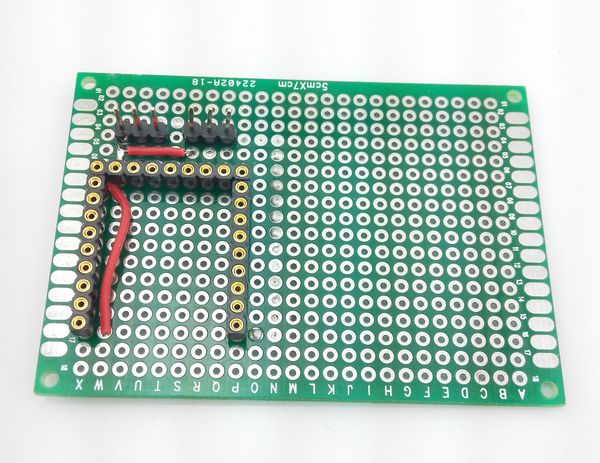
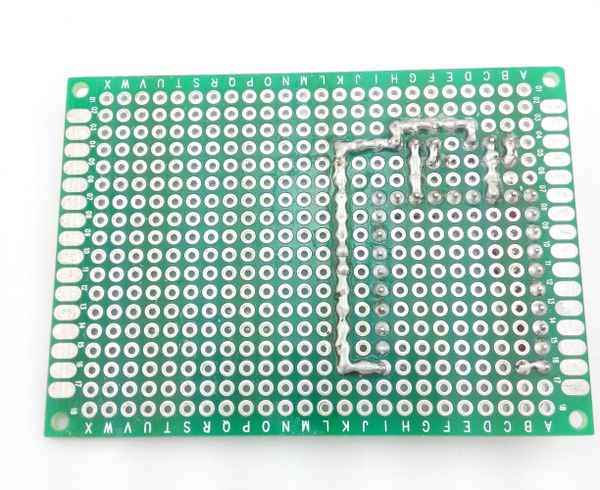
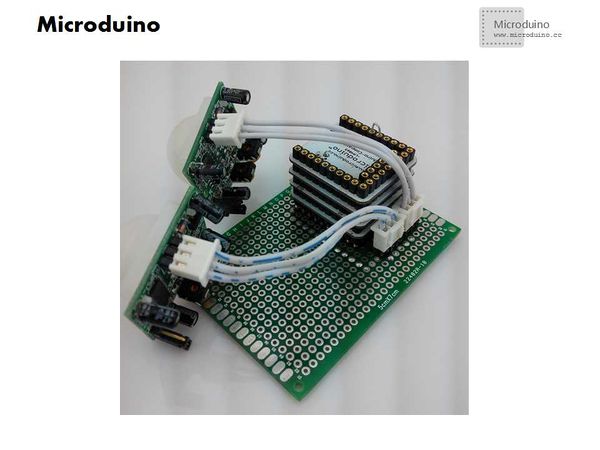
The front after welding: | The front after welding: | ||
[[File:Welcome_devicesjpg_Schematics3.jpg||600px|center|thumb]] | [[File:Welcome_devicesjpg_Schematics3.jpg||600px|center|thumb]] | ||
| − | The | + | The back: |
[[File:Welcome_devicesjpg_Schematics4.jpg||600px|center|thumb]] | [[File:Welcome_devicesjpg_Schematics4.jpg||600px|center|thumb]] | ||
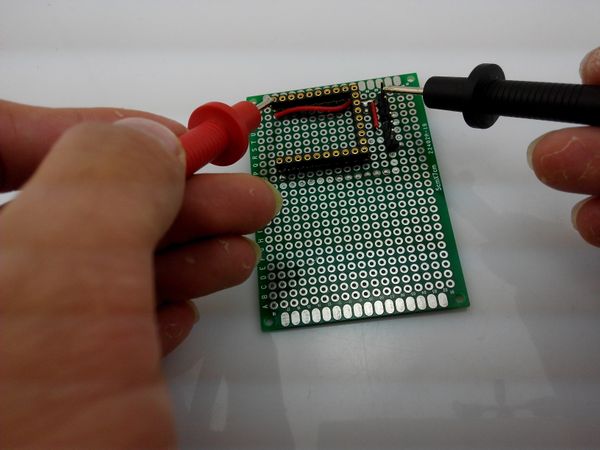
Use the multimeter to measured if the welding is correct. | Use the multimeter to measured if the welding is correct. | ||
| Line 70: | Line 70: | ||
*Step 3: Change the pyroelectric infrared sensor, welding a resistor(330Ω) and a LED between 5V and OUT node; | *Step 3: Change the pyroelectric infrared sensor, welding a resistor(330Ω) and a LED between 5V and OUT node; | ||
[[File:Welcome_devicesjpg_Change.jpg||600px|center|thumb]] | [[File:Welcome_devicesjpg_Change.jpg||600px|center|thumb]] | ||
| − | + | Reason: When the sensor detects the body, OUT pin will output high level, using the LED to display, so easy to debug. | |
| − | *Step | + | *Step 4: Set up circuit |
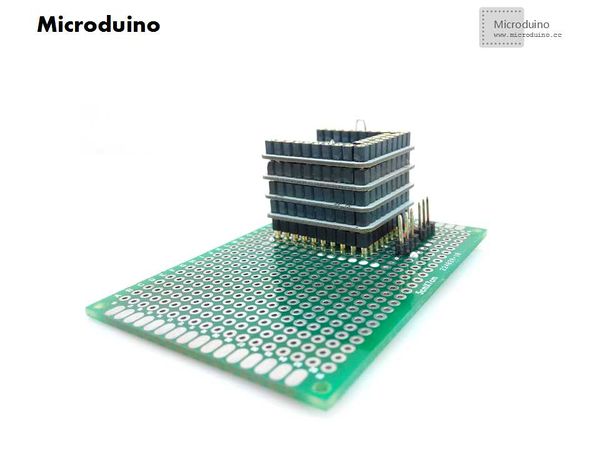
**Stack all module and plug in to control board. | **Stack all module and plug in to control board. | ||
[[File:Welcome_devicesjpg_Control1.jpg||600px|center|thumb]] | [[File:Welcome_devicesjpg_Control1.jpg||600px|center|thumb]] | ||
**Connect the sensor and power on, check if the sensor can work. | **Connect the sensor and power on, check if the sensor can work. | ||
[[File:Welcome_devicesjpg_Control2.jpg||600px|center|thumb]] | [[File:Welcome_devicesjpg_Control2.jpg||600px|center|thumb]] | ||
| − | *Step | + | *Step 5: Get the audio file |
| − | |||
| − | |||
**Install software | **Install software | ||
| − | ** | + | **Open the software and generate the audio file |
| − | *Step | + | *Step 6: Convert the generated file |
| − | |||
| − | *Step | + | *Step 7: Start to debug the program |
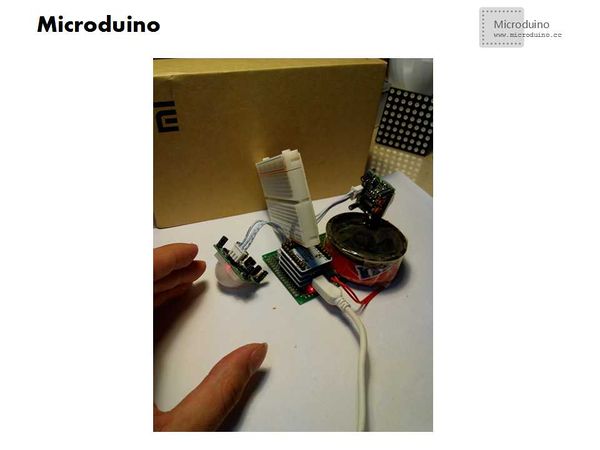
**Adjust the delay time and induction distance to a minimum, easy to debug | **Adjust the delay time and induction distance to a minimum, easy to debug | ||
| Line 99: | Line 96: | ||
**Put the hand to the sensor, test it. | **Put the hand to the sensor, test it. | ||
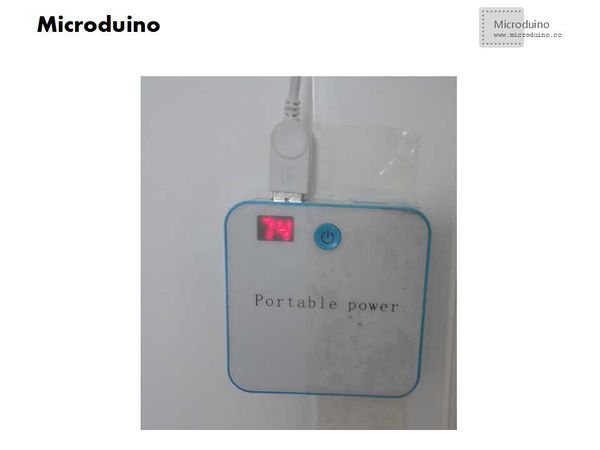
| − | *Step | + | *Step 8: After finished debug, install it on door. |
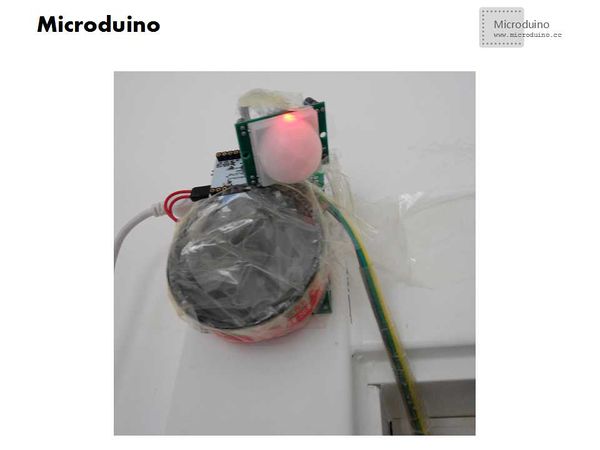
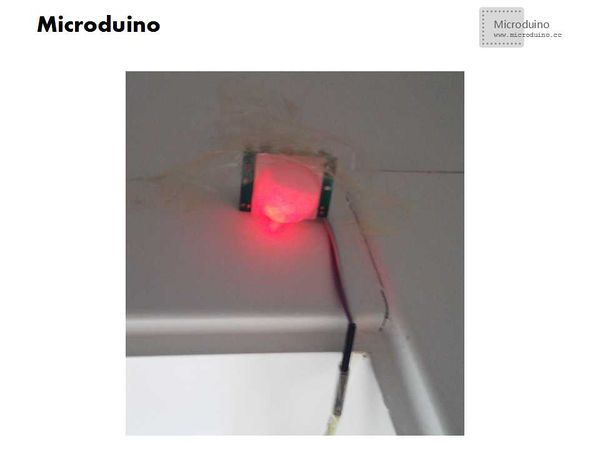
**Using mobile power supply, and convenient. | **Using mobile power supply, and convenient. | ||
[[File:Welcome_devicesjpg_steup1.jpg|600px|center|thumb]] | [[File:Welcome_devicesjpg_steup1.jpg|600px|center|thumb]] | ||
| Line 111: | Line 108: | ||
==The issue need pay attention== | ==The issue need pay attention== | ||
| − | *The welding circuit can't go | + | *The welding circuit can't go wrong; |
*Sensor position should be correct. | *Sensor position should be correct. | ||
==Video== | ==Video== | ||
| − | + | ||
|} | |} | ||
Latest revision as of 09:20, 12 September 2016
| Language: | English • 中文 |
|---|
ContentsOutline
Bill of Materials
DocumentDownload pyroelectric infrared sensor HC-sr501 material: Debug
Welding the circuit according to the schematic. The front after welding: The back: Use the multimeter to measured if the welding is correct. Measuring principle: use wire connect two nodes, the resistance is almost zero. Measurement method: use the multimeter ohm, if the display value close to 0, that means welding success, otherwise there is a problem. Then need to measure the power and GND whether short circuit.
Reason: When the sensor detects the body, OUT pin will output high level, using the LED to display, so easy to debug.
ResultEnter the room, it automatically broadcast: "master: hello! Welcome back", and go out automatically broadcast: "master remember to lock the doors and Windows", similar to the electronic welcome device. The issue need pay attention
Video |
