Difference between revisions of "Microduino Rain sensor usage"
From Microduino Wiki
(Created page with "{{Language | Microduino 雨滴传感器使用}} {| style="width: 800px;" |- | ==Objective== This tutorial will teach you how to use the rain sensor. ==Equipment== *'''Micro...") |
|||
| (One intermediate revision by the same user not shown) | |||
| Line 18: | Line 18: | ||
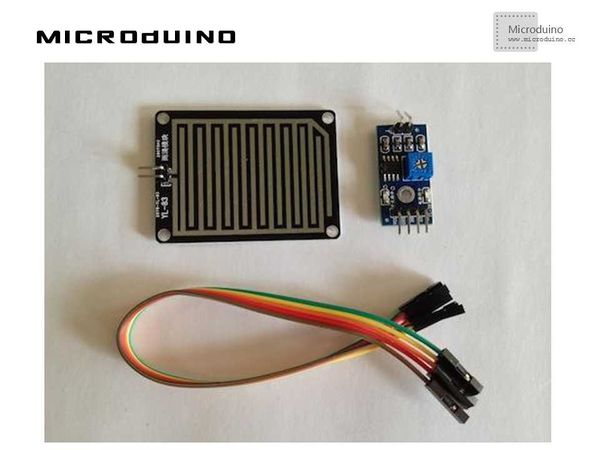
==Rain sensor== | ==Rain sensor== | ||
| − | + | Introduction: | |
| − | * | + | *Voltage: 5V |
| − | *Power | + | *Power indicator, output LED indicator. |
| − | *TTL | + | *TTL output: TTL output signal for low level effectively. Drive power is about 100ma, can driven relay, buzzer, small fan, and so on directly . |
*Sensitivity can be adjusted through the potentiometer | *Sensitivity can be adjusted through the potentiometer | ||
| Line 38: | Line 38: | ||
*Raindrops board size is 5.4*4.0MM | *Raindrops board size is 5.4*4.0MM | ||
| − | Usage | + | Usage introduction: |
*Connect the 5V power, the power LED indicator light. If no rain on raindrop board, DO port outputs high voltage, then switch LED off, otherwise, D0 port outputs low voltage, switch LED on. | *Connect the 5V power, the power LED indicator light. If no rain on raindrop board, DO port outputs high voltage, then switch LED off, otherwise, D0 port outputs low voltage, switch LED on. | ||
| Line 50: | Line 50: | ||
[[File:雨滴传感器.jpg|600px|center|thumb]] | [[File:雨滴传感器.jpg|600px|center|thumb]] | ||
| − | |||
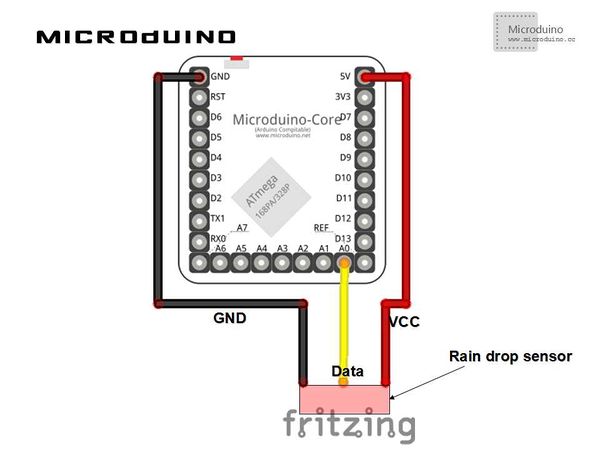
==Schematic== | ==Schematic== | ||
| Line 60: | Line 59: | ||
https://github.com/Microduino/Microduino_Tutorials/tree/master/Microduino_Sensor/rainDropSensor | https://github.com/Microduino/Microduino_Tutorials/tree/master/Microduino_Sensor/rainDropSensor | ||
| − | The program is very simple. Read the A0 analog value directly, the rain sensor will | + | The program is very simple. Read the A0 analog value directly, the rain sensor will generate voltage when hit the rain. |
==Debug== | ==Debug== | ||
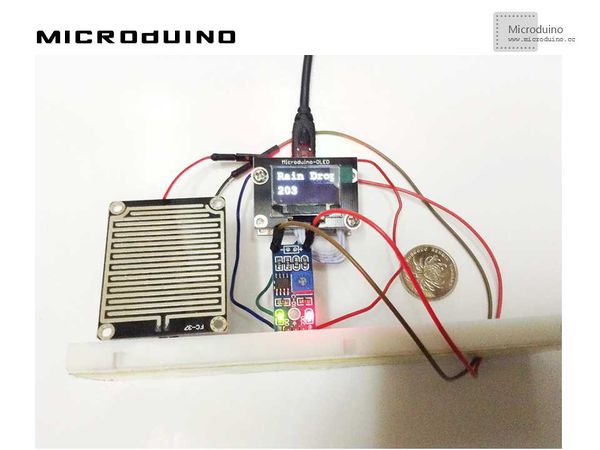
| − | Step | + | Step : Stack all Microduino module and sensor, as follows: |
[[File:雨滴传感器连接图.jpg|600px|center|thumb]] | [[File:雨滴传感器连接图.jpg|600px|center|thumb]] | ||
| − | Step | + | Step 2: Compile the program and download it. |
| − | Step | + | Step 3: Drop two drops of water, the OLED displayed value will be changed. |
==Result== | ==Result== | ||
Latest revision as of 10:29, 28 September 2016
| Language: | English • 中文 |
|---|
ObjectiveThis tutorial will teach you how to use the rain sensor. Equipment
Rain sensorIntroduction:
Usage introduction:
Schematic
Programhttps://github.com/Microduino/Microduino_Tutorials/tree/master/Microduino_Sensor/rainDropSensor The program is very simple. Read the A0 analog value directly, the rain sensor will generate voltage when hit the rain. DebugStep : Stack all Microduino module and sensor, as follows: Step 2: Compile the program and download it. Step 3: Drop two drops of water, the OLED displayed value will be changed. ResultOLED displays value will be changed with the rainfall. Videohttp://v.youku.com/v_show/id_XNzAxMTA2MDAw.html
|


