Difference between revisions of "Microduino ENC Network (9)——Send a bigger image"
From Microduino Wiki
| Line 4: | Line 4: | ||
| | | | ||
==Objective== | ==Objective== | ||
| − | This | + | This tutorial will show how to references to images hosted by other websites in your HTML page and control a bulb by your smartphone. |
==Equipment== | ==Equipment== | ||
| Line 31: | Line 31: | ||
==Debug== | ==Debug== | ||
| − | Step | + | Step 1: Download the EtherCard library and copy to your libraries fold of IDE, then restart IDE. |
https://github.com/jcw/ethercard | https://github.com/jcw/ethercard | ||
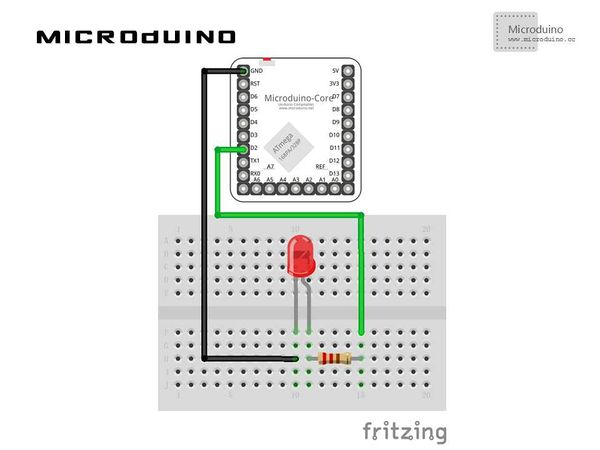
| − | Step | + | Step 2: Connect the bulb, as follows: |
[[File:MicroduinoENC9连接图.jpg|600px|center|thumb]] | [[File:MicroduinoENC9连接图.jpg|600px|center|thumb]] | ||
| − | Step | + | Step 3: Compile the code and download the it. |
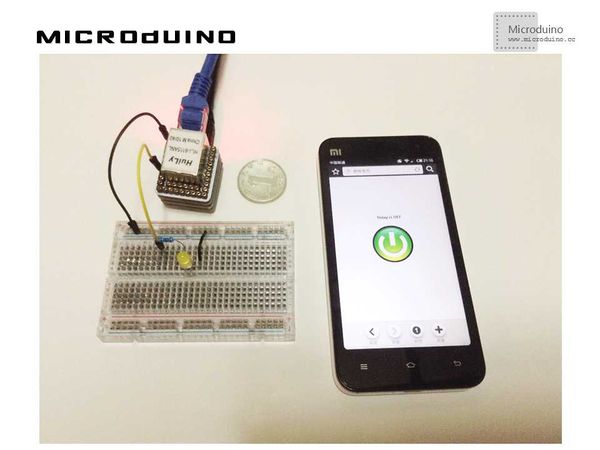
| − | Step | + | Step 4: Use the mobile phone to access Microduino's IP address, click the button, observe the bulb's state. |
==Result== | ==Result== | ||
Latest revision as of 09:48, 12 September 2016
| Language: | English • 中文 |
|---|
ObjectiveThis tutorial will show how to references to images hosted by other websites in your HTML page and control a bulb by your smartphone. Equipment
Schematic
Stack all modules and then connect the ethernet cable, as follows: Programhttps://github.com/Microduino/Microduino_Tutorials/tree/master/Microduino_ENC/ENCnetworknine DebugStep 1: Download the EtherCard library and copy to your libraries fold of IDE, then restart IDE. https://github.com/jcw/ethercard Step 2: Connect the bulb, as follows: Step 3: Compile the code and download the it. Step 4: Use the mobile phone to access Microduino's IP address, click the button, observe the bulb's state. ResultUse the mobile phone to access Microduino's IP address, then you can use the mobile to control the bulb. Video |

