Difference between revisions of "Microduino W5500 Network (2)"
(Created page with "{| style="width: 800px;" |- | ==Purpose== This course will show you how to use DHCP server to configure network parameter automatically, enabling your Microduino to acquire IP...") |
|||
| Line 51: | Line 51: | ||
==Debugging== | ==Debugging== | ||
| − | Step 1: First, make sure | + | Step 1: First, make sure you have _02_Microduino_Ethernet_WIZ library in your IDE and put it into libraries folder of your IDE. |
Step 2: If there still exists Ethernet library in the libraries folder of your IDE, it needs to be deleted since the previous Ethernet is compiled according to W5100. | Step 2: If there still exists Ethernet library in the libraries folder of your IDE, it needs to be deleted since the previous Ethernet is compiled according to W5100. | ||
Revision as of 08:22, 10 March 2015
PurposeThis course will show you how to use DHCP server to configure network parameter automatically, enabling your Microduino to acquire IP address accordingly. Equipment
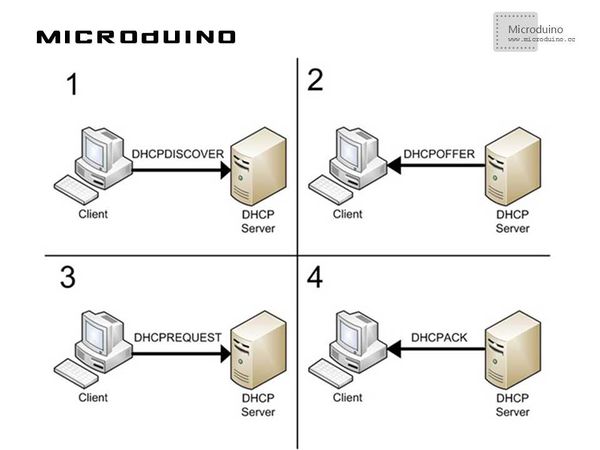
DHCPGenerally, you can find a DHCP (Dynamic Host Configuration Protocol) server in local network. DHCP distributes network parameters (IP address, mask, gateway and DNS) to internal network device automatically.
You need a device (Client) with IP address, send a DISCOVERY broadcasting data package—which will reach the whole network of the device, and “discover” a functional DHCP server; If there are more than one DHCP servers functional, they will respond to a OFFER package and “suggest” Client set available IP address; Client selects the IP address and send a REQUEST data package to the corresponding server, asking the permission of using the address; We suggest set server of the IP address and return an ACK to confirm associated IP address. Luckily, the acquisition of IP address mentioned above has been achieved in library file of dhcp.cpp. Next, we’ll compile a simple example to present the use of DHCP server. Schematic
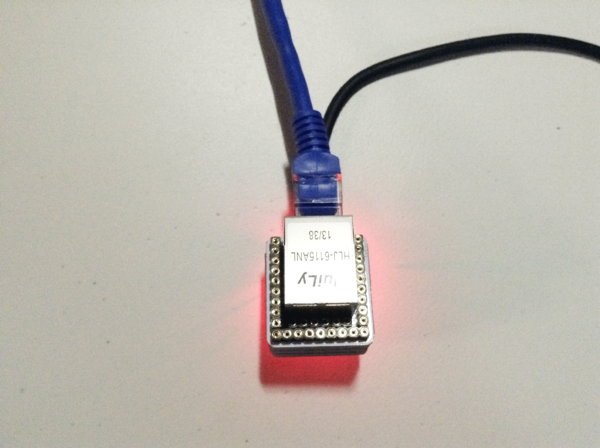
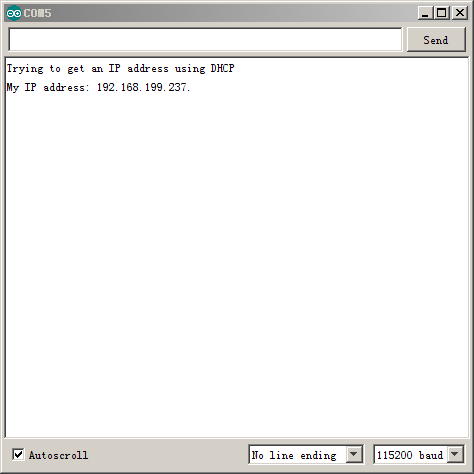
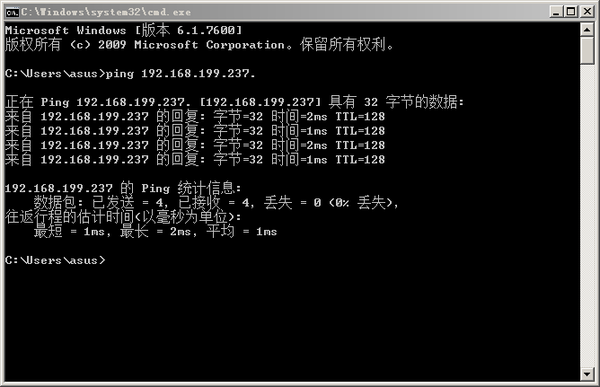
Stack them and then plug in network cable. As follows: ProgramDebuggingStep 1: First, make sure you have _02_Microduino_Ethernet_WIZ library in your IDE and put it into libraries folder of your IDE. Step 2: If there still exists Ethernet library in the libraries folder of your IDE, it needs to be deleted since the previous Ethernet is compiled according to W5100. Then you need to change _02_Microduino_Ethernet_WIZ so that the library function can be corresponding with the pin of Microduino-W5500: Find w5100.h in utility folder of _02_Microduino_Ethernet_WIZ library. Change #define wiz_cs_pin 8 //CS_PIN of the code to #define wiz_cs_pin 10 //CS_PIN. Step 3: Interpret the code: // start the Ethernet connection:
Serial.println("Trying to get an IP address using DHCP");
if (Ethernet.begin(mac) == 0) {
Serial.println("Failed to configure Ethernet using DHCP");
// initialize the ethernet device not using DHCP:
#if defined(WIZ550io_WITH_MACADDRESS)
Ethernet.begin(ip, gateway, subnet);
#else
Ethernet.begin(mac, ip, gateway, subnet);
#endif
}
The code above uses DHCP to assign IP address firstly. So, if the assignment failed, you need to assign the IP address defined previously. Step 4: Download the code and pass compile. Step 5: If everything works fine, you can open the serial port and acquire IP address assigned by DHCP. With the IP, you can have a ping connection with your Microduino. ResultIf you can check your DHCP server (Usually, you can find it in the DHCP client of our router), you will see a newly connected device. Video |


