Difference between revisions of "Buzzer Alarm"
(Created page with "{| style="width: 800px;" |- | ==Purpose== This coure will show you the way to use Microduino buzzer to play music. ==Equipment== *'''Microduino-CoreUSB''' *'''Microdu...") |
|||
| (5 intermediate revisions by 3 users not shown) | |||
| Line 1: | Line 1: | ||
| + | {{Language| Buzzer Alarm}} | ||
{| style="width: 800px;" | {| style="width: 800px;" | ||
|- | |- | ||
| | | | ||
| − | == | + | ==Objective== |
| − | This | + | This tutorial will show you how to use Microduino-buzzer with three examples. |
| + | [[File:MicroduinoBuzzer.jpg|600px|center]] | ||
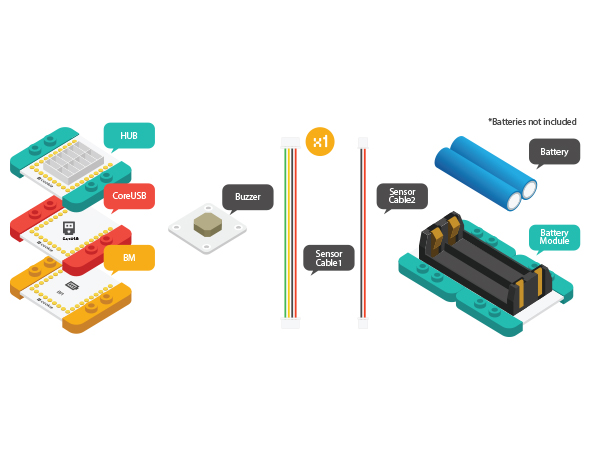
==Equipment== | ==Equipment== | ||
| Line 10: | Line 12: | ||
*'''[[Microduino-BUZZER]]''' | *'''[[Microduino-BUZZER]]''' | ||
*'''[[Microduino-Sensorhub]]''' | *'''[[Microduino-Sensorhub]]''' | ||
| + | *Other hardware equipment | ||
| + | **USB cable One | ||
| + | [[File:MicroduinoBuzzer-Equipment.jpg|600px|center]] | ||
| − | * | + | ==Description== |
| − | ** | + | Generally, buzzer can be divided into active buzzer and passive buzzer. |
| + | *Active buzzer | ||
| + | **Internal oscillating and driving circuit. With voltage signal(high level), the buzzer can make sound. | ||
| + | ***Advantage: Easy to use。 | ||
| + | ***Disadvantage: only one single tone left since fixed frequency. | ||
| + | *Passive buzzer | ||
| + | **Since there is no internal oscillating source, the buzzer can't make sound with DC signal. It has to be driven by changing power signal. | ||
| + | ***Advantage: With controllable sound frequency, you can achieve the effect of seven musical notes. | ||
| + | ***Disadvantage: A little hard to control. | ||
| − | == | + | ==Example 1: Let the buzzer goes off== |
| − | Buzzer | + | ===Build module circuit=== |
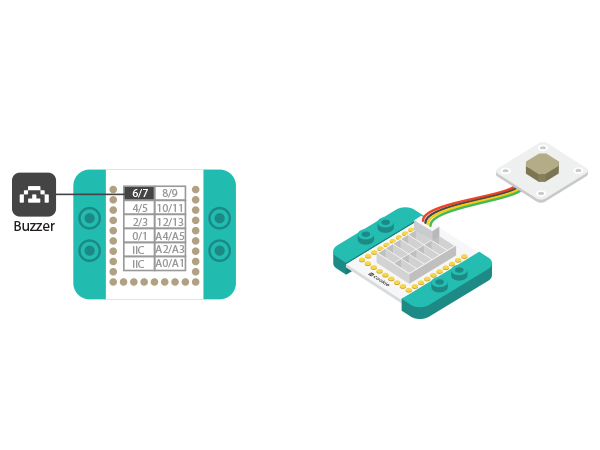
| + | *Setup 1: Connect the Buzzer sensor to interface(6) on the Sensorhub module with connecting line. | ||
| + | [[File:MicroduinoBuzzer-D6.jpg|600px|center]] | ||
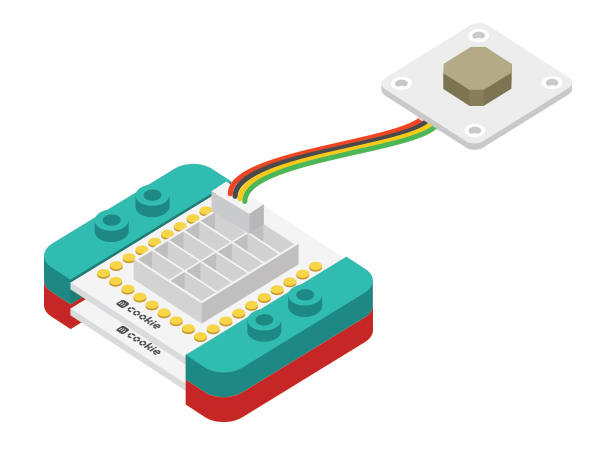
| + | *Setup 2: Stack the Sensorhub and the CoreUSB together. | ||
| + | [[File:MicroduinoBuzzer-hub-coreusb.jpg|600px|center]] | ||
| − | == | + | ===Debugging=== |
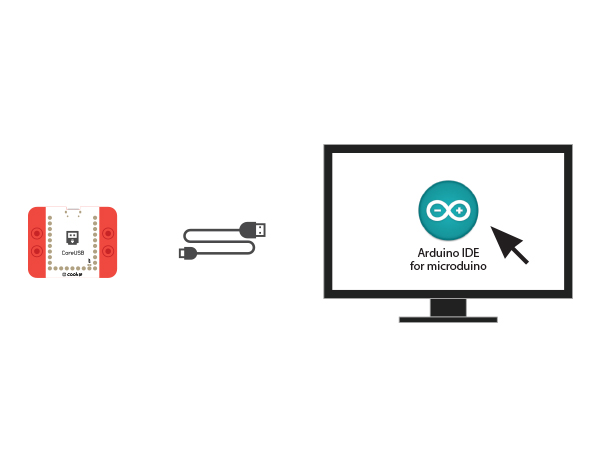
| − | * | + | *Setup 1: Use usb cable to connect CoreUSB and PC/Mac and then open Arduino IDE. |
| + | [[File:CoreUSB_Ble_pc.jpg|600px|center]] | ||
| + | * Setup 2: Download the code and copy it to IDE. | ||
<source lang="cpp"> | <source lang="cpp"> | ||
| − | + | #define buzzer_pin 6 //Define buzzer pin | |
| − | + | #define buzzer_fre 600 //Define output frequency | |
| − | + | ||
| − | + | void setup() | |
| − | + | { | |
| − | } | + | pinMode(buzzer_pin,OUTPUT); |
| − | + | } | |
| − | + | ||
| − | + | void loop() | |
| − | + | { | |
| − | + | tone(buzzer_pin,buzzer_fre); //Drive the buzzer | |
| − | + | } | |
| − | + | </source> | |
| + | Select Microduino-CoreUSB as the board card as well as corresponding port(COMXX). Click the right arrow(—>)and download program. When you see upload finish notice, it means the program has been written into CoreUSB. Then, you'll hear buzzer goes off. | ||
| + | *"tone(pin,fre)" Function | ||
| + | **Fixed pin (pin) and output frequency (fre) signal. | ||
| + | **You can change the value of buzzer_fre and watch buzzer change. | ||
| + | ==Example 2: Buzzer makes alarm== | ||
| + | *Copy program code to IDE and download it to Core board. | ||
| + | <source lang="cpp"> | ||
| + | #define buzzer_pin 6 //Define buzzer pin | ||
| − | void setup() { | + | void setup() |
| − | for (int | + | { |
| + | pinMode(buzzer_pin,OUTPUT); | ||
| + | } | ||
| + | |||
| + | void loop() | ||
| + | { | ||
| + | for(int i=200;i<=800;i++) //Increase frequency from 200HZ to 800HZ in a circular manner. | ||
| + | { | ||
| + | tone(buzzer_pin,i); //Output frequency in Number four port. | ||
| + | delay(5); //The frequency lasts 5ms. | ||
| + | } | ||
| + | delay(2000); //The highest frequency lasts 2s. | ||
| + | for(int i=800;i>=200;i--) | ||
{ | { | ||
| − | + | tone(buzzer_pin,i); | |
| − | tone( | + | delay(10); //The frequency lasts 10ms. |
| − | |||
| − | delay( | ||
| − | |||
} | } | ||
| − | |||
| − | |||
| − | |||
} | } | ||
</source> | </source> | ||
| + | "for(int i=200;i<=800;i++)" Description: The value of 'i' is 200 initially, which increases 1 each time the 'for' function executes and it will exit from 'for' loop until the value reaches 800. Users can change parameters and watch buzzer change. | ||
| − | + | <br>The example adopts 'for' loop to change frequency and therefore make alarm. | |
| − | |||
| − | |||
| − | |||
| − | == | + | ==Example 3: Play music== |
| + | |||
| + | *Program code | ||
| + | <source lang="cpp"> | ||
| + | #define buzzer_pin 6 //Define buzzer pin | ||
| + | int song[] = { | ||
| + | 262, 262, 294, 262, 349, 330, | ||
| + | 262, 262, 294, 262, 392, 349, | ||
| + | 262, 262, 523, 440, 349, 330, 294, | ||
| + | 494, 494, 440, 349, 392, 349 | ||
| + | }; | ||
| − | + | int noteDurations[] = { | |
| − | + | 4, 4, 2, 2, 2, 1, | |
| − | + | 4, 4, 2, 2, 2, 1, | |
| + | 4, 4, 2, 2, 2, 2, 2, | ||
| + | 4, 4, 2, 2, 2, 1 | ||
| + | }; | ||
| − | + | void setup() { | |
| − | + | pinMode(buzzer_pin, OUTPUT); | |
| − | + | } | |
| − | + | void loop() { | |
| − | + | song_play(); | |
| − | + | } | |
| − | == | + | void song_play() |
| + | { | ||
| + | for (int thisNote = 0; thisNote < 25; thisNote++) | ||
| + | { | ||
| + | int noteDuration = 1000 / noteDurations[thisNote]; | ||
| + | tone(buzzer_pin, song[thisNote], noteDuration); | ||
| + | int pauseBetweenNotes = noteDuration * 1.20; | ||
| + | delay(pauseBetweenNotes); | ||
| + | noTone(buzzer_pin); | ||
| + | } | ||
| + | }</source> | ||
| + | ' song_play()' is music play function and the note (frequency) is saved in ' song[]'. ' noteDurations[]' represents rhythm. | ||
| + | <br>Music is controlled by tone() and change this function means changing music rhythm. Two types of code: tone(pin, frequency, duration) or tone(pin, frequency) | ||
| + | <br> Seen from the first function, 'pin' represents the pin connecting the speaker and 'frequency' represents sound frequency and 'duration' means time duration (The unit is 'ms'). | ||
| + | <br> If using the second function, you need another noTone() function to control noTone(pin) and stop music. | ||
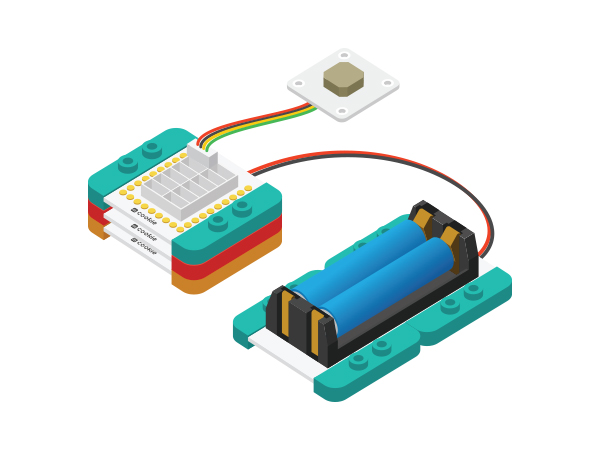
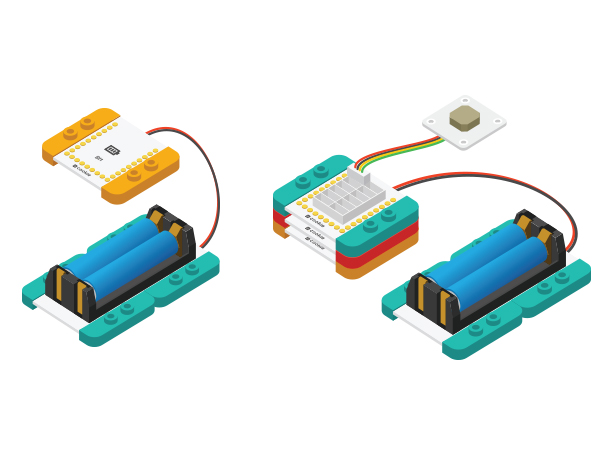
| + | *Connect the activated buttery box and BM module, stack them together and finishing buildup. | ||
| + | [[File:MicroduinoBuzzer-Equipment-ok.jpg|600px|center]] | ||
| − | + | |} | |
Latest revision as of 07:25, 4 August 2017
| Language: | English • 中文 |
|---|
ContentsObjectiveThis tutorial will show you how to use Microduino-buzzer with three examples. Equipment
DescriptionGenerally, buzzer can be divided into active buzzer and passive buzzer.
Example 1: Let the buzzer goes offBuild module circuit
Debugging
#define buzzer_pin 6 //Define buzzer pin
#define buzzer_fre 600 //Define output frequency

void setup()
{
  pinMode(buzzer_pin,OUTPUT);
}

void loop()
{
    tone(buzzer_pin,buzzer_fre);    //Drive the buzzer
}
Select Microduino-CoreUSB as the board card as well as corresponding port(COMXX). Click the right arrow(—>)and download program. When you see upload finish notice, it means the program has been written into CoreUSB. Then, you'll hear buzzer goes off.
Example 2: Buzzer makes alarm
#define buzzer_pin 6 //Define buzzer pin

void setup()
{
  pinMode(buzzer_pin,OUTPUT);
}

void loop()
{
  for(int i=200;i<=800;i++)  //Increase frequency from 200HZ to 800HZ in a circular manner.
  {
    tone(buzzer_pin,i);    //Output frequency in Number four port.
    delay(5);      //The frequency lasts 5ms.
  }
  delay(2000);     //The highest frequency lasts 2s.
  for(int i=800;i>=200;i--)
  {
    tone(buzzer_pin,i);
    delay(10); //The frequency lasts 10ms.
  }
}
"for(int i=200;i<=800;i++)" Description: The value of 'i' is 200 initially, which increases 1 each time the 'for' function executes and it will exit from 'for' loop until the value reaches 800. Users can change parameters and watch buzzer change.
Example 3: Play music
#define buzzer_pin 6 //Define buzzer pin
int song[] = {
  262, 262, 294, 262, 349, 330,
  262, 262, 294, 262, 392, 349,
  262, 262, 523, 440, 349, 330, 294,
  494, 494, 440, 349, 392, 349
};

int noteDurations[] = {
  4, 4, 2, 2, 2, 1,
  4, 4, 2, 2, 2, 1,
  4, 4, 2, 2, 2, 2, 2,
  4, 4, 2, 2, 2, 1
};

void setup() {
  pinMode(buzzer_pin, OUTPUT);
}

void loop() {
  song_play();
}

void song_play()
{
  for (int thisNote = 0; thisNote < 25; thisNote++)
  {
    int noteDuration = 1000 / noteDurations[thisNote];
    tone(buzzer_pin, song[thisNote], noteDuration);
    int pauseBetweenNotes = noteDuration * 1.20;
    delay(pauseBetweenNotes);
    noTone(buzzer_pin);
  }
}
' song_play()' is music play function and the note (frequency) is saved in ' song[]'. ' noteDurations[]' represents rhythm.
|
