Difference between revisions of "The Use of Light Sensor"
From Microduino Wiki
(→Experiment: Detect analog Brightness Value) |
|||
| (One intermediate revision by one other user not shown) | |||
| Line 4: | Line 4: | ||
| | | | ||
==Outline== | ==Outline== | ||
| − | Microduino | + | The Microduino Light Sensor uses a photosensitive resistor to detect the amount of ambient light present. The sensor is effectively a resistor that changes in value as the light intensity surrounding it changes. The sensor will output a voltage value that corresponds to the amount of light detected by the sensor. |
| + | |||
| + | Couple the sensor to an LED and you have a smart light that illuminates a room as it gets dark! | ||
| + | |||
==Specification== | ==Specification== | ||
| − | *Electrical | + | *Electrical Specifications |
| − | ** | + | **Analog Output Device |
| − | **Output | + | **Analog Output: 0-1023 (with Microduino Core modules) |
| − | * | + | *Technical Specifications |
| − | **Bright Resistance( | + | **Bright Resistance(up to 100Lux): 8-20kΩ |
**Dark Resistance: 1MΩ | **Dark Resistance: 1MΩ | ||
| − | **Sensitivity: | + | **Sensitivity: |
| − | * | + | ***Given light intensity of 10Lux and 100Lux, with corresponding resistances (R10 and R100), the sensitivity factor is 0.8. This gives you a sense of how resistance changes with a given quantitative change in the amount of light present. |
| − | ** | + | *Dimensions |
| − | **1.27mm-pitch | + | **Board: 20mm x 10mm |
| − | *Connection | + | **Connector: 4-Pin interface, 1.27mm-pitch |
| − | ** | + | *Connection Interface |
| + | **Pins: Signal, VCC (power), GND (ground) and NC (not connected) | ||
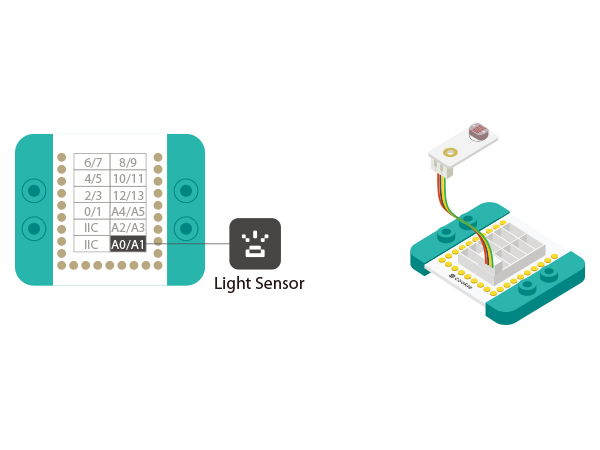
| + | **'''''NOTE''''': Sensor must be connected to analog capable ports (i.e. A0-A7) | ||
[[File:sensor-light.jpg|center|400px]] | [[File:sensor-light.jpg|center|400px]] | ||
| Line 38: | Line 43: | ||
===Preparation=== | ===Preparation=== | ||
| − | *Setup | + | *Setup 1: Connect Microduino-Light and the A0 analog port of the Hub. |
[[file:mCookie-pir-sensor.JPG|600px|center]] | [[file:mCookie-pir-sensor.JPG|600px|center]] | ||
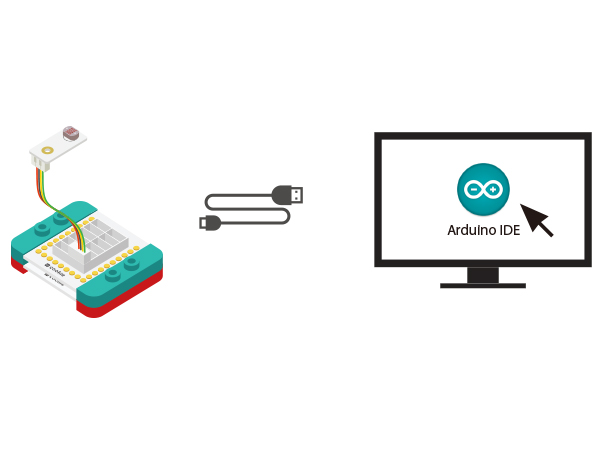
| − | *Setup | + | *Setup 2: Connect the CoreUSB, Hub and Light to the computer with a USB cable. |
[[file:mCookie-Light-pc.JPG|600px|center]] | [[file:mCookie-Light-pc.JPG|600px|center]] | ||
| Line 71: | Line 76: | ||
===Program Debugging=== | ===Program Debugging=== | ||
| − | * | + | *"#define sensorPin A0" defines sensor interface. |
| − | * | + | *Use"analogRead(sensorPin);"function to read the output analog value of the sensor and therefore, to judge light intensity change. |
==Application== | ==Application== | ||
| − | *Light | + | *Couple the Light Sensor with an LED and you can automate the intensity of the LED based on how bright or dark it is in a room. |
==Video== | ==Video== | ||
|} | |} | ||
Latest revision as of 06:43, 30 September 2016
ContentsOutlineThe Microduino Light Sensor uses a photosensitive resistor to detect the amount of ambient light present. The sensor is effectively a resistor that changes in value as the light intensity surrounding it changes. The sensor will output a voltage value that corresponds to the amount of light detected by the sensor. Couple the sensor to an LED and you have a smart light that illuminates a room as it gets dark! Specification
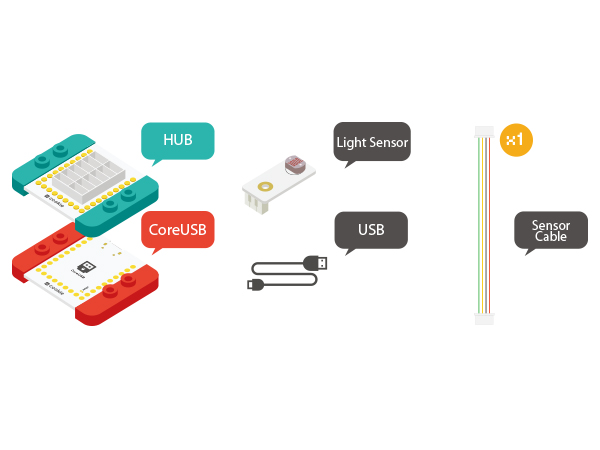
DevelopmentEquipment
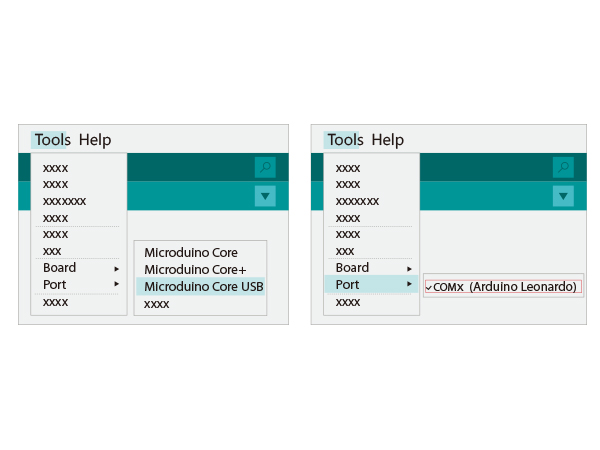
Preparation
Experiment: Detect analog Brightness Value
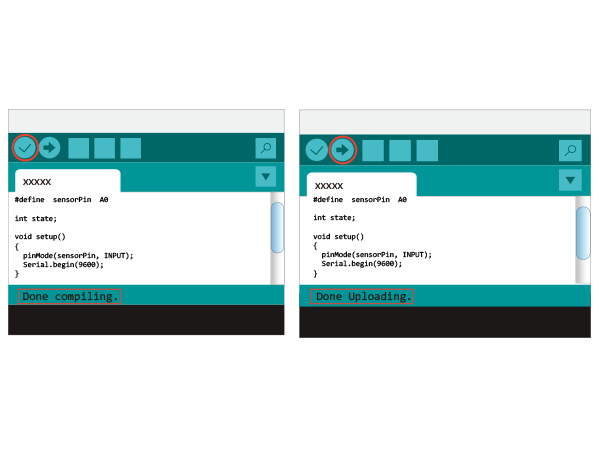
#define  sensorPin  A0

int state;

void setup()
{
  pinMode(sensorPin, INPUT);
  Serial.begin(9600);
}
void loop()
{
  state = analogRead(sensorPin);
  Serial.print("state:");
  Serial.println(state);
  delay(100);
}
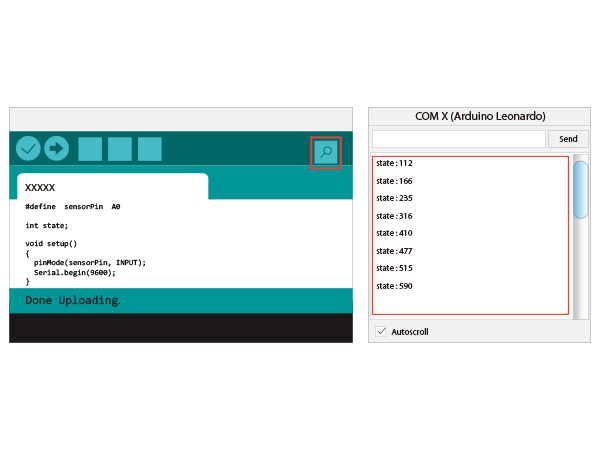
The stronger the light is, the greater the output value becomes. Therefore, you can build some projects controlled by light intensity change. Program Debugging
Application
Video |
