Difference between revisions of "Microduino ENC Network (2)"
(→Debug) |
(→Result) |
||
| (One intermediate revision by the same user not shown) | |||
| Line 67: | Line 67: | ||
==Result== | ==Result== | ||
| + | And our DHCP server will show a new device connected (EtherCard library chooses Microduino-XX as device name,with XX the last octet of MAC address). | ||
| − | |||
==Video== | ==Video== | ||
|} | |} | ||
Latest revision as of 14:23, 29 April 2014
| Language: | English • 中文 |
|---|
ObjectiveThis tutorial will show you how to use a DHCP server to automatically configure network parameters. Equipment
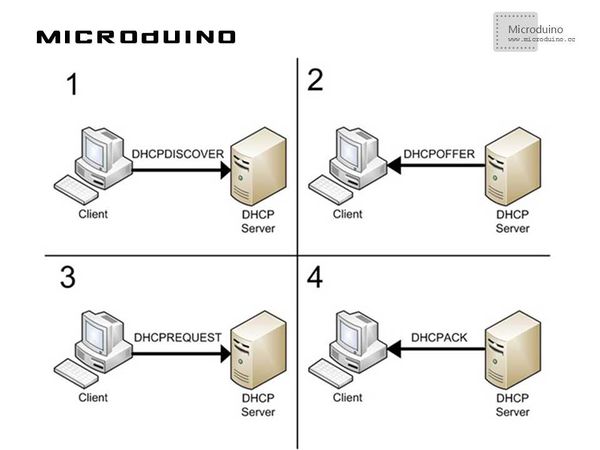
DHCPUsually, in local network you can find a DHCP server (Dynamic Host Configuration Protocol), that is a service which automatically configure the devices connected to the network. Without explaining too deeply the protocol, it works this way: The device (client) that needs an IP address, sends a DISCOVERY broadcast packet (that is a packet which will reach all the devices in the network), to “discover” if there are DHCP servers available; If one or more DHCP servers are alive, they answer with an OFFER packet, “proposing” an available IP address to the requesting client; The client chooses one of the offered IP addresses and sends a REQUEST packet, to ask for permission to use that address; The server that proposed it, answers with an ACK packet to confirm the IP address association. Luckly what I described above has altready been implemented for us in the dhcp.cpp library file: I’m going to show a simple sketch using DHCP services. Schematic
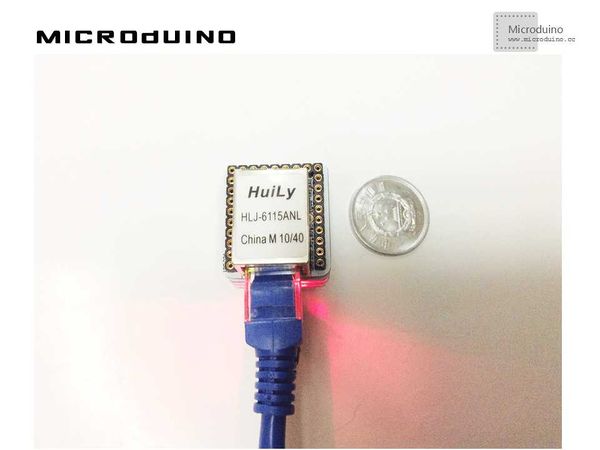
Stack all modules and then connect the ethernet cable, as follows:
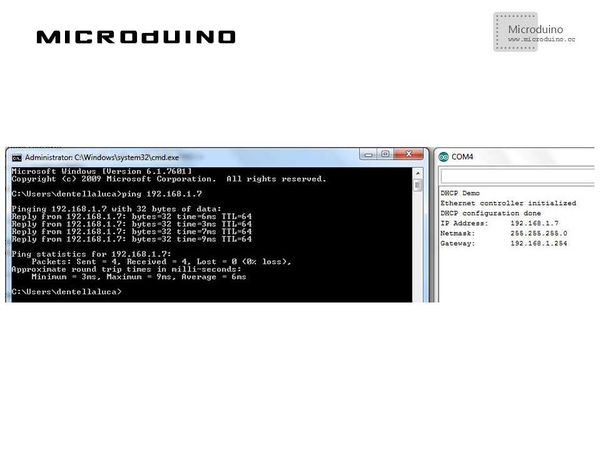
ProgramDownload the program: https://github.com/Microduino/Microduino_Tutorials/tree/master/Microduino_ENC/ENCnetworktwo DebugStep 1:Download the EtherCard library and copy to your libraries fold of IDE, then restart IDE. https://github.com/jcw/ethercard Step 2:Explain the program: //First, I haven’t defined a fixed IP address anymore, just the MAC address. The controller’s initialization is still run with the usual begin() method. ether.dhcpSetup(); //The dhcpSetup() method performs all the steps detailed above: looks for a DHCP server, check its replies, choose an IP address and ask for permission to use it. That method waits for 30 seconds, after that it returns an error. ether.printIp(); //The printIp() method is an easy way to print on serial monitor an IP address (that is stored in Ethernet buffer as an array of uint8_t). Step 3:Compile the code and download it. Step 4:If everything goes right, you should be able to ping your Arduino again: ResultAnd our DHCP server will show a new device connected (EtherCard library chooses Microduino-XX as device name,with XX the last octet of MAC address). Video |


