Difference between revisions of "ArduBlock Scratch Getting Started"
From Microduino Wiki
(Created page with "{{Language|Microduino Scratch Getting started}} {| style="width: 800px;" |- | ==Software Preparation== *Build Microduino development environment, referring to: '''Microduino...") |
|||
| Line 6: | Line 6: | ||
*Build Microduino development environment, referring to: '''[[Microduino Getting started]]'''. | *Build Microduino development environment, referring to: '''[[Microduino Getting started]]'''. | ||
*Ardublock jar environment packet, referring to official website: | *Ardublock jar environment packet, referring to official website: | ||
| − | '''[http://sourceforge.net/projects/ardublock/files/latest/download?source=dlp_top3 Ardublock]''' | + | '''[http://sourceforge.net/projects/ardublock/files/latest/download?source=dlp_top3 Ardublock]''' |
[[File:microduinoGettingStartHeader.jpg|400px|center|thumb]] | [[File:microduinoGettingStartHeader.jpg|400px|center|thumb]] | ||
==Build Ardublock Development Environment== | ==Build Ardublock Development Environment== | ||
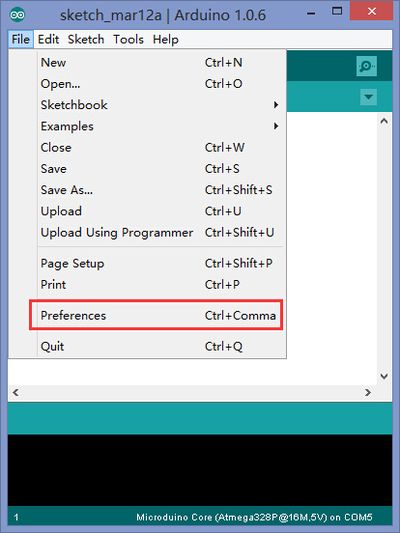
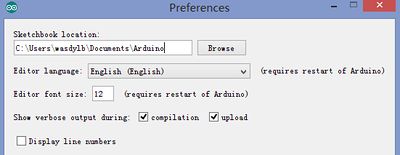
| − | *Start Arduino IDE and open | + | *Start Arduino IDE and open "File"->"Preferences". |
[[File:microduinoGettingStart Preferences.jpg|400px|center|thumb]] | [[File:microduinoGettingStart Preferences.jpg|400px|center|thumb]] | ||
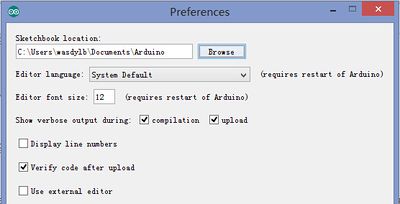
| − | *Find | + | *Find "Sketchbook location:" and open file directory in calculation. |
| − | **Under home directory of | + | **Under home directory of "Documents/ Arduino" by default in Mac. |
| − | **Under home directory of | + | **Under home directory of "sketchbook" by default in Linux. |
| − | **Under home directory of | + | **Under home directory of "Documents\ Arduino" by default in Windows. |
[[File:microduinoGettingStart Sketch.jpg|400px|center|thumb]] | [[File:microduinoGettingStart Sketch.jpg|400px|center|thumb]] | ||
*Create tools directory here; | *Create tools directory here; | ||
| Line 22: | Line 22: | ||
*Put the downloaded ArduBlock jar under the directory of tool. | *Put the downloaded ArduBlock jar under the directory of tool. | ||
[[File:microduino_ArduBlock_road.jpg|400px|center|thumb]] | [[File:microduino_ArduBlock_road.jpg|400px|center|thumb]] | ||
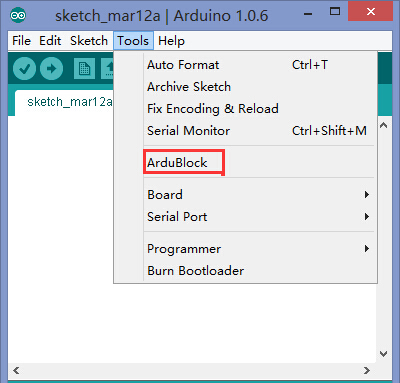
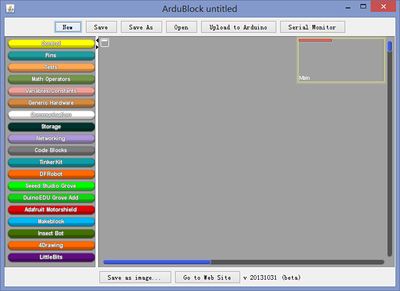
| − | *Restart Arduino and you will find ArduBlock under | + | *Restart Arduino and you will find ArduBlock under "Tool". You can begin programming by clicking "start". |
[[File:microduino_ArduBlock_ok.jpg|400px|center|thumb]] | [[File:microduino_ArduBlock_ok.jpg|400px|center|thumb]] | ||
[[File:microduino_ArduBlock_face.jpg|400px|center|thumb]] | [[File:microduino_ArduBlock_face.jpg|400px|center|thumb]] | ||
Latest revision as of 09:38, 13 September 2016
| Language: | English • 中文 |
|---|
Software Preparation
Build Ardublock Development Environment
|
