Difference between revisions of "Vibration Sensor"
From Microduino Wiki
| Line 9: | Line 9: | ||
==Specification== | ==Specification== | ||
*Electrical specification | *Electrical specification | ||
| − | *Operation | + | *Operation voltage: 5V |
**Input device | **Input device | ||
*Tech parameters | *Tech parameters | ||
| Line 33: | Line 33: | ||
[[File:shock-module.jpg|center|600px]] | [[File:shock-module.jpg|center|600px]] | ||
===Preparation=== | ===Preparation=== | ||
| − | *Setup | + | *Setup 1: Connect the Shake sensor's interface with the Hub's digital D6 port. |
[[file:mCookie-shock-sensor.JPG|600px|center]] | [[file:mCookie-shock-sensor.JPG|600px|center]] | ||
| − | *Setup | + | *Setup 2: Stack the CoreUSB, Hub and Shake sensor together and then connect them to the computer with a USB cable. |
[[file:mCookie-shock-pc.JPG|600px|center]] | [[file:mCookie-shock-pc.JPG|600px|center]] | ||
Revision as of 06:48, 30 September 2016
Contents[hide]OutlineVibration sensor---whose internal structure is like a metal ball that is fixed in a special spring as pole, around it is the other pole. When the vibration gets to an extent, the two poles are connected so as to judge the shock occurs. Vibration sensor outputs digital signal.
Specification
DevelopmentEquipment
Preparation
Debugging
#define pushButton  6

int buttonState;

// the setup routine runs once when you press reset:
void setup() {
  // initialize serial communication at 9600 bits per second:
  Serial.begin(9600);
  // make the pushbutton's pin an input:
  pinMode(pushButton, INPUT);
}

// the loop routine runs over and over again forever:
void loop() {
  // read the input pin:
  buttonState = digitalRead(pushButton);//Read the input value of the Shake sensor.
  // print out the state of the button:
  Serial.print("buttonState:");
  Serial.println(buttonState);  //Print the sensor value in the serial port.
  delay(100);     //100ms delay
}
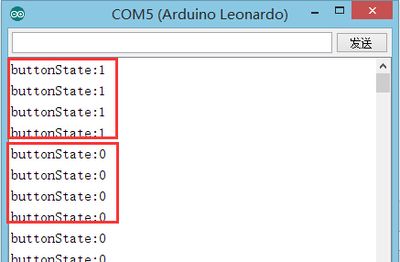
*Adopt "digitalRead(XX)" function to read vibration digital signal with two status of "0" and "1". Application
Video |


