Difference between revisions of "Somatosensory interaction - Potentiometer"
From Microduino Wiki
| Line 16: | Line 16: | ||
**330Ω resistor one | **330Ω resistor one | ||
**Bread one | **Bread one | ||
| − | **Breadboard Jumper | + | **Breadboard Jumper one box |
==Schematic== | ==Schematic== | ||
| Line 28: | Line 28: | ||
==Debug== | ==Debug== | ||
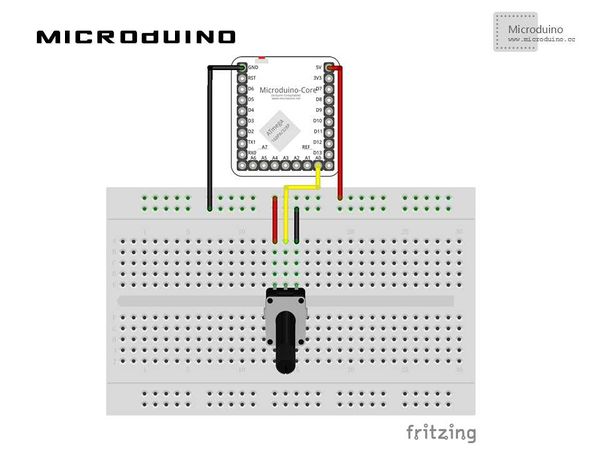
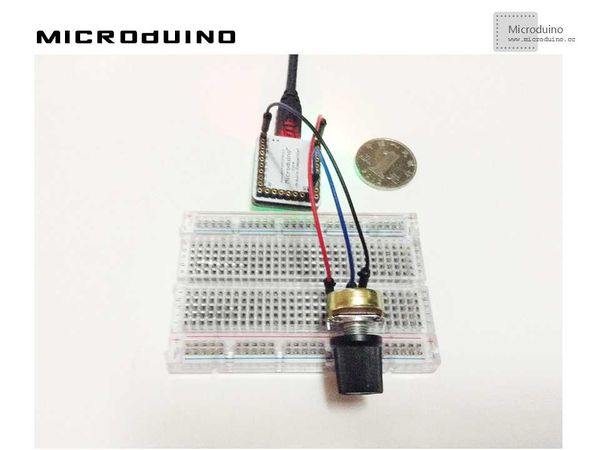
| − | Step | + | Step 1: Set up hardware system, as follows: |
[[File:InteractivePotentiometerConnectionDiagram.jpg|600px|center|thumb]] | [[File:InteractivePotentiometerConnectionDiagram.jpg|600px|center|thumb]] | ||
| − | Step | + | Step 2: Explain the code: |
//Read potentiometer's simulation value, and assign values to the smiling face of the x coordinate values | //Read potentiometer's simulation value, and assign values to the smiling face of the x coordinate values | ||
Latest revision as of 09:04, 13 September 2016
| Language: | English • 中文 |
|---|
ObjectiveThis tutorial will teach you how to use the potentiometer to control Processing, then to control the movement of smile face on screen. Equipment
SchematicProgramDebugStep 1: Set up hardware system, as follows: Step 2: Explain the code: //Read potentiometer's simulation value, and assign values to the smiling face of the x coordinate values void draw() {
sensorValue = arduino.analogRead(potPin); //Reading the value of the potentiometer
background(255);
image(face,sensorValue,80);
}
Step 3: Compile the code and download it. Step 4: After running, a smile face will display on the left side, rotate the potentiometer and then observe the smile face's change. ResultThe smiling face on the screen will move around with the potentiometer's rotation, as follows: Video |


