Difference between revisions of "Microduino W5500 Network (4)"
(Created page with "{| style="width: 800px;" |- | ==Purpose== This course will show you how to turn your Microduino to a chat server. ==Equipment== *'''Microduino-Core''' *'''Microduino-U...") |
|||
| Line 71: | Line 71: | ||
Step 5: Have a try if IP can be ping connected. | Step 5: Have a try if IP can be ping connected. | ||
| − | Open telnet: | + | Open telnet: "Start"->"Run"->"telnet"and input "?/help", you can see help information. Input "open 192.168.199.177" and press "Enter", it shows "connecting to 192.168.199.177". |
[[File:MicroduinoW5500OpenTelnet.png|600px|center|thumb]] | [[File:MicroduinoW5500OpenTelnet.png|600px|center|thumb]] | ||
| − | Press | + | Press "Enter" again, the serial monitor will show "We have a new client" and the telnet client will show "Hello, client!". It means the telnet client has had a communication connection with Chat Server (Microduino-W5500). |
[[File:MicroduinoW5500TelnetConnected.png|600px|center|thumb]] | [[File:MicroduinoW5500TelnetConnected.png|600px|center|thumb]] | ||
| Line 83: | Line 83: | ||
[[File:MicroduinoW5500TelnetSendDoubleChar.png|600px|center|thumb]] | [[File:MicroduinoW5500TelnetSendDoubleChar.png|600px|center|thumb]] | ||
| − | This is because the instruction of | + | This is because the instruction of "server.write(thisChar);//"—server response data is returned to the client—is shielded. It'll be OK to just re-compile and download. |
Latest revision as of 09:39, 12 September 2016
PurposeThis course will show you how to turn your Microduino to a chat server. Equipment
Schematic
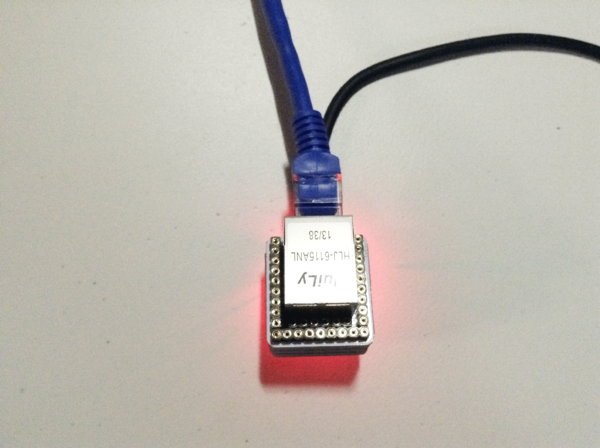
Stack them and then plug in network cable. As follows: ProgramDebuggingStep 1: First, make sure you have _02_Microduino_Ethernet_WIZ library in your IDE and put it into libraries folder of your IDE. Step 2: If there still exists the previous Ethernet library in your libraries folder, it needs to be deleted since the previous Ethernet is compiled according to W5100. Then, you need to change _02_Microduino_Ethernet_WIZ file so that the library function could be corresponding with Microduino-W5500: First find w5100.h of utility in _02_Microduino_Ethernet_WIZ library. Change #define wiz_cs_pin 8 //CS_PIN of the code to #define wiz_cs_pin 10 //CS_PIN. Step 3: Interpret the code: // when the client sends the first byte, say hello:
if (client) {
if (!alreadyConnected) {
// clead out the input buffer:
client.flush();
Serial.println("We have a new client");
client.println("Hello, client!");
alreadyConnected = true;
} //The code above achieves monitoring client telnet connection. It’ll output a friendly information if there is connection. if (client.available() > 0) {
// read the bytes incoming from the client:
char thisChar = client.read();
// echo the bytes back to the client:
server.write(thisChar);
// echo the bytes to the server as well:
Serial.write(thisChar);
}
}
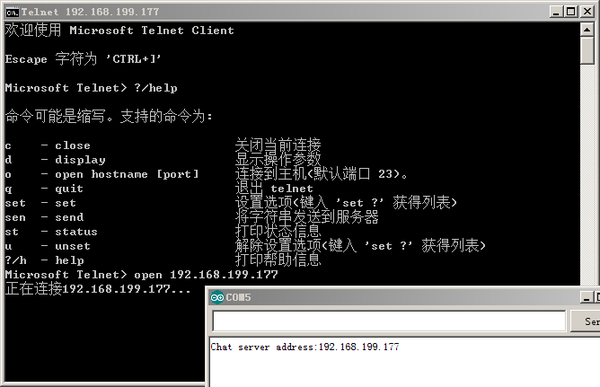
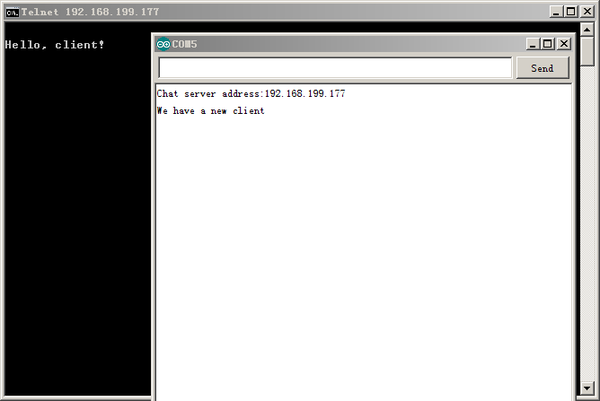
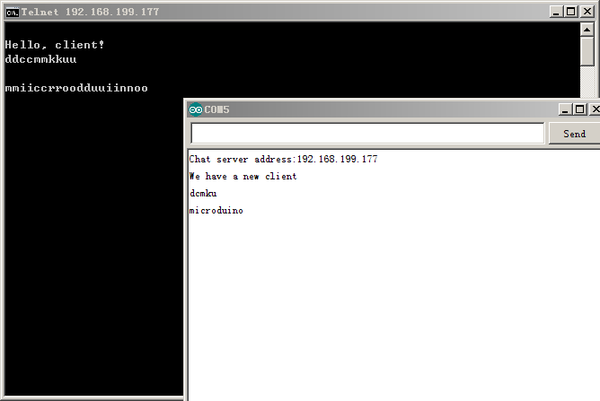
The code above achieves reading client input and returns it to the client side. Step 4: Download the code and pass compile. Step 5: Have a try if IP can be ping connected. Open telnet: "Start"->"Run"->"telnet"and input "?/help", you can see help information. Input "open 192.168.199.177" and press "Enter", it shows "connecting to 192.168.199.177". Press "Enter" again, the serial monitor will show "We have a new client" and the telnet client will show "Hello, client!". It means the telnet client has had a communication connection with Chat Server (Microduino-W5500). Next, we can send messages to Chat Server through telnet client. Chat Server will show message receiving via serial monitor. At the same time, you can see telnet client show two same characters in telnet client each time you enter a character. This is because the instruction of "server.write(thisChar);//"—server response data is returned to the client—is shielded. It'll be OK to just re-compile and download.
ResultBy Microduino-W5500, we achieve a telnet server, which can receive data sent from telnet client. Video |


