Difference between revisions of "Colored LED"
From Microduino Wiki
(→Experiment One: Get the light lighten) |
(→Preparation) |
||
| Line 52: | Line 52: | ||
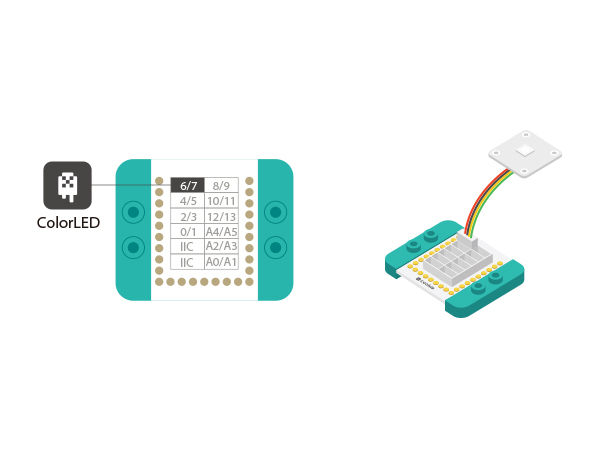
*Setup 1:Connect the '''IN''' port on the back of the Color LED with the D6 port of the Hub. (D6 is the LED control pin, which can be freely changed by users.) | *Setup 1:Connect the '''IN''' port on the back of the Color LED with the D6 port of the Hub. (D6 is the LED control pin, which can be freely changed by users.) | ||
[[file:mCookie-strandtext-sensor.JPG|600px|center]] | [[file:mCookie-strandtext-sensor.JPG|600px|center]] | ||
| − | *Setup | + | *Setup 2:Connect the CoreUSB, Hub and Color LED to the computer with a USB cable. |
[[file:mCookie-strandtext-pc.JPG|600px|center]] | [[file:mCookie-strandtext-pc.JPG|600px|center]] | ||
| + | |||
===Experiment One: Get the light lighten === | ===Experiment One: Get the light lighten === | ||
*Open Arduino IDE and copy the following code into IDE. | *Open Arduino IDE and copy the following code into IDE. | ||
Revision as of 01:35, 5 November 2015
| Language: | English • 中文 |
|---|
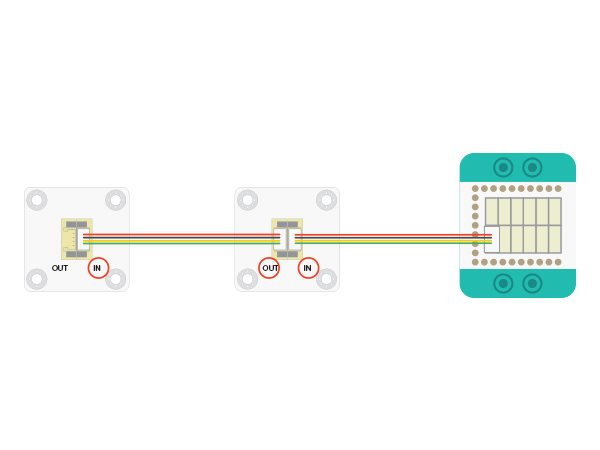
ContentsOutlineMicroduino-Color LED is a colored LED light with an built-in IC control chip, which can be cascaded arbitrarily. With only one I/O port, you can control all the lights. Each light can be controlled separately. Features
Specification
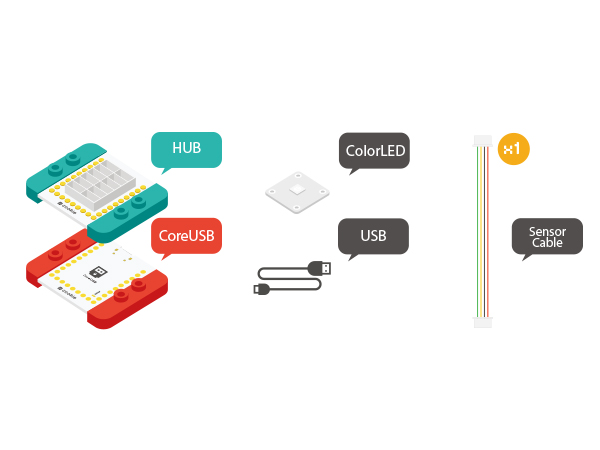
DocumentDevelopmentEquipment
Preparation
Experiment One: Get the light lighten
#include <Adafruit_NeoPixel.h>

#define PIN 6   //led control pin
#define PIN_NUM 2 //Light number allowed

Adafruit_NeoPixel strip = Adafruit_NeoPixel(PIN_NUM, PIN, NEO_GRB + NEO_KHZ800);

void setup() {
  strip.begin();
  strip.show();
}

void loop() {
  colorWipe(strip.Color(255, 0, 0), 500); // The first light goes read and after 500ms, the second light will go red.
  colorWipe(strip.Color(0, 255, 0), 500); // The first light goes read and after 500ms, the second light will go green.
  colorWipe(strip.Color(0, 0, 255), 500); // The first light goes read and after 500ms, the second light will go blue.
}

// Fill the dots one after the other with a color
void colorWipe(uint32_t c, uint8_t wait) {
  //Let each light turn to a specific color in loop. "C" indicates color; "wait" represents the time duration of each light .
  for (uint16_t i = 0; i < strip.numPixels(); i++) {
    strip.setPixelColor(i, c);
    strip.show();
    delay(wait);
  }
}
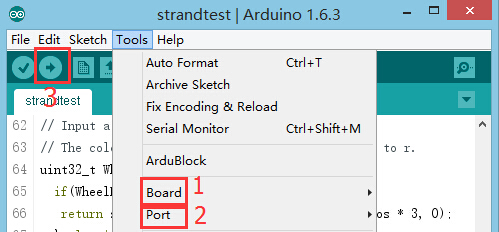
Program Debugging
Experiment Two: Breathing Light
#include <Adafruit_NeoPixel.h>

#define PIN 6   //LED light control pin
#define PIN_NUM 2 //LED light number allowed

#define val_max 255
#define val_min 0

Adafruit_NeoPixel strip = Adafruit_NeoPixel(PIN_NUM, PIN, NEO_GRB + NEO_KHZ800);

void setup() {
  strip.begin();
  strip.show();
}

void loop() {
  rainbowCycle( 255, 0, 0, 10);//Red breathing
  rainbowCycle( 0, 255, 0, 10);//Green breathing
  rainbowCycle( 0, 0, 255, 10);//Blue breathing
}

void colorSet(uint32_t c) {
  for (uint16_t i = 0; i < strip.numPixels(); i++) {
    strip.setPixelColor(i, c);
  }
  strip.show();
}

void rainbowCycle( int r, int g, int b, uint8_t wait) {
  for (int val = 0; val < 255; val++)
  {
    colorSet(strip.Color(map(val, val_min, val_max, 0, r), map(val, val_min, val_max, 0, g), map(val, val_min, val_max, 0, b)));
    delay(wait);
  }
  for (int val = 255; val >= 0; val--)
  {
    colorSet(strip.Color(map(val, val_min, val_max, 0, r), map(val, val_min, val_max, 0, g), map(val, val_min, val_max, 0, b)));
    delay(wait);
  }
}
Code Debugging
Application
|


