Difference between revisions of "The Use of Light Sensor"
From Microduino Wiki
(Created page with "{| style="width: 800px;" |- | ==Objective== How to use Microduino light sensor. ==Equipment== *'''Microduino-CoreUSB''' *'''Microduino-Light Intensity Sensor''' *'...") |
|||
| Line 1: | Line 1: | ||
| + | |||
{| style="width: 800px;" | {| style="width: 800px;" | ||
|- | |- | ||
| | | | ||
| − | == | + | ==Outline== |
| − | + | Microduino-Light adopts photosensitive resistor. It uses a resistor that is based on semiconductor's photoelectric effect and is able to change along with the intensity of t the incident light. The photosensitive resistor is generally applied in light measurement, light control and photoelectric conversion. | |
| − | + | ==Specification== | |
| − | + | *Electrical features | |
| − | == | + | **The brighter the light is, the bigger the output voltage gets. |
| − | * | + | **Output analog quantity |
| − | * | + | *Tech parameter |
| − | * | + | **Bright Resistance(10Lux): 8-20KΩ |
| − | + | **Dark Resistance: 1MΩ | |
| − | + | **Sensitivity: Under the light of 10Lux and 100Lux, the resistance rate is (R10/R100) =0.8 | |
| + | *Size | ||
| + | **Size of the Board: 20mm*10mm | ||
| + | **1.27mm-pitch 4Pin interface; | ||
| + | *Connection method | ||
| + | **Pin Description: GND, VCC, signal and NC. It needs analog port(A0-A7)to detect. | ||
| + | [[File:sensor-light.jpg|center|400px]] | ||
| + | ==Development== | ||
| + | ===Equipment=== | ||
| + | {|class="wikitable" | ||
| + | |- | ||
| + | |Module||Number||Function | ||
| + | |- | ||
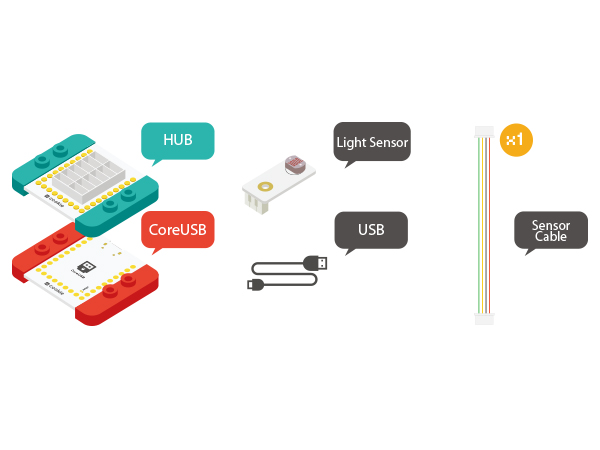
| + | |[[mCookie-CoreUSB]]||1||Core board | ||
| + | |- | ||
| + | |[[mCookie-Hub]]||1||Sensor pin board | ||
| + | |- | ||
| + | |[[Microduino-Light]]||1||Photosensitive sensor | ||
| + | |} | ||
*Other Hardware Equipment | *Other Hardware Equipment | ||
| − | ** | + | **One USB cable |
| − | + | [[File:module-light.jpg|600px|center]] | |
| − | |||
| − | |||
| − | |||
| − | |||
| − | |||
| − | |||
| − | |||
| − | [[File: | ||
| − | |||
| − | |||
| − | |||
| − | |||
| − | |||
| − | |||
| − | |||
| − | |||
| − | |||
| − | |||
| + | ===Preparation=== | ||
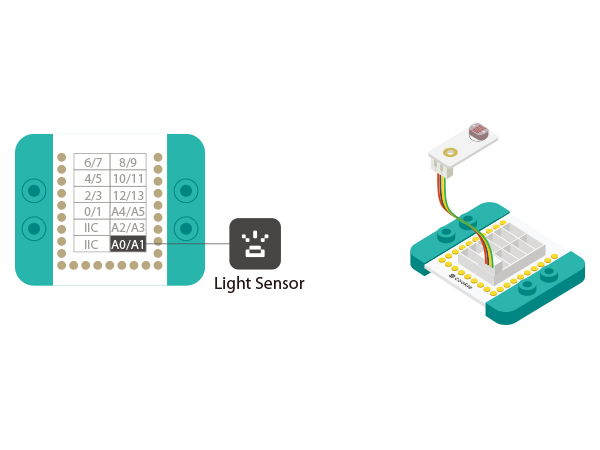
| + | *Setup 1:Connect Microduino-Light and the A0 analog port of the Hub. | ||
| + | [[file:mCookie-pir-sensor.JPG|600px|center]] | ||
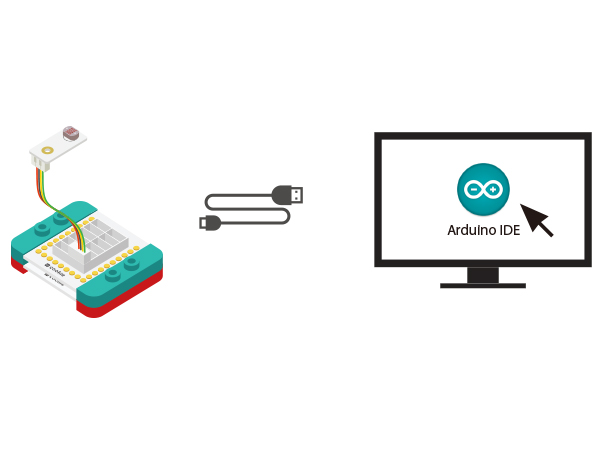
| + | *Setup 2:Connect the CoreUSB, Hub and Light to the computer with a USB cable. | ||
| + | [[file:mCookie-Light-pc.JPG|600px|center]] | ||
| − | + | ===Experiment: Detect analog Brightness Value === | |
| − | + | * Open Arduino IDE and copy the following code into IDE. | |
| − | + | <source lang="cpp"> | |
| + | #define sensorPin A0 | ||
| + | int state; | ||
| − | = | + | void setup() |
| + | { | ||
| + | pinMode(sensorPin, INPUT); | ||
| + | Serial.begin(9600); | ||
| + | } | ||
| + | void loop() | ||
| + | { | ||
| + | state = analogRead(sensorPin); | ||
| + | Serial.print("state:"); | ||
| + | Serial.println(state); | ||
| + | delay(100); | ||
| + | } | ||
| + | </source> | ||
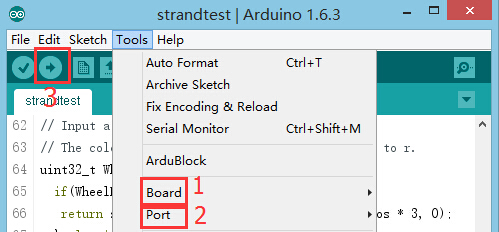
| + | * Select the right board from Tools→Serial Port in Arduino IDE and download the program. [[file:upload.JPG|500px|center]] | ||
| + | *After the download, you can open the serial monitor. The disp | ||
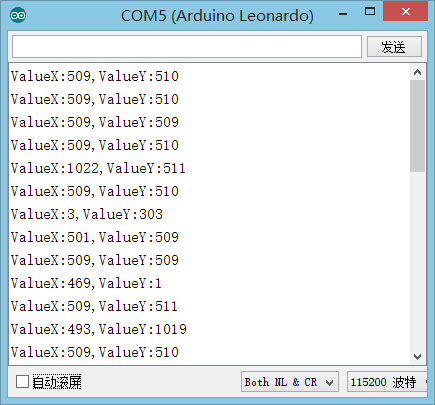
| + | After the download, you can open the serial monitor. The displayed value reflects the current light intensity. | ||
| + | [[file:mCookie-pir-res.JPG|500px|center]] | ||
| + | *Result | ||
| + | The stronger the light is, the greater the output value becomes. Therefore, you can build some projects controlled by light intensity change. | ||
| − | + | ===Program Debugging=== | |
| + | *“#define sensorPin A0”defines sensor interface. | ||
| + | *Use“analogRead(sensorPin);”function to read the output analog value of the sensor and therefore, to judge light intensity change. | ||
| + | ==Application== | ||
| + | *Light-control street lamp | ||
==Video== | ==Video== | ||
|} | |} | ||
Revision as of 06:24, 4 November 2015
ContentsOutlineMicroduino-Light adopts photosensitive resistor. It uses a resistor that is based on semiconductor's photoelectric effect and is able to change along with the intensity of t the incident light. The photosensitive resistor is generally applied in light measurement, light control and photoelectric conversion. Specification
DevelopmentEquipment
Preparation
Experiment: Detect analog Brightness Value
#define  sensorPin  A0

int state;

void setup()
{
  pinMode(sensorPin, INPUT);
  Serial.begin(9600);
}
void loop()
{
  state = analogRead(sensorPin);
  Serial.print("state:");
  Serial.println(state);
  delay(100);
}
After the download, you can open the serial monitor. The displayed value reflects the current light intensity.
The stronger the light is, the greater the output value becomes. Therefore, you can build some projects controlled by light intensity change. Program Debugging
Application
Video |
