Difference between revisions of "Lesson 14--Microduino "A simple thermometer""
From Microduino Wiki
(→Video) |
m (photo added) |
||
| Line 44: | Line 44: | ||
==Result== | ==Result== | ||
After download, you can see the temperature data from serial monitor, refreshed every 1s. | After download, you can see the temperature data from serial monitor, refreshed every 1s. | ||
| + | |||
| + | [[File:Lesson14.jpg|600px|thumbnail|center]] | ||
| + | |||
==Video== | ==Video== | ||
|} | |} | ||
https://www.youtube.com/watch?v=Yo3pF0iPbWk | https://www.youtube.com/watch?v=Yo3pF0iPbWk | ||
Latest revision as of 07:45, 3 July 2015
| Language: | English • 中文 |
|---|
ContentsObjectiveThis lesson will introduce the temperature sensor, combined with Microduino to be a simple thermometer. Digital temperature sensors have a common DS18b20, DHT11, SHT10 and so one. Analog temperature sensor has thermistor, AD590, LM35D so on. Equipment
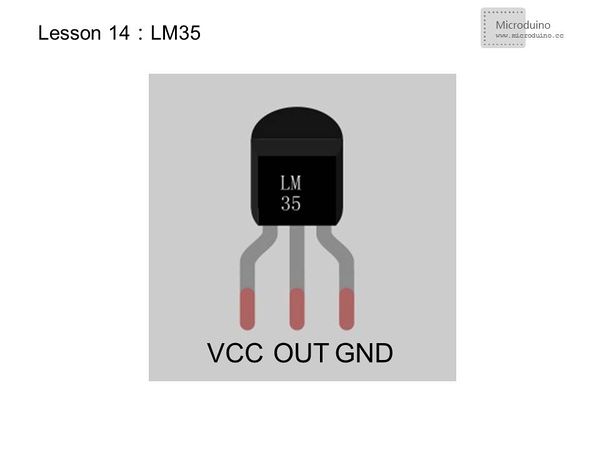
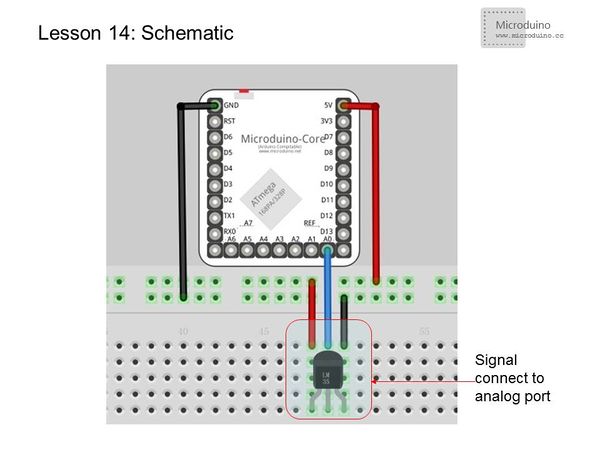
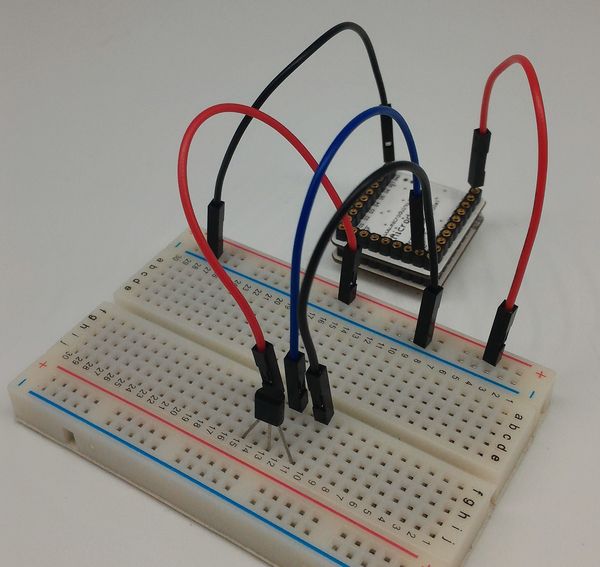
LM35 temperature sensorThis sensor can measure of 0-100 degrees Celsius temperature, and output the value of voltage. Starting from 0 degrees temperature rise per 1 degree output voltage will increase 10 mv, so that we can use the analog port to detection sensor voltage, after simple to calculate the measured temperature value. LM35 connectionExperimental schematicThe connection is very easy,just pay attention to the positive and negative。 Programvoid setup() {
Serial.begin(115200); //Set teh baud rate to 115200
}
void loop() {
int n = analogRead(A0); //Read the voltage from A0
float vol = n * (5.0 / 1023.0*100); //Use a float variable to save temperature value which was calculated from voltage.
Serial.println(vol); //Output the temperature from serial
delay(1000); //Wait for 1s for refresh
}ResultAfter download, you can see the temperature data from serial monitor, refreshed every 1s. Video |


