Difference between revisions of "Somatosensory interaction - ultrasound"
(Created page with "{{Language | 体感互动-超声波}} {| style="width: 800px;" |- | ==Objective== This turorial will display a distance that ultrasonic sensor measured in Processing with a cu...") |
|||
| Line 4: | Line 4: | ||
| | | | ||
==Objective== | ==Objective== | ||
| − | This | + | This tutorial will display a distance that ultrasonic sensor measured in Processing with a curve. |
==Equipment== | ==Equipment== | ||
| Line 27: | Line 27: | ||
==Debug== | ==Debug== | ||
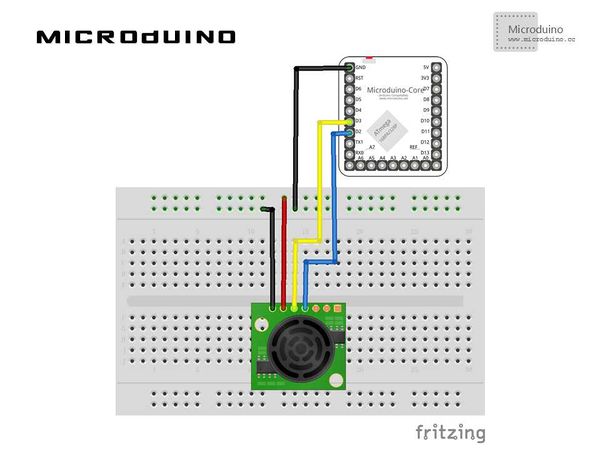
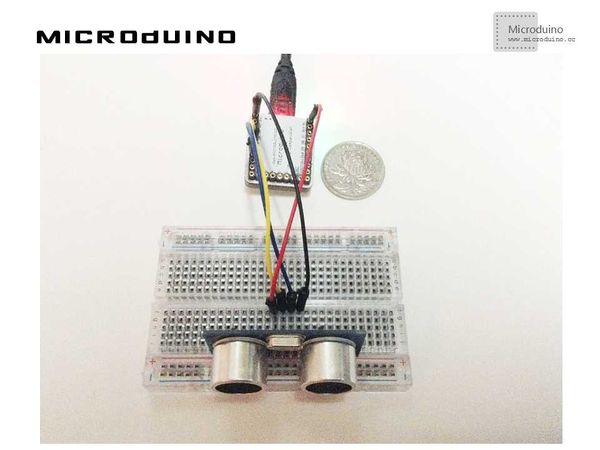
| − | Step | + | Step 1: Set up hardware system, as follows: |
[[File:interactionUltrasonicConnectionDiagram.jpg|600px|center|thumb]] | [[File:interactionUltrasonicConnectionDiagram.jpg|600px|center|thumb]] | ||
| Line 93: | Line 93: | ||
Step 3: Compile the code and download it. | Step 3: Compile the code and download it. | ||
| − | Step 4: | + | Step 4: Running the program and put an object in front of the ultrasonic sensor, then observe the Processing's output. |
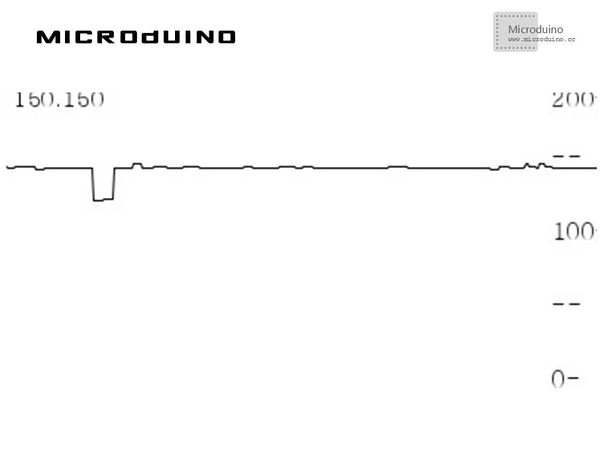
==Result== | ==Result== | ||
Latest revision as of 09:11, 13 September 2016
| Language: | English • 中文 |
|---|
ObjectiveThis tutorial will display a distance that ultrasonic sensor measured in Processing with a curve. Equipment
SchematicProgramRefers to interactionUltrasonic interactionUltrasonicArduino DebugStep 1: Set up hardware system, as follows: Step 2: Explain the code: This example needs two parts code, one is Processing and the other is Microduino. Microduino: //Calculate the distance and output to serial for Processing's display. void loop()
{
digitalWrite(TrigPin, LOW);
delayMicroseconds(2);
digitalWrite(TrigPin, HIGH);
delayMicroseconds(10);
digitalWrite(TrigPin, LOW);
cm = pulseIn(EchoPin, HIGH) / 58.0; //Echo time will be converted into cm
cm = (int(cm * 100.0)) / 100.0; //Two decimal places
Serial.println(cm);
delay(100);
}
Processing: //Get the the first serial data, // is always my Arduino, so I open Serial.list()[0]. // Open whatever port is the one you're using. myPort = new Serial(this, Serial.list()[0], 9600);
myPort.bufferUntil('\n'); // Trigger a SerialEvent on new line
//Use the curve to display the data that Microduino sent using the curve and mark the table scale void draw() {
background(255);
// Draw lines connecting all points
for (int i = 0; i < vals.length-1; i++) {
stroke(0);
strokeWeight(1);
line(i, vals[i], i+1, vals[i+1]);
}
// Slide everything down in the array
for (int i = 0; i < vals.length-1; i++) {
vals[i] = vals[i+1];
}
// Add a new random value
//vals[vals.length-1] = random(height);
String val = myPort.readStringUntil('\n');
if (val != null) {
val = trim(val);
println(val);
cm=Float.parseFloat(val);
}
vals[vals.length-1] = 200-cm;
//Display scale
text ( "200-", 370, 10);
text ( "--", 370, 50);
text ( "100-", 370, 100);
text ( "--", 370, 150);
text ( "0-", 370, 200);
//show current num
text ( cm, 0, 10);
}
Step 3: Compile the code and download it. Step 4: Running the program and put an object in front of the ultrasonic sensor, then observe the Processing's output. ResultScreen will display the distance data curve, as follows: Vidoe |


