Difference between revisions of "Stepper Motor Control"
(→Debugging) |
|||
| Line 4: | Line 4: | ||
==Objective== | ==Objective== | ||
| − | The course will show you how to control stepper motor via | + | The course will show you how to control stepper motor via "Processing". |
==Equipment== | ==Equipment== | ||
| Line 38: | Line 38: | ||
http://www.microduino.cc/wiki/index.php?title=%E7%AC%AC%E4%B8%89%E5%8D%81%E5%85%AB%E8%AF%BE--Microduino_%E6%AD%A5%E8%BF%9B%E7%94%B5%E6%9C%BA%E9%A9%B1%E5%8A%A8/zh | http://www.microduino.cc/wiki/index.php?title=%E7%AC%AC%E4%B8%89%E5%8D%81%E5%85%AB%E8%AF%BE--Microduino_%E6%AD%A5%E8%BF%9B%E7%94%B5%E6%9C%BA%E9%A9%B1%E5%8A%A8/zh | ||
| − | *Step | + | *Step 1: Cut pegboard with the right size; |
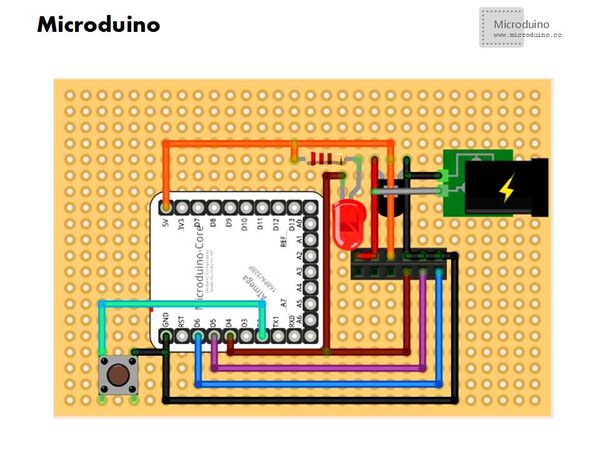
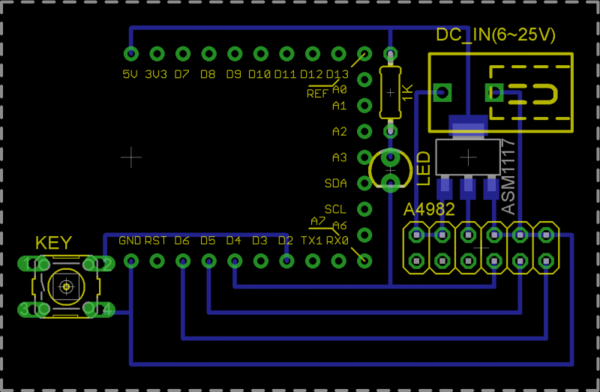
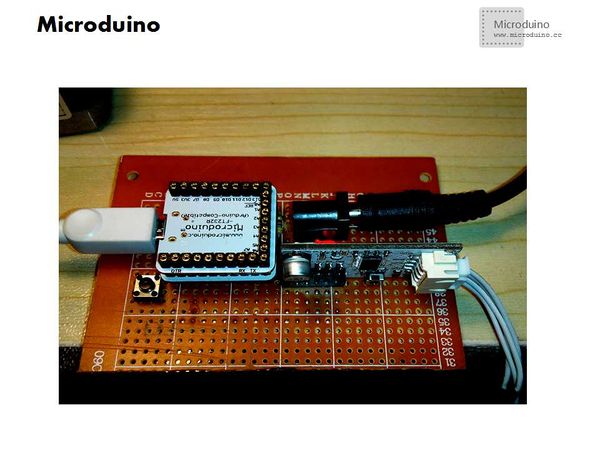
| − | *Step | + | *Step 2: Make sure a right base location and weld the circuit according to the schematic; |
[[File:A4982.png|thumb|600px|center|洞洞板焊法]] | [[File:A4982.png|thumb|600px|center|洞洞板焊法]] | ||
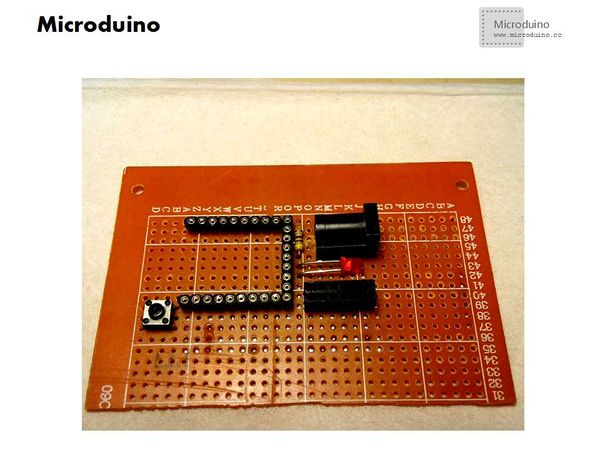
[[File:A4982_Stepper_motor-t.jpg|thumb|600px|center|正面]] | [[File:A4982_Stepper_motor-t.jpg|thumb|600px|center|正面]] | ||
| Line 48: | Line 48: | ||
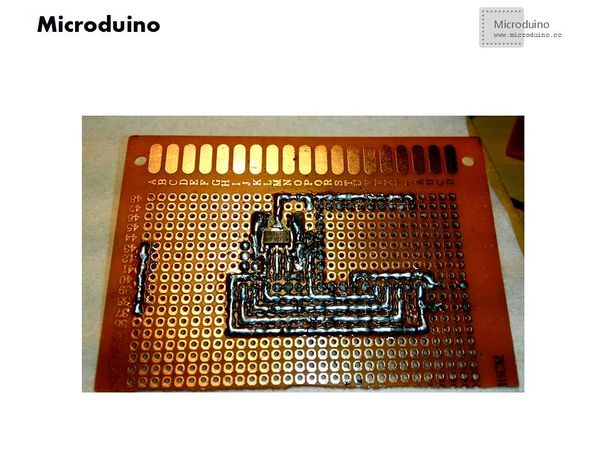
[[File:A4982_Stepper_motor-ok.jpg|thumb|600px|center|ok]] | [[File:A4982_Stepper_motor-ok.jpg|thumb|600px|center|ok]] | ||
| − | Step | + | Step 3: Here is the code needed: |
The code of the two ends (Processing and Microduino) | The code of the two ends (Processing and Microduino) | ||
| Line 112: | Line 112: | ||
} | } | ||
| − | Step | + | Step 4: Download the code and get it compiled successfully. |
| − | Step | + | Step 5: Put the mouse on the "boy in the left" and the "girl in the right" to see the response of the stepper motor after the system goes well. |
==Result== | ==Result== | ||
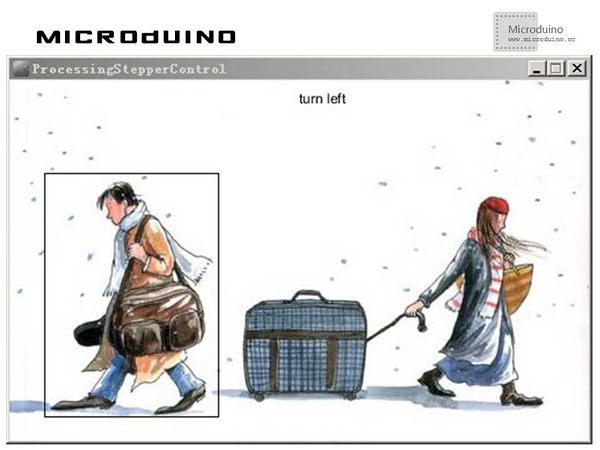
| − | When putting the mouse on the | + | When putting the mouse on the "boy in the left": |
[[File:processingStepperControlResult1.jpg|600px|center|thumb]] | [[File:processingStepperControlResult1.jpg|600px|center|thumb]] | ||
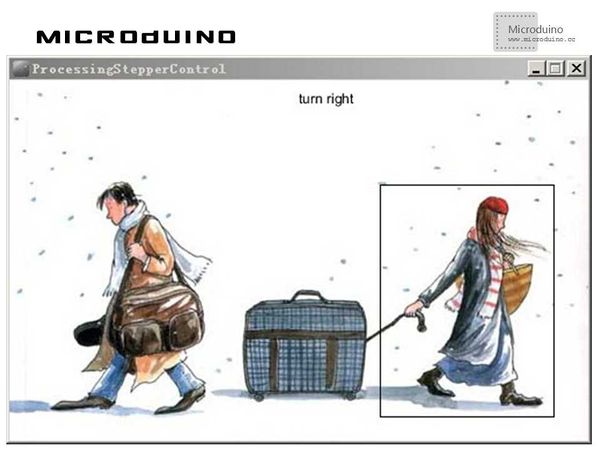
| − | When putting the mouse on the | + | When putting the mouse on the "girl in the right": |
[[File:processingStepperControlResult2.jpg|600px|center|thumb]] | [[File:processingStepperControlResult2.jpg|600px|center|thumb]] | ||
Latest revision as of 09:27, 13 September 2016
ObjectiveThe course will show you how to control stepper motor via "Processing". Equipment
SchematicProgramDebuggingThe hardware buildup is similar to that of the DC motor in the 38th advanced course: http://www.microduino.cc/wiki/index.php?title=%E7%AC%AC%E4%B8%89%E5%8D%81%E5%85%AB%E8%AF%BE--Microduino_%E6%AD%A5%E8%BF%9B%E7%94%B5%E6%9C%BA%E9%A9%B1%E5%8A%A8/zh
Step 3: Here is the code needed: The code of the two ends (Processing and Microduino) Microduino: //Read serial data void loop() {
if(Serial.available())
{
command=Serial.read();
Serial.println(command);
if(command=='l') {//The stepper motor turns left if the data sent from Processing is 'l'
stepper.setSpeed(motorSpeed);
stepper.runSpeed();
}
else if(command=='r') {//The stepper motor turns right if the data sent from Processing is 'r'
stepper.setSpeed(-motorSpeed);
stepper.runSpeed();
}
else {
stepper.stop();//otherwise, it will stop turning
}
}
}
//Monitor the mouse during drawing function. void draw()
{
background(0);
image(img,0,0);
noFill();
if("left".equals(turning)) {
rect(30,80,150,210);
fill(0); //Specify font color
text ( "turn left" ,250,20);
port.write("l");
}else if("right".equals(turning)) {
rect(320,90,150,200);
fill(0); //Specify font color
text ( "turn right" ,250,20);
port.write("r");
}
}
//Move the mouse and judge if it it inside the selection area // When the mouse is moved, the state of the turning is toggled.
void mouseMoved() {
if (mouseX > 30 && mouseX < 180 && mouseY > 80 && mouseY < 290) {
turning = "left";
cursor(HAND);
}
else if (mouseX > 320 && mouseX < 470 && mouseY > 90 && mouseY < 290) {
turning = "right";
cursor(HAND);
}
else {
turning = "turning";
cursor(ARROW);
}
}
Step 4: Download the code and get it compiled successfully. Step 5: Put the mouse on the "boy in the left" and the "girl in the right" to see the response of the stepper motor after the system goes well. ResultWhen putting the mouse on the "boy in the left": When putting the mouse on the "girl in the right": The stepper motor will turn in the appropriate direction
Video |
