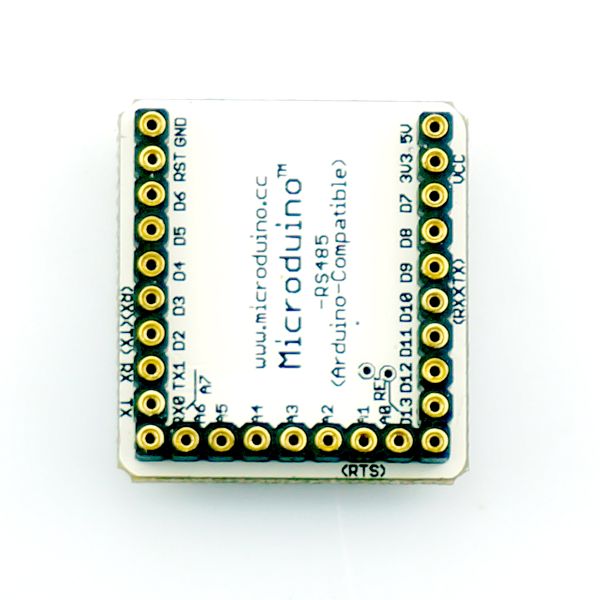
Microduino-Module RS485

From Microduino Wiki
Revision as of 02:52, 22 January 2016 by 33434428@qq.com (talk)
Jump to: navigation, search
Language: English  • 中文
Microduino- RS485

Microduino- RS485 is a low-power serial communication module based on MAX485 chip, which can achieve bidirectional serial port data transmission.


Features

  • With low power consumption, fast transmission rate and long transmission distance.
  • Operate in half-duplex mode and need only two lines.
  • Convert data receiving or sending automatically.
  • Capable of changing the TTL electric level to RS-485.
    • RS-485's electrical feature: Logic "1" represents the voltage difference between the two lines--+(2—6) V; Logic "0" represents the voltage difference between the two lines--(2—6)V.
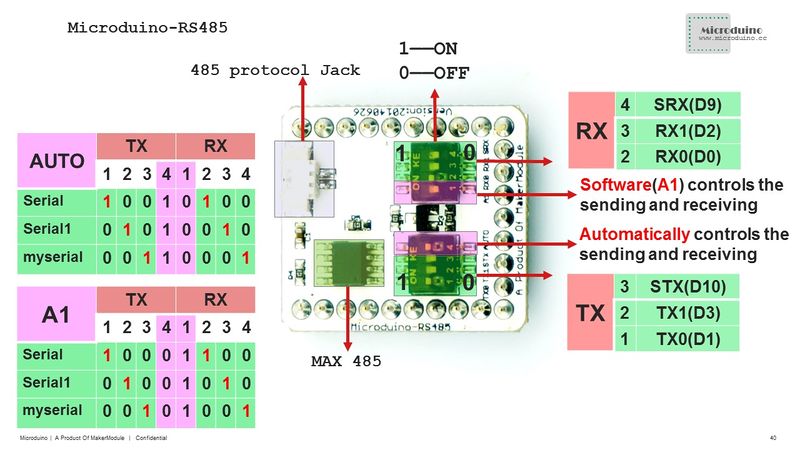
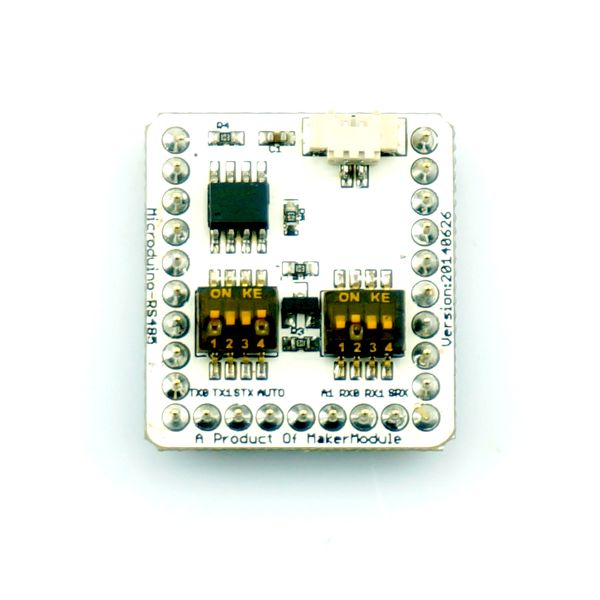
  • Combined with Microduino core or extension modules, you can select the serial port(Serial, Serial1, myserial(9,10)) through the dial switch.
  • Standard UPIN27 interface.

Specification

  • Power supply: 5V and 300μA.
  • Adopt half-duplex communication mode, which can send or receive data at a time.
  • Transmission rate up to 2.5Mbps.
  • Convert data receiving or sending automatically or with program.
Microduino-RS485-rule pin.JPG

Document

Development

The 485 communication interface is a hardware description for the communication interface. It needs only two communication lines, which can transmit data among two or more devices. And the connection for this data transmission is the half-duplex communication mode, that means in a certain moment, one device can only send or receive data.

In hardware, you can select the serial communication by the toggle switch. Meantime, you need program to achieve data transmission among different serial ports through the 485 protocol.

Application

  • Adopt two Core+ modules for the serial data transmission and send the data you want to transmit through the serial monitor.
  • Hardware Buildup
Hardware Number Function
Microduino-Core+ 2 Core
Microduino-USBTTL 2 Program download
Microduino-RS485 2 485 communication
USB cable 2 Connection between Microduino modules and a computer.
  • Stack the Core+, USBTTL and RS485 together for two groups respectively, and connect the 485 protocol interface with a wire.
  • Select Serial1 through the toggle switch, you can refer to the pin description and select the auto mode.
    • TX:0101,RX:0010
  • Program
//#include <SoftwareSerial.h>

//SoftwareSerial mySerial(9, 10); //RX,TX

String comdata_rec = "";  //Character string displayed. 
String onedata_rec = "";  //Judge "clean" cache character string. 

String comdata_send = "";  // Character string displayed.
String onedata_send = "";  // Judge "clean" cache character string.
String serialdata_rec="";
String serialdata_send="";

void setup()
{
  Serial.begin(9600);
  Serial1.begin(115200);     
}

void loop() // run over and over again
{  
  while (Serial.available() > 0)  
  {
    comdata_rec = "";                //Clear the character. 
    serialdata_rec = "";
    onedata_rec += char(Serial.read());  //Read the character 
    comdata_rec += onedata_rec;          // Read the character
    delay(30);
  }
  if( serialdata_rec!=comdata_rec)
  {
    onedata_rec = "";  //Clear the cache character string 
    serialdata_rec=comdata_rec;
    Serial1.print(comdata_rec);
  }

  while (Serial1.available() > 0)  
  {
    comdata_send = "";                     ///Clear the character
    serialdata_send = "";
    onedata_send += char(Serial1.read()); // Read the character
    comdata_send += onedata_send;               /// Read the character
    delay(30);
  }
  if( serialdata_send!=comdata_send)
  {
    onedata_send = "";  // Clear the cache character string
    serialdata_send=comdata_send;
    Serial.println(comdata_send);
  }
}
  • Please make sure you got the Microduino IDE or please refer to: Microduino Getting start
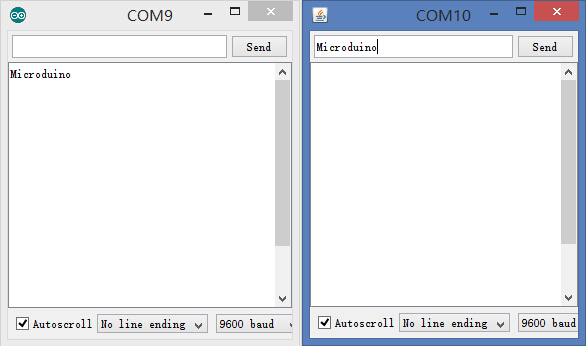
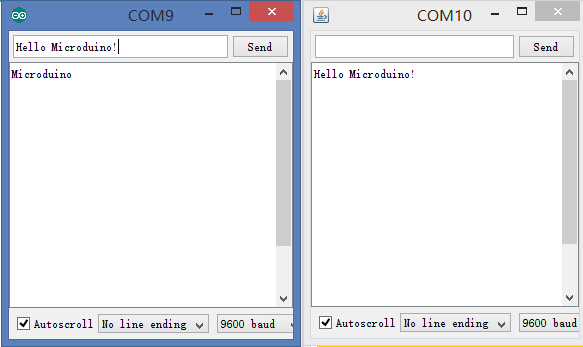
  • Download the program to two core modules respectively and open the serial monitor. When in one serial monitor you see data received from the other serial monitor, it means the data have been transmitted from one module to the other.
Microduino - RS485-send1.JPG
Microduino - RS485-send2.JPG

Purchase

History

Picture

  • Front
Microduino- Microduino- RS485-F.JPG
  • Back
Microduino- Microduino- RS485-b.JPG

Video