Difference between revisions of "Microduino BLE IOS-202KIT"
(Created page with "{| style="width: 800px;" |- | ==Outline== Project:Microduino BT communicates with IOS device Objective:Passthough the Microduino Core and Microduino BT module's run time ...") |
|||
| Line 30: | Line 30: | ||
|- | |- | ||
| | | | ||
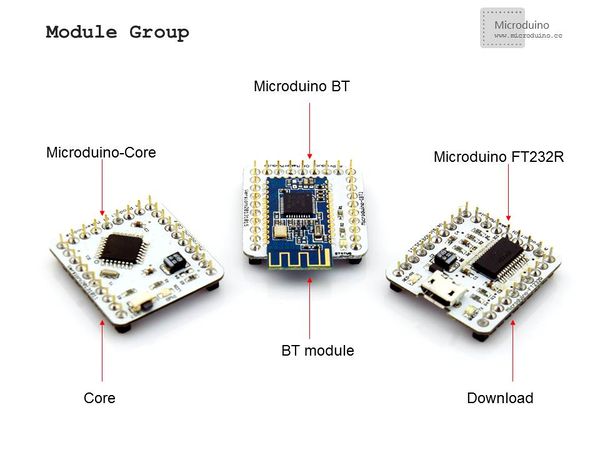
| − | [[File:202KIT.jpg|600px|center|thumb| | + | [[File:202KIT-module.jpg|600px|center|thumb|202KIT]] |
|- | |- | ||
| | | | ||
| Line 51: | Line 51: | ||
|- | |- | ||
| | | | ||
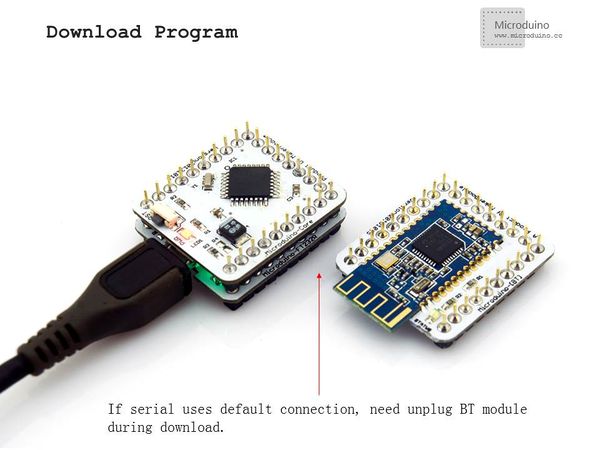
| − | [[File:Download.jpg|600px|center|thumb|Download]] | + | [[File:ble-Download.jpg|600px|center|thumb|Download]] |
Step 2:After download the program, install the Microduino FT232R, Microduino-Core and Microduino BT, please power off firstly then install them. | Step 2:After download the program, install the Microduino FT232R, Microduino-Core and Microduino BT, please power off firstly then install them. | ||
|- | |- | ||
| | | | ||
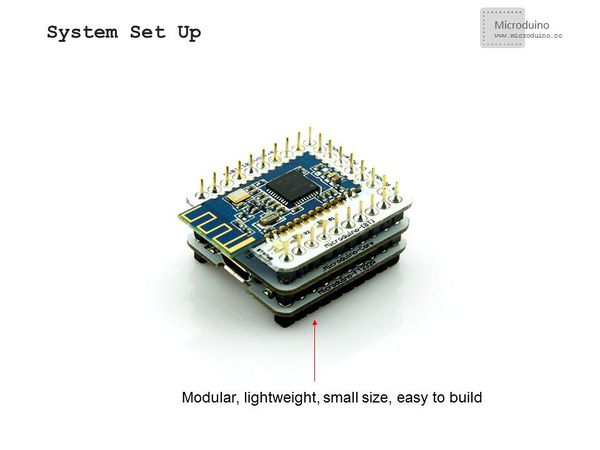
| − | [[File:202KIT- | + | [[File:202KIT-system.jpg|600px|center|thumb|202KIT-system]] |
Step 3:Start to set the IOS device,start the bluetooth function on IOS device. | Step 3:Start to set the IOS device,start the bluetooth function on IOS device. | ||
| − | + | ||
Step 4:Open LightBlue | Step 4:Open LightBlue | ||
In "Central" tab find the "HMSoft", then set "Service"-"Characteristics"; | In "Central" tab find the "HMSoft", then set "Service"-"Characteristics"; | ||
| Line 63: | Line 63: | ||
|- | |- | ||
| | | | ||
| − | [[File:Connection.jpg|600px|center|thumb|Connection]] | + | [[File:ble-Connection.jpg|600px|center|thumb|Connection]] |
Connect successed, LED light. | Connect successed, LED light. | ||
|- | |- | ||
| | | | ||
| − | [[File: | + | [[File:BlE-LED.jpg|600px|center|thumb|LED]] |
==Result== | ==Result== | ||
Revision as of 06:02, 24 February 2014
OutlineProject:Microduino BT communicates with IOS device Objective:Passthough the Microduino Core and Microduino BT module's run time to IOS devices Difficulty:Elementary Time-consuming:Half an hour Maker:Microduino Studio-YLB | ||||||||||||
Bill of Materials
| ||||||||||||
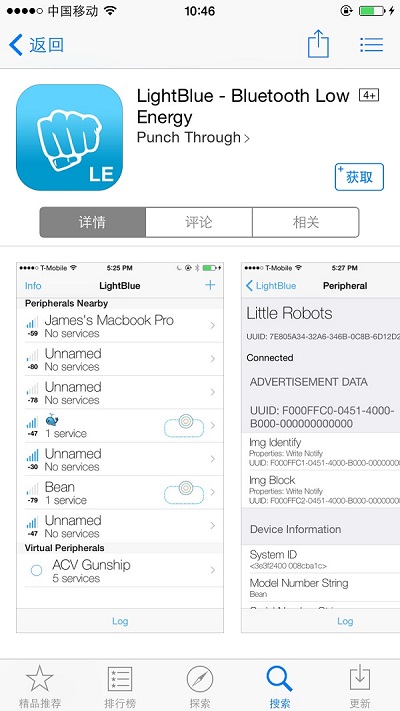
Arduino IDE(1.0 release and upper), download LightBlue from App Store.
Document | ||||||||||||
Debugging | ||||||||||||
|
Step 1:Start Arduino IED, open the Microduino example program, board type choose "Microduino Core (Atmega328P@16M,5V)" | ||||||||||||
|
Step 2:After download the program, install the Microduino FT232R, Microduino-Core and Microduino BT, please power off firstly then install them. | ||||||||||||
|
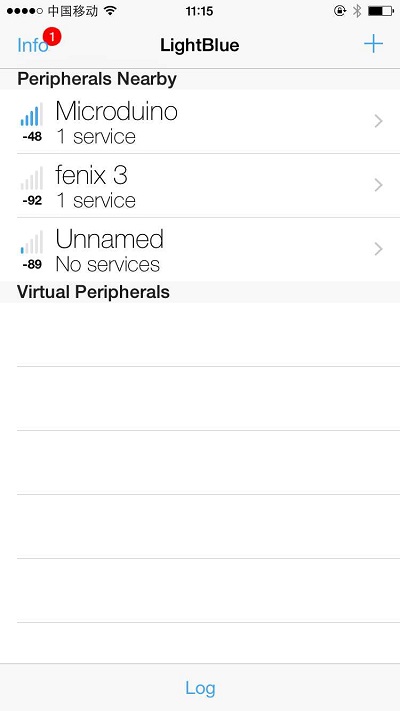
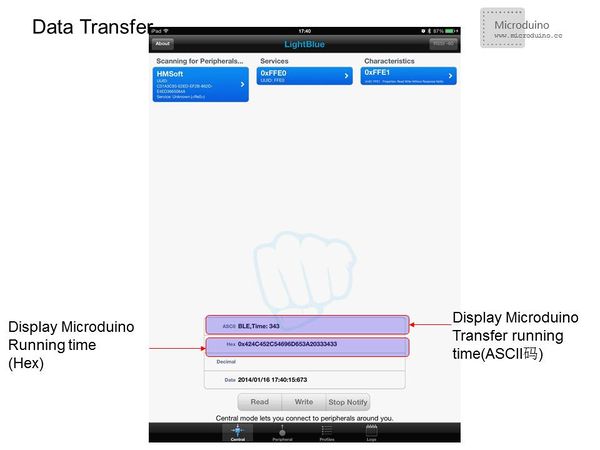
Step 3:Start to set the IOS device,start the bluetooth function on IOS device. Step 4:Open LightBlue In "Central" tab find the "HMSoft", then set "Service"-"Characteristics"; Then you can see the debugging window, click the "Start Notify". | ||||||||||||
|
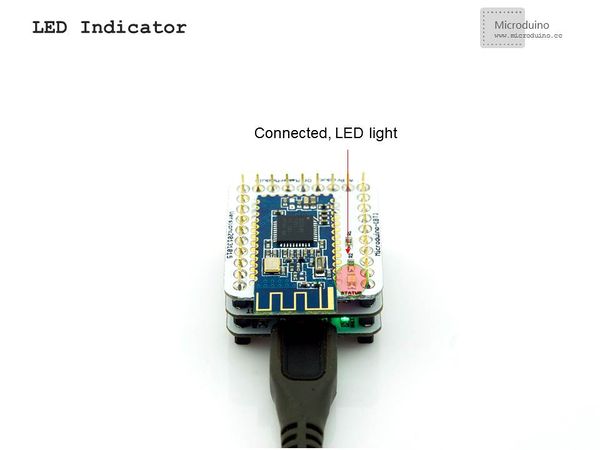
Connect successed, LED light. | ||||||||||||
ResultASCII data can be seen displayed: "BLE, Time: xxx" after connection success, where xxx is the Core and Shield BT4.0's running time in seconds. Note
File:Bluetooth-Connection.jpg Bluetooth-Connection |
