Lesson 40--Microduino DC Motor Drive (Potentiometer PWM control speed)
From Microduino Wiki
| Language: | English • 中文 |
|---|
Contents[hide]ObjectiveThis tutorial will teach you how to control the speed of a DB motor via the potentiometer. Equipment
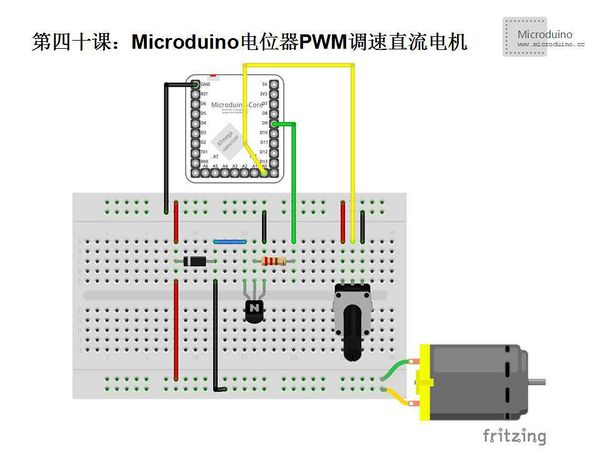
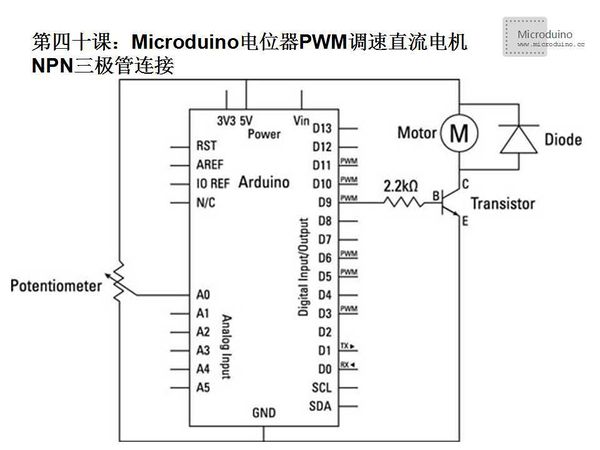
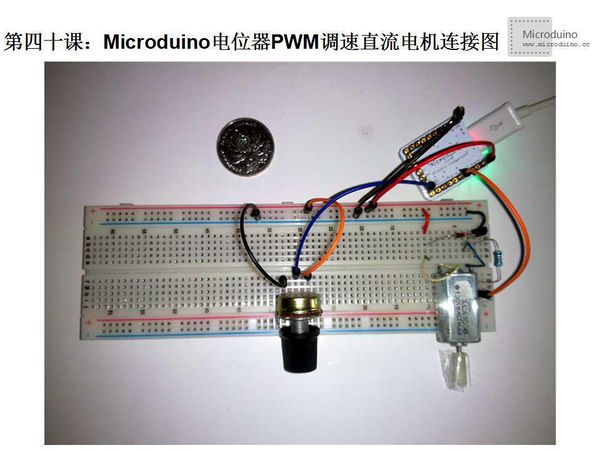
SchematicDescription: When connect the NPN transistor, Base (B) connects with 2.2K resistor, emitter (E) connects the GND and collector (C) connects to motor. As follows: Programint potPin = A0; //Potentiometer input pin
int motorPin = 9;//Motor pin
int potValue = 0;//Define the value of potentiometer
int motorValue = 0;//Define the value of motor
void setup() {
Serial.begin(9600);
}
void loop() {
potValue = analogRead(potPin); //Read the value of potentiometer
motorValue = map(potValue, 0, 1023, 0, 255);//Map to a value among 0~255
analogWrite(motorPin, motorValue);//Output PWM to motor
//Display
Serial.print("potentiometer = " );
Serial.print(potValue);
Serial.print("\t motor = ");
Serial.println(motorValue);
delay(2);
}DebugStep 1: Copy the code to IDE and compile it Step 2: Set up circuit, as follows: Step 3: Run program Step 4: Adjust potentiometer, and check the speed of the motor ResultTwist potentiometer to adjust the motor's speed Video |


