Lesson 45--Microduino Electric Guitar
Contents[hide]ObjectiveThis tutorial will show you how to use ultrasonic sensor to make an electric guitar. Equipment
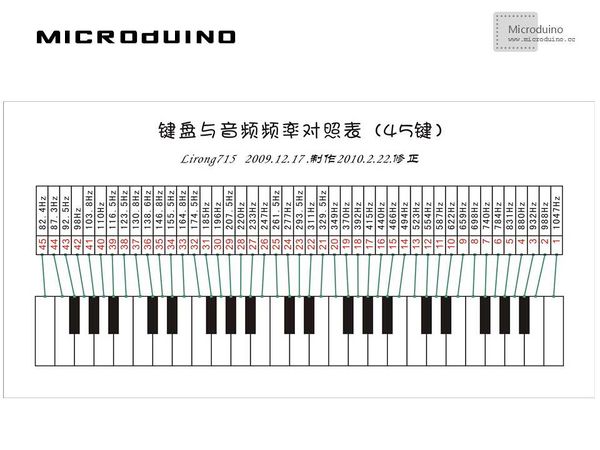
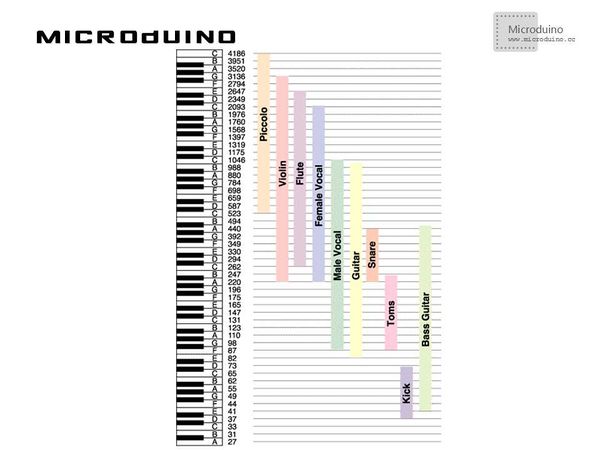
Note FrequencyWe all know that the notes Do - Re - Mi - Fa - Sol - La - Si/Te have their corresponding frequencies, seeing at the two tables below:
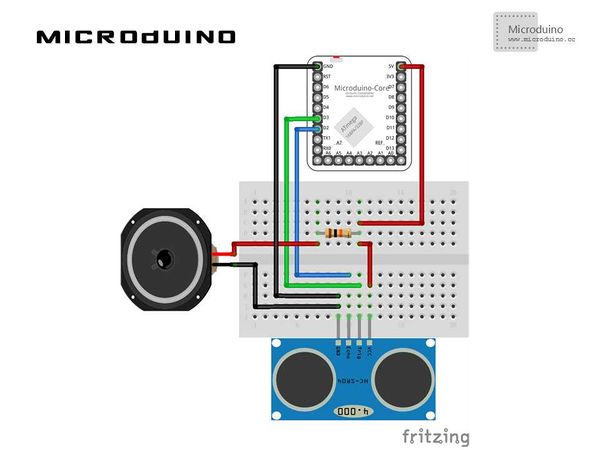
Schematic
ProgramIn the program,int toneFrequency[]={415,440,466,494,523,554,587,622}; It is used to define the range and number that can generate notes. You can adjust the note frequency range according to individual needs.
Debugging1. Download Tone library: Tone, and put it into libraries of IDE and then restart IDE. Compared with the built-in Tone, this Tone library can output waves with different frequency at the same time.
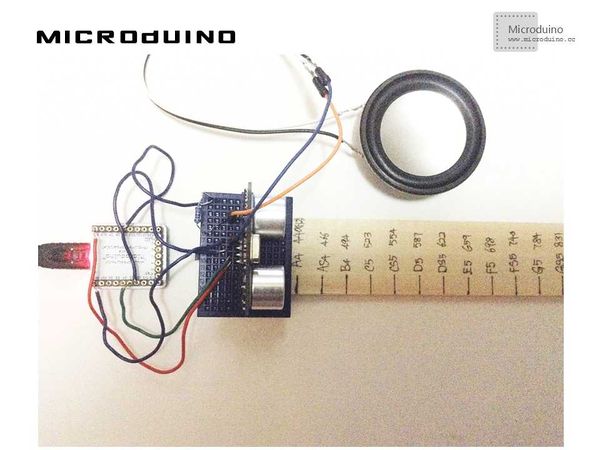
2. Build the circuit according to schematic: You can mark the location of notes according to note frequency on the battery. 3. Download and run the code 4. Move the obstruction in front of ultrasonic and pay attention to the loudspeaker. ResultThe loudspeaker will generate different notes according to different locations of the obstruction, which is basically the same with the note on the battery.
Video |


